Why you should periodically change your brake fluid
It is important to understand that, regardless of its functions and duration of validity, any automotive fluid for technical purposes must be replaced.
The replacement periods for all types of technical substances are different, and they are necessarily indicated in the rules for operating the car . Moreover, in some cases they differ, since certain models and brands of cars require an individual approach.
In the car owner's manual, the manufacturer indicates after what period the brake fluid should be replaced, and these indicators must be adhered to in order to ensure driving safety.
Basically, the average service life of brake fluid is limited either by the number of kilometers (30-40 thousand km) or by time space (1-3 years). Of course, in this case, the mode and load of the vehicle are taken into account, as well as speed, emergency situations that occur on the streets and highways, in short, all the factors affecting the activity of the brakes.
Novice motorists have some misconceptions regarding brake fluid, so we will try to dispel them.
- There are a number of compensation holes in the brake system that are designed to maintain the technological regime for air. Knowing that TJ has the property of being hygroscopic, one can understand that it absorbs moisture in small quantities. Therefore, the loss of the original qualities of the brake fluid gradually occurs, which means that the closed mode in the brake system can be called conditional.
- The modern TJs produced allow them to be mixed, but not in all cases and not all of them. Manufacturers and brands try to meet general requirements for the composition, but for individual models and brands of cars, the composition contains design features. This allows you to add brake fluid for a short period of time, but, according to experts, it is better to do such manipulation only in extreme cases, and replace the brake fluid in full.
- Modern cars use any diesel vehicle that has the DOT-4 standard - this is one of the main misconceptions of novice drivers. Professionals adhere to the requirements of the car manufacturer and, for their own safety, always buy the type of brake fluid specified in the car’s operating instructions.
If you have carefully read all the comments written above, you understand that all your thoughts about this or that liquid are a waste of time. Follow the recommendations of specialists and your car will drive you faithfully and for a long time, and most importantly, safely.
Under the hood of the car on the driver's side there is a reservoir in which the brake fluid is located; this place of the master cylinder of the brake system is difficult to confuse with anything. The tank, made of transparent plastic, is mounted on two elastic bands. In different car models, an example is BMW, a filter is put on the reservoir, its housing can be easily removed in order to be able to perform various manipulations with the brake system reservoir.
How often to change brake fluid in a car
Typically, every car manual contains information about how often it is necessary to completely replace the fluid that affects braking performance. If there is no exact information on the frequency of replacement, then this must be done in accordance with the general regulations.
Many people change brake fluid based on mileage, or for a certain amount of time since the last change. Some people don’t change it at all and don’t even suspect such a need. Regardless of the age of the car, it should be completely replaced with a new one periodically. The quality of braking directly depends on this, and therefore your safety too.
The general regulations provide for the replacement of technical fluids once every 30-60 thousand kilometers, or once every two years, if your mileage during this period of time was less than this value
With an aggressive driving style using heavy braking, the replacement interval will be every 30 thousand km. With a calm driving style, drivers who use smooth advance braking will need to replace the brake fluid after 60 thousand km.
An exception to this regulation will be sports cars with a sports braking system. In them, brake fluid is replaced twice as often.
On sports cars, brake fluid has to be changed twice as often.
If you do not use your car very often, then it is also necessary to change the brake fluid every two years, even if you have driven no more than 10 thousand km. This is due to the fact that in just a year it can absorb up to 1-3%! water.
VAZ 2107 Filling the brake system with fluid. Removing air from the brake system and bleeding
Why and how often do they change brake fluid?
The brake system is pumped when replacing brake fluid, when air gets into the hydraulic drive, or when carrying out repair work related to depressurization of the system.
The hydraulic drive has two independent circuits, so each circuit is pumped separately. Bleeding should begin with the brake mechanism furthest from the main brake cylinder, that is, on the right. Pumping is performed by two performers in the following order:
| Rice. 8.3. Main brake cylinder: 1 - body; 2 - tube; 3 — connecting sleeve; 4 - tank; 5 — protective cap; 6 — sensor for emergency brake fluid level drop; 7 - thrust ring; 8 — outer cuff; 9 — guide sleeve; 10, 17 — pistons; 11 — retaining ring; 12 - sealing ring; 13 — piston washer; 14, 16 — cuffs; 15, 18—thrust washers; 19 — spring: 20 — plug; A, B - compensation holes; C - bypass holes |
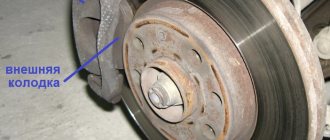
— clean the bleeding valves of the front and rear brake mechanisms from dirt, remove the rubber protective caps from the bleeding valves;
— Place the brake fluid drain hose onto the valve head of the right rear wheel cylinder. Place the free end of the hose into brake fluid poured into a clean transparent container;
— unscrew the bleeder valve 1/2 - 3/4 of a turn, press the brake pedal. With the pedal fully pressed, an assistant should close the bleeder valve. Repeat this operation until the release of air bubbles stops;
— after the pumping has stopped, the assistant must tightly tighten the valve while the brake pedal is held down. Remove the hose and put on the protective cap;
— Bleed the rear left and front brakes in the same sequence.
When removing air from the hydraulic brake drive, it is necessary to promptly add brake fluid to the reservoir, avoiding a “dry” bottom.
After bleeding, add brake fluid to the reservoir up to the MAX mark. If the bleeding is not done thoroughly enough, then when you press the brake pedal at the end of its stroke, you will feel some elasticity, more or less depending on the amount of air remaining in the system. At the same time, the pedal travel increases slightly. In this case, pumping should be repeated.
Replacing brake fluid
Replacing the brake fluid in the system is necessary because during operation it absorbs moisture from the atmosphere, which worsens its temperature properties and causes corrosion of the cylinders and pistons. The fluid is replaced during seasonal vehicle maintenance (once a year).
To change the brake fluid you must:
— Unscrew the reservoir cap from the master brake cylinder, remove the protective caps from the bleeder valves;
— put rubber hoses on the valve heads, lower the free ends of which into transparent containers, and then unscrew all the valves 1/2 - 3/4 of a turn;
— drain the used fluid from the system by pressing the brake pedal vigorously and releasing it smoothly. As the exhaust fluid stops flowing, close the bleeding valves;
— drain the used liquid from the vessels and put them in place under the rubber hoses; Pour fresh brake fluid into the master cylinder reservoir and unscrew all bleeder valves. By vigorously pressing and smoothly releasing the brake pedal, as well as promptly refilling the reservoir with brake fluid, fill the system with fresh brake fluid; As soon as clean brake fluid appears in the vessels, close the bleeding valves;
— bleed the system according to the method described above.
Snapshot2
Similarly, we bleed the brake mechanisms of the other circuit.
When pumping, you need to monitor the fluid level in the tank and add fluid if necessary.
After bleeding the hydraulic brakes, bring the fluid level in the reservoir to normal.
There is an even simpler option for replacing brake fluid. This method does not require the presence of an assistant. In this case, a certain supply of brake fluid is desirable (at least 1 liter).
We place the car on an inspection ditch or overpass and provide free passage between the place where you can refill the brake fluid reservoir in the engine compartment and the brake cylinders of all four wheels.
Use a rubber bulb or syringe to pump out the brake fluid from the reservoir. Add new fluid to the top edge. To speed up the process (to release fluid from all cylinders at once), it is advisable to select four pieces of tubes that fit tightly onto the bleeder fittings of all cylinders. We lower the free ends of the tubes into small transparent bottles.
We unscrew the fittings of all brake cylinders. We make sure that the liquid has flowed through all four tubes. We control the decrease in fluid from the reservoir located on the brake cylinder and immediately replenish the reservoir. We observe an increase in the level of liquid in bottles located near the wheel brake cylinders.
It is necessary to move several times from the position of observing the flow of fluid from the brake cylinder fittings to a position where you can check and replenish the fluid level in the reservoir located on the brake cylinder in order to prevent the reservoir from drying out.
Usually the level rises most quickly in the bottle into which the hose coming from the brake cylinder of the front left wheel is lowered. As soon as there is about 200 ml of liquid in the bottle of the front left wheel, wrap and tighten the fitting of this cylinder. Next, we wait for the same result for the front right wheel cylinder, and tighten its bleeder fitting in the same way. The process can be completed after 200–250 ml of liquid comes out through the fitting of each rear wheel.
We make sure that all fittings are tightly tightened. We put on protective caps. Check the fluid level in the master cylinder reservoir.
Volume of fluid in the brake system
How long does it take to change brake fluid?
Basically, the brake system holds from 0.55 to 1.0 liters of fluid, this depends both on whether the car has an ABS system and on the size of the car. The period for replacing brake fluid in most cars is 2-3 years of use, or 40-60 thousand mileage. To determine a more specific interval, you need to look at a specific fluid standard and driving characteristics. For example, in sports cars the TZ is changed every 5-10 thousand.
But since the question of the required volume of brake fluid in the system and its standard is asked only by owners of ordinary cars, and not premium or business class ones, we will give specific examples for cars popular in the CIS countries.
What and how much brake fluid is in some cars
| Table of the volume of brake fluid required for replacement | ||
| car model | DOT class | Required amount of fuel fluid, l |
| Ford Focus 2 | DOT4 | 1 |
| Ford Focus 3 | DOT4 | 1 |
| Ford Kuga | DOT4 | 1 |
| Chevrolet Niva | DOT4 | 1 |
| Chevrolet Cruze | DOT4 | 1 |
| Chevrolet Lacetti | DOT 4 | 0.5 a with ABS and ESP 1.0 |
| Kia Sid | DOT4 | 1 |
| Kia Rio 3 | DOT4 | 1 |
| Kia Rio 2 | DOT 4 | with ABS - 1-1.5 l without - 1 l |
| Kia Sorento | DOT 5.1 | 1 |
| Kia Spectra | DOT3, DOT4 | 1 |
| Renault Logan | DOT 4 | with ABS – 1-1.5 l without – 0.7 l |
| Renault Duster | DOT4 | 1 |
| Renault Fluence | DOT4 | 0,5-1 |
| Renault Sandero | DOT4 | 1 |
| Renault Megane 2 | DOT4 | 1 |
| VAZ 2107, 2109 | DOT 3 | 0,55 |
| VAZ 2114, VAZ 2115 | DOT 4 | 1 |
| VAZ 2108, 2110, 2112 | DOT 4 | 1 |
| Lada Kalina | DOT 4 | 1 |
| Lada Priora (VAZ 2170) | DOT 4 | 1 |
| Lada Granta | DOT 4 | 1 |
| Lada Largus | DOT 4+ | 1 |
| Daewoo Matiz | DOT 4 | 1 |
| Mitsubishi Pajero 4 | DOT 4 | 1 |
| Mitsubishi Lancer IX | DOT 3, DOT 4 | 1 |
| Mitsubishi Lancer 10 | DOT 4 | 1 |
| Mazda Demio | DOT 3, DOT 4 | 1 |
| Mazda 3 | DOT 5.1 | 1 |
| Mazda cx 5 | DOT 4 | 1 |
| Skoda Superb II | with ABS DOT 4 | 1 |
| SKODA Octavia A5 | DOT 4 | 1 |
| Toyota RAV4 | DOT 3, DOT 4 | 0,5 |
| Toyota Corolla | DOT 4 | 1 |
| Toyota Prado 150 | DOT 4, DOT 5.1 | 1,5-1,6 |
| Volkswagen Polo sedan | DOT 4 | 1 |
| Daewoo Nexia | DOT 4, DOT 5.1 | 1 |
| Hyundai Solaris | DOT 4 | 1 |
| Hyundai Accent | DOT 5.1 | 1-1,5 |
| Volvo XC70 | DOT 4+ | 1 |
| Nissan Tiida | DOT 4 | 1 |
| Nissan Qashqai | DOT 4 | 1 |
| Nissan X Trail | DOT 3, DOT 4 | 1 |
How much brake fluid is in the VAZ system
As you can see in the TZ volume table, VAZ cars are filled with brake fluid of the DOT-4 standard, but its amount in the brake system can be from 550 ml in classics (VAZ 2107), to 1.0 liters in more modern domestic cars, such as VAZ 2110 or Kalina. But if you replace the TJ with flushing, then you should take 1.5 liters, and since there is no such packaging, you will have to buy two liter bottles.
However, remember that when opened, the shelf life of brake fluid is limited to two years.
How often to change brake fluid
Useful recommendations on how often to change the brake fluid in a car. Regulations on the frequency of changing brake fluid. Read more
How to bleed the brakes
To properly bleed the brakes, you need to know the bleeding procedure specified by the car manufacturer. At the same time, such mistakes should not be made...More
Bleeding the brakes without an assistant
Bleeding your brakes can be a challenging task at times. But there is a simple way to do it without an assistant. See instructions for bleeding your car's brakes yourself. Read more
Manual transmission oil
Transmission oils, just like motor oils, are classified according to quality level. According to API designations, all performance properties are characterized by one number (from 1 to 6). The following consumables are suitable for the manual transmission of Kalina-2 cars:
| Brand | Viscosity SAE | API class |
| Lukoil TM-4 transmission | 75W80, 75W85, 75W90, 80W85, 80W90 | GL-4 |
| Rosneft KINETIC (Angarsk, Novokuibyshevsk) | 80W85 | GL-4 |
| Rosneft KINETIC (Novokuibyshevsk) | 75W90 | GL-4/5 |
| Tatneft TRANSLUX TM4-12 | 75W85 | GL-4 |
| TNK TRANS KP | 80W85 | GL-4 |
| TNK TRANS KP SUPER | 75W90 | GL-4 |
| G-BOX EXPERT GL-4 | 75W90, 80W85 | GL-4 |
| Gazpromneft GL-4 | 80W85, 80W90 | GL-4 |
| SHELL SPIRAX S5 ATE | 75W90 | GL-4/5 |
In an automatic transmission, the oil cannot be changed. When changing manual transmission oil, it is preferable to use material with a viscosity of 75W85, 75W90.
How to add transmission oil
By unscrewing the dipstick plug from the gearbox housing, you can check the transmission oil level. Topping up is done through the hole in the casing in small portions.
The main thing is that the dipstick plug should always be screwed in as far as possible. The volume of transmission fluid in a manual transmission is 2200 ml, but, according to reviews, it is about 3 liters. The material used is from the factory manufactured (see table above).
A few words about the braking system
Mazda tribute
I just want to remind you how it works. Any car has a brake pedal, if “roughly exaggerating” it is connected to the brake working cylinder. After you press this pedal, pressure is created in the brake system, it presses on special pistons in the brake calipers (or rear cylinders) which compress (in the case of front-wheel drive) or spread (in the case of rear-wheel drive) the brake pads. And they, in turn, squeeze the brake disc or stop the drum from the inside, I advise you to read - disc or drum brakes.
I think everyone knows the principle of operation of this system; in our article this is mandatory for the following understanding of the material.
Replacing brake fluid on Kalina
Welcome! Brake fluid - although it is called brake fluid, in some cars, namely in classics and Nivas, it is also used in the clutch mechanism, and all this is because on these cars the clutch mechanism and the brake mechanism work according to the same principle, but on front-wheel drive, the clutch is no longer engaged due to the fluid, but due to the cable that comes from the pedal and is connected to the box, but we are now talking about the brakes and not the clutch, we will try to explain to you why this particular fluid is present in the brake system, that’s all the fact is that this liquid is not compressed and therefore when you press the pedal, the rod, which is located in the main brake cylinder, moves forward and in connection with this the liquid moves and all the pistons on four wheels push the brake pads and thus braking occurs if If you are interested, you can learn more about this from the article entitled: “The principle of operation of the brake caliper and why is it needed?”
Engine oil
Motor oil is the main fluid for the functioning of the engine. This is a lubricating material that reduces friction between moving parts - pistons and cylinder block. The main function of motor oil is to reduce friction between elements inside the engine and protect the engine from wear. In addition, motor oil also dissipates heat at the point of direct contact. The following requirements apply to engine oil:
— good thermal conductivity;
— the ability to withstand high and low temperatures, as well as temperature changes;
— withstand pressure up to 100 megapascals.
Unlike coolant, motor oil is made from hydrocarbons. It can be mineral, synthetic and semi-synthetic. Each type of motor oil is used for different types of engines and at different periods of wear. The circulation of engine oil inside the engine occurs thanks to an oil pump and an oil filter, which cleans the oil of carbon deposits and small metal particles.
Snapshot1
In this case, liquid will flow out of the hose, and the brake pedal should be pressed all the way.
As soon as the liquid stops flowing from the hose, tighten the fitting, and only after that can the assistant release the pedal.
We repeat this operation until new brake fluid (lighter than the old one) comes out of the fitting.
We remove the hose, wipe the bleeder fitting dry and put a protective cap on it.
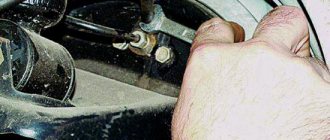
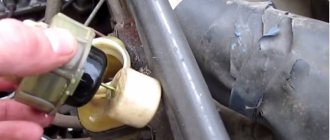
Remove the protective cap from the brake bleeder fitting of the left front wheel.
We put a hose on the fitting, and immerse its free end in a container partially filled with working fluid.
Features of using brake fluid
Without a special chemical solution, no hydraulic drive will work. It will not work well even if the quality of this substance is inadequate. Therefore, it is necessary for the driver to know what kind of hydraulic fluid is poured into the brake system on his car.
Vehicle fluid is divided into classes, and depending on the basis on which it is made, the frequency of changing the brake fluid is determined. It's quite easy to check. You need to look into the GTZ reservoir and look at the color of the filled liquid.
If the color is brown or yellow, then the base is glycol. For the car owner, this means that the vehicle will have to be changed quite often. As a rule, it is changed after one or two years, depending on how many kilometers and on what road the driver drives the car during this time. In terms of mileage, experts recommend focusing on the figure of 60,000 kilometers.
When there is red hydraulic fluid in the reservoir, its base is silicone. In this case, the brake fluid is replaced after five years.
You can often hear the question from inexperienced drivers: why change the brake fluid?
TJ, like other chemicals, loses its properties over time, and this impairs its performance and can lead to an accident. When the brakes are applied frequently enough, for example on a bad road or when driving at high speeds with obstacles, the temperature in the brake system rises to 150 degrees or higher. These frequently repeated temperature changes lead to the loss of the desired properties of the brake fluid. This can be visually determined by the loss of color of the poured liquid. It loses its brightness and becomes faded.
In addition, TJ absorbs moisture well. And when the brake system loses its tightness, the fluid becomes saturated with oxygen. All this also affects her working qualities.
You can check its condition using a tester designed for this purpose. This device determines the boiling point of fuel oil.
It is considered normal if it shows above 175 degrees. If the readings are 165-175 degrees, you need to look at how long this liquid “works.” If it is more than a year, then it needs to be replaced.
Washer fluid, antifreeze and the rest
The glass washer tank, the volume of which in Kalina-2 is 5 liters, is recommended to be filled with a suitable liquid:
| Brand | Manufacturer |
| REVIEW-E | LLC "ASD" (Tolyatti) |
| REVIEW | JSC "Orsknefteorgsintez" (Orsk) |
| SPARK | NPP "Makromer" (Vladimir) |
| NET MILE 40 | Tosol-Sintez LLC (Dzerzhinsk) |
The brake system filler can be ROSDOT fluid, produced by TC Tosol-Sintez LLC, or KAPROS-DOT produced by Sibur-Neftekhim. These materials are produced in the city of Dzerzhinsk. The volume of brake fluid to be replaced will be 0.45 liters.
New design of ROSDOT labels
The volume of coolant in the engine cooling system is 7.84 liters. When replacing, it is recommended to use the following materials:
| Brand | Manufacturer |
| FELIX CARBOX, TOSOL-TS FELIX | Tosol-Sintez LLC (Dzerzhinsk) |
| Cool Stream Standard, G-Energy Antifreeze, Cool Stream Premium | JSC "Technoform" (Klimovsk) |
| ANTIFREEZE SINTEC | CJSC "Obninskorgsintez" (Obninsk) |
Compatible coolants are those whose color matches. If this requirement is violated, refilling is not performed. At the same time, materials painted in the following two colors may be compatible: blue, green.
How to replace and which brake fluid for Lada Priora
According to the technical inspection card, the brake fluid on the Lada Priora should be replaced every 45 thousand kilometers or once every 2 years. Over time, during operation, the fluid loses its properties, which affects braking efficiency. Used brake fluid is dark in color, while new brake fluid is light in color.
A small historical digression
The “pioneers” among brake fluids were substances of mineral origin marked DOT 1 and DOT2, used in cars with a maximum acceleration of up to 60 km/h. But under increased loads, such fuel fluids simply boiled. Their performance characteristics were so unconvincing that they have almost ceased to be used today.
In addition to its main functions, brake fluid of any brand also has positive side effects - lubrication of calipers, oil seals, and cylinders. Only one thing stands out as a disadvantage - the high hygroscopicity of the liquid, which is actually why the fuel fluid has to be changed.
conclusions
It is simply necessary to periodically replace the brake fluid on Kalina. This is due to chemical and physical properties that may be lost during operation. Thus, the choice of fluid must be approached quite carefully, since traffic safety depends on it.
I think when buying brake fluid, you don’t need to overpay for liquid moth. DOT-4 does an excellent job, despite the price, I completely agree with the author.
To bleed the brakes, have anyone sit in the car. Let him press the brake pedal 3-5 times until it becomes elastic. Open the valve on the caliper and release the air. Repeat the operation until air comes out of the system completely.
I don’t remember, but it seems to me that I intuitively understood everything myself. When I changed the brake fluid for the first time, but I never bother with brands, I always take something of an average price.
We carry out the work on an inspection ditch or overpass.
Completion of work
At this time, there must be an assistant in the vehicle interior who will carry out the pumping process. To do this, he will need to press the brake pedal with sudden movements. In this case, it should be squeezed to the lowest position 5-6 times. After the required number of presses, the pedal must be locked in its lowest position.
The cylinder air valve should then be unscrewed 1/2 turn. This will cause the fluid to squeeze out and flow through the hose. After the brake circuit is completely released, the operating pedal in the passenger compartment will fall to the floor. After waiting until the hydraulic solution has completely flowed out, the outlet valve fitting must be tightened. A similar bleeding procedure should be repeated on the other rear wheel, and then move on to the front.
The front wheels will be drained in the same way as the rear wheels. After pumping out the remaining solution, you need to fill in new brake fluid. Before this, you need to check whether the hydraulic cylinders in the system require repair. If the movement of the working parts of the rod is smooth and without the presence of sharp twitches, then their repair is not required.
Otherwise, it is necessary to eliminate such malfunctions of the brake system or replace the hydraulic cylinder. The system should also be filled in stages, bleeding each wheel. After one side has been pumped, the solution should be added to the tank until it stops. Having pumped all the wheels, you must continue adding to the tank to the level mark indicated on its body.
After completing the repair, they check the functionality and operating efficiency of the brakes. If everything has been done correctly, the braking forces should be distributed evenly without causing delay in response. Different pad response speeds will lead to skidding during braking; this should be avoided.
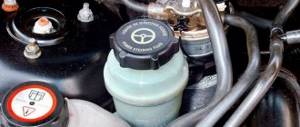
Where is the liquid located?
You can find brake fluid in the brake hoses. It is also found in:
- master cylinder;
- brake reservoir.
It is worth noting that almost every experienced Lada Kalina owner knows where the brake system is located and how it works. If there is no such knowledge, then it is better to study the structure of the car before replacing it or still seek help from professionals at a service station.
When choosing the option of self-replacement, the first step is to carry out preparatory work:
- Place the car on an overpass or pit.
- Turn off the engine and install wheel chocks.
- Disconnect the terminals from the battery.
First of all, during replacement, the old fluid is drained. It is performed as follows:
- The lid of the tank needs to be unscrewed. It contains brake fluid. The lid can be put aside, but it is better to place a rag under it, since the composition is in excellent contact with surrounding surfaces, without affecting them very well.
- The next step is to unlock the pressure regulator on the rear wheels, if necessary. To unlock this design, you will need to install a screwdriver between the plate and the piston.
- After this, you should prepare a hose and a container to drain the old fluid. It is best to use an empty bottle if you don’t have a container at hand. Before draining, it is necessary to clean the fitting from dirt using a brush. Subsequently, a hose will be attached to the fitting.
- Once the fitting is cleaned, you will need to remove the cap from it and insert one end of the hose into the hole, and the other should go into a container or bottle. Then you will need the help of a second person. He will need to get into the car and press the brake pedal several times. This must be done sharply so that the liquid can be drained, but between each press it is necessary to maintain a short break.
- As soon as the liquid stops flowing, you need to pull the hose out of the hole, wipe the fitting with a rag and close it with a lid. In this case, it is important to tighten the cap correctly. So, for example, if during the process of unscrewing it was loosened by 3/4, then it should be tightened by the same amount.
- The final action will be to begin pouring the new compound while tightening the fitting. As soon as new liquid begins to flow out of the existing hole, you can screw the cap on completely.
This fluid drain diagram is for rear brakes. As for the front ones, the procedure is practically no different. The main difference is only in the location of the fittings, but this will not be a problem if you familiarize yourself with the structure of the car and the brake system in advance.
Thus, the brake fluid is drained from both the front and rear brakes, after which it will be possible to begin filling in new fluid.
Various brake fluid compositions
So what did we understand - that brake fluid must have high fluidity, lubricate, protect against corrosion, not freeze, withstand temperatures within 150 - 170 degrees Celsius, and not boil! That is, there is such a “super liquid”.
I probably won’t surprise anyone by saying that “brakes” are still evolving - BUT NOW THERE IS NO IDEAL COMPOSITION THAT WOULD MEET ALL REQUIREMENTS 100%.
Mineral compounds - it all started with them, I will say that they were used on old cars that didn’t even have front disc brakes, only drums. YES, and speeds at that time rarely exceeded 60 km/h.
Their composition has long been known - castor oil with the addition of butyl or ethyl alcohol, this is a kind of base, but many manufacturers mixed other minerals and petroleum products of varying degrees of purification into the composition. It’s difficult to call such a composition ideal, but there are still positive aspects:
- They lubricate perfectly
- They practically do not absorb moisture, that is, if we say “scientifically”, they have low hygroscopicity
However, there are many more disadvantages:
- They boil at temperatures of 110–130 degrees
- At -20 degrees they begin to thicken
- In addition, castor oil has a negative effect on parts made of brass, aluminum, and copper.
- Also, for a long time they could not find a formula that, over time, would not decompose rubber products, oil seals, cuffs, etc.
For a very long time they struggled with the formula with castor oil, adding all kinds of additives and other substances, but its time has already passed.
Glycol brake fluids are now used quite widely and can be known by their abbreviations (DOT3, DOT4, DOT 5.1). They contain polyethylene glycols and boric acid polyesters, meet all international standards, and have also passed Russian GOST certification.
This composition is almost ideal, boils at + 150, + 200 degrees, perfectly lubricates, protects against rust, and is almost neutral to rubber elements.
There is one minus here and it is quite large - it is highly hygroscopic, it absorbs moisture very strongly, so it is MANDATORY to completely change it every 2-3 years! Otherwise, the calipers begin to sour and rust.
Silicone brake fluids (DOT5 and special version DOT-5.1/ABS). The composition here is completely different from its counterparts; it is based on silicon-organic polymers. There are enough advantages - it does not absorb moisture, it is absolutely neutral to rubber and metals, it is always fluid (does not depend on temperature).
There are also disadvantages, and where would we be without them - the lubricating properties are low, so there is more wear on the seals (when compared with their counterparts). Such compositions are rarely used on production versions of cars; as a rule, they are poured into sports or racing cars, where the heating of the calipers is much higher.
Well, to sum it up, it turns out that in 90% of cases your cars will be filled with brake fluid based on boric acid glycols. Change it after two to three years, regardless of the mileage (if the car is stationary, it can also absorb moisture) - AND THE BRAKING WILL ALWAYS BE 100%. But if you mess around, the calipers will make themselves felt in three years.
That's all, sincerely your AUTOBLOGGER.
Functions and parameters of brake fluid
The main task is to ensure timely, high-quality operation of the brakes. It has several parameters that you need to pay attention to when purchasing. These include:
- Boiling point - this indicator has two values. One refers to the “dry” liquid, the other to the “wet” liquid. During operation, the brake compound absorbs moisture, so the boiling point is greatly reduced. If boiling begins, this will lead to the appearance of air bubbles inside the system and brake failure.
- Viscosity at low temperatures - this indicator indicates at what temperature below zero the composition will begin to thicken and will flow worse through the tubes. For old-style liquids, this temperature was about -20 degrees Celsius. For new ones, this indicator is approximately 40 degrees.
- Hygroscopicity - this parameter indicates how strongly the composition will absorb moisture during operation. There are completely non-hygroscopic silicone-based compounds, but they are very expensive. The hygroscopicity indicator will also be a hint about the frequency of changing the brake fluid.
It is these three points that form the basis of how to choose brake fluid. All compositions also have a different base. This substance should also be taken into account before purchasing. In total, three different bases are used:
- Butyl alcohol and castor oil - a product with such a base is designated BSK and is used in old domestic cars. It does not contain rubber-aggressive components, but other parameters are far from the best. The boiling point is about 115-120 degrees, and it freezes at -20.
- Glycol and polyglycol are the most common formulations. Their boiling point is on average 230 degrees, and they freeze at temperatures below – 40. The disadvantage is their high hygroscopicity. Over a year of operation, the liquid absorbs about 2% of its volume of water. Over the next year there will be about the same amount of use. Because of this, the boiling point decreases, so such a “brake guard” must be changed on time. The glycol-based composition is well suited for cars of both domestic and foreign production. Therefore, when the question arises, for example, which brake fluid is best for the VAZ 2106, you can safely buy just such compounds.
- Silicone – this type of base is used in products for sports cars. It has a high boiling point; some compounds boil only at 300 degrees. Such liquids do not absorb moisture at all, so they can be changed every 4-5 years. The disadvantage is the high price. In addition, to switch from one type to another, you will have to flush the entire brake system. Not every car will perform better with a silicone-based brake fluid.
Checking the level and adding brake fluid to the hydraulic brake reservoir of a VAZ 2106 car
To check the level and top up brake fluid in the brake hydraulic reservoir on a VAZ 2106, you will need: brake fluid, a clean rag.
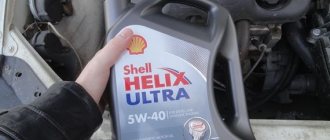
RECOMMENDATION Brake fluid type: “Tom” or “Rosa” with a class not lower than DOT-4. When the brake fluid level in the brake reservoir drops below the “MIN” mark, the warning lamp on the instrument panel lights up red. We recommend checking the level before each trip and, if necessary, adding fluid to the brake reservoir without waiting for the warning light to come on: this operation is best done in advance. If you have to add brake fluid to the reservoir quite often, immediately contact a specialist or fix the problem yourself (see “Brake system of a VAZ 2106”). When replacing brake fluid in the system, remember or write down the brand of fluid that was added so that when topping up, use the same brand. When installing a brake reservoir cap with a float, the fluid level in the reservoir increases slightly due to the volume of the float.
On a VAZ 2106 car, the brake reservoir for the hydraulic brake drive is located in the engine compartment in the left rear corner next to the hydraulic clutch reservoir.
WARNING Take precautions when working with brake fluid: it is toxic. It is unacceptable for brake fluid to come into contact with wires, plastic or painted body parts, so always use clean rags when filling.
If brake fluid gets on these parts, wipe them off immediately. Use only brake fluid recommended by the manufacturer. Do not reuse brake fluid that has been drained from the system: it is contaminated, saturated with air and moisture. Only add new fluid to the brake reservoir of the brand that was filled before. HELPFUL ADVICE To avoid exposing yourself in the future to unforeseen expenses for repairing the brake system, or even the entire car as a whole, promptly replace the brake fluid on your VAZ 2106 with fresh brake fluid. It is very hygroscopic and absorbs moisture from the air, which, in addition to causing corrosion of brake system parts, increases the boiling point of the fluid itself, which can lead to brake failure during frequent heavy braking.
1. Open the hood of the VAZ 2106 car. Check the fluid level in the brake reservoir. The brake fluid level should be between the “MAX” mark and the lower edge of the brake reservoir filler neck.
2. To add fluid, unscrew the brake reservoir cap and remove it along with the brake fluid level sensor float. Place the lid on a clean cloth, avoiding contamination of the lid and liquid dripping from it.
NOTE
If the brake fluid level sensor wires interfere with removing the cover, disconnect them.
3. Carefully add brake fluid to the reservoir up to the “MAX” mark. When the float cap is installed, the level will rise to normal. 4. Close the lid. Reconnect the wires to the brake fluid level sensor if they were disconnected. The order of connection does not matter.
USEFUL ADVICE After adding fluid, as well as at any opportunity, check the serviceability of the brake fluid level sensor located in the reservoir cap.
The check can be performed without an assistant, since the indicator is clearly visible from outside the VAZ 2106 car.
A pusher is placed on top of the brake reservoir cap. Turn on the ignition on the VAZ 2106 car. Press the pusher and keep it pressed. The indicator light on the instrument panel should be lit in constant red for the entire time you press the pusher. After checking, turn off the ignition.
Types of brake fluid (BF) for cars
Brake fluid is a fluid of a special composition that ensures the transmission of forces that are created in the brake cylinder to clamp the brake discs or release the pads.
The composition of all brake fluids is 92-97% basic composition and 3-8% additives. Without additives, it will not be possible to create a fluid that will meet the high requirements of a responsible brake unit. Depending on the combination of constituent components, TJ can be classified into 3 groups.
Classification of brake fluid by type:
- Mineral TJ. Based on LHM mineral oil, alcohol and castor oil.
- Glycolic TJs. Based on essential and polyglycol oils.
- Silicone TJ. This type is based on silicon-organic polymer products.
Classification according to physical and chemical parameters:
- By viscosity.
- By boiling point.
Exceeding the viscosity and boiling point ranges significantly degrades the properties of the brake fluid. So, for example, if you heat the brake fluid to a temperature exceeding the maximum permissible, then some substances from the composition will begin to evaporate and a vapor lock will form. After this, it happens that the brake pedal simply falls down without effort.
Reasons for sensor activation
The level sensor signals that there is a low level of brake fluid in the reservoir, and this occurs when there are leaks from the lines. Therefore, when the warning light comes on, first check the level in the reservoir, and then inspect the pipelines going to the working cylinders.
But the sensor can also work for another reason - severe wear of the pads. To compensate for pad wear, the pistons of the working cylinders move out of the cylinders as the pads wear. Because of this, the space inside the cylinder under the piston increases and fills with liquid. The lack of it in the drive is compensated from the tank, which is why the level drops to the minimum level. In this case, the sensor may not light up, but the signal will be triggered during braking. When you press the pedal, fluid from the reservoir will be supplied to the main cylinder, so its level in the reservoir will drop below a critical level. When you release the pedal, some of the liquid will flow back into the tank, and the sensor will stop signaling.
To eliminate the sensor from triggering, replenish the amount of liquid. But you should understand that the pads are worn out and need to be replaced.
In addition to quantity, the quality of the liquid is also important. It is hygroscopic and accumulates moisture
The water content reduces the boiling point, so during intense braking there is a high probability of drive failure due to boiling of the substance.
Bay
It is necessary to add liquid during the draining procedure. In this case, both actions should not be performed simultaneously, but in a certain sequence. In other words, you cannot fill in a new fluid composition until at least half of the old one has been drained.
When carrying out work, several points should be taken into account:
- Do not allow air to get inside the brake system. This leads to a deterioration in the performance of the brake pedal - the resistance changes.
- There should also be no bubbles in the bottle or hose. If such a situation arises, then new fluid cannot be added until the entire brake system has been pumped and air has been removed from it.
Upon completion of the replacement, the necessary elements are reinstalled and checked by turning on the engine. If there are no problems, then the amount of liquid in the tank is additionally checked, and if necessary, top up to the required volume.
Brake fluid in a Lada Kalina car is an important component that ensures safe driving of the entire vehicle.
Therefore, it is worth monitoring the condition of the fluid, as well as its level, in order to avoid serious problems, and replace it in a timely manner. It should also be noted that in some situations, old brake fluid or its leak can become the root cause of a serious accident, since in this case the car’s brakes simply will not work.
The fluid in the brake circuit of the LADA Kalina belongs to “consumables” - automotive parts and fluids that must be periodically changed during operation. Replacing brake fluid on a LADA Kalina does not require special equipment or special skills, so it can be done independently.
Working brake system: 1 — brake mechanism of the front left wheel; 2, 6, 12, 17 — brake hoses; 3, 7, 11, 18 — brake pipes; 4 — main brake cylinder; 5 — brake mechanism of the front right wheel; 8 — reservoir of the main brake cylinder; 9 — vacuum booster; 10 — brake pedal; 13 — brake mechanism of the rear right wheel; 14 — fluid pressure regulator in the brake mechanisms of the rear wheels; 15 — lever for regulating the fluid pressure in the brake mechanisms of the rear wheels; 16 — brake mechanism of the rear left wheel Note. Some cars are equipped with a braking system with ABS (anti-lock braking system).
Why is it necessary to change the brake fluid?
Brake cylinders work under difficult conditions. During intensive braking and driving with a trailer, the brake fluid in the Lada Kalina heats up to 180 degrees, and in quiet city mode - up to 150. Therefore, initially its boiling point exceeds 260 degrees. But brake fluid is hygroscopic and intensively absorbs water from the environment. Over time, the percentage of water content increases and the boiling point of the brake fluid decreases, which leads to the brake fluid boiling and the appearance of “bubbles” in it. The bubbles, unlike the fluid itself, are compressed, which leads to “sinking” of the brake pedal and brake failure. Therefore, it is necessary to periodically replace the brake fluid in the system.