How to replace the support bearings of the front struts of a Lada Granta (VAZ 2190)
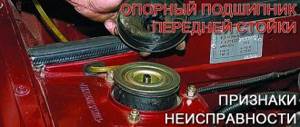
The upper support bearing is an important element in the design of the Granta front strut. The “supports” are involved in the rotation of the front strut during a turn, and also absorb axial loads and provide rigidity to the mechanism.
The “support” itself is a housing of two cups, inside of which the bearing itself is located, consisting of a rubber separator with balls inside. It also contains gaskets (vibration and noise insulators). The listed elements, as well as the design of the front support, are presented in the photo.
Video review of the SS20 suspension (front struts, springs, bearings).
Video: “SS20 suspension: briefly about the main thing”
Causes and signs of failure, diagnostics
The node takes a dynamic (variable) load, and failure, as well as replacement, is usually required for several reasons:
- Part wear, time to failure (service life);
- Accidents, frequent driving in potholes, aggressive driving style;
- Contamination of the support bearing from the inside, ingress of moisture and dust;
- Malfunction of suspension (shock absorbers, springs).
The main sign that a support bearing will need to be replaced is that the Granta rattles and creaks under the hood or near the struts. This appears after 80-100 thousand kilometers, under appropriate operating conditions of the car.
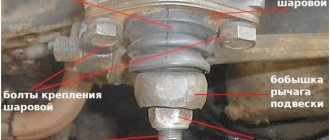
The design of the “support” and the front pillar is complex; the following elements can fail:
- The entire support, including the body (rarely) - position 4;
- Support bearing (more often) – position 8;
- Rubber gaskets wear out (more often) - position 9.
Diagnostics of support bearings
To diagnose a breakdown, do the following:
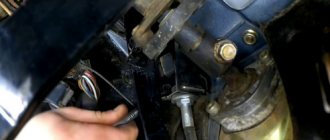
- Raise the hood, find the front supports;
- Place your hand over the knot;
- Start to strongly rock the car from bottom to top (or ask an assistant);
- If you feel a knock or hear, as well as other incomprehensible sounds, it means that there are problems. It is worth disassembling or replacing the front support mechanism.
- Watch the diagnostic video:
How to check support bearings
Replacement
Replacing the front support bearings is quite simple. The main thing is to find a really high-quality part, because not all manufacturers can provide supports with a high degree of wear resistance. So, we arm ourselves with the following tools:
- spanner;
- head for disassembling racks;
- spark plug head for ratchet;
- rod nut wrench;
- spring compressors.
And, of course, the prop himself. We will carry out the replacement procedure as follows:
- Jack up and remove the wheel.
- Remove the two nuts securing the front strut to the hub.
- Unscrew the nut from the shock absorber rod, while holding it with a hexagon.
- We remove the stand.
- Compress the spring and remove the support bearing.
- We again clamp the hexagon on the rod and unscrew the nut.
- We remove the bearing, install a new one and repeat all the steps, only in reverse order.
The cause of knocking while turning may be a malfunction of the steering rack, steering shaft or steering cardan. Therefore, after replacing the support, the problem may not disappear. In this case, all of the above systems should be checked.
Video on replacing the support:
Roads are called one of the two main “troubles” of Russia. Constant holes and potholes cause not only inconvenience in terms of comfortable movement, but also cause significant damage to the car’s suspension, its individual elements, especially bearings. Replacing them is not difficult, even a beginner can handle it, but diagnosing the need for this replacement in a timely manner is much more difficult, especially without knowing the signs of a faulty support bearing. We will talk about them further, but first a little theory.
Preparatory measures for replacing the support bearing Do-it-yourself grants
Replacing the support bearing of the Lada Granda strut can be done in two ways.
- Removing the front strut and unscrewing the wheel alignment bolts.
- Removing the strut module along with the rotating mechanism and brake disc assembly without unscrewing the adjusting fasteners.
Both methods cannot be performed without removing the strut, but using the second method, which is described below, you can avoid another wheel alignment.
Preparation for repair
It is advisable to carry out the replacement in an inspection hole, so you will save time on the convenience of performing operations to remove/install the unit. The car is in first gear; to comply with safety regulations, use wheel chocks.
Tools for work
- Any jack.
- Large wrench to remove chassis bolts.
- A long 30mm wrench for unscrewing the hub nut.
- Clamps for tightening shock absorbers.
- Tool for removing tie rod ends.
- Hammer, chisel, core.
- Set of keys (22, 17, 13).
- "Ratchets" on 13, 17, 19.
- Hex key for unscrewing the rod nut.
- Special heads. "Eshki" E8 and E12.
- Large negative screwdriver.
- Pliers.
- Penetrating lubricant such as WD-40.
- Torque wrench for tightening the rod nut.
Required set of new parts
- Supports or individual support bearings, depending on the breakdown;
- Rubber gaskets (if you are only changing the bearing);
- Boot with tie rod cotter pin (if replacement is required).
Video 2
In order to replace at least one of the elements that is part of the Kalina front strut, you need to remove the entire assembly from its seat.
To do this, open the hood and use a 22 wrench to rip off the upper support nut, while holding the shock absorber rod with a 9 wrench. There is no need to unscrew the nut completely yet.
We also use a wheel wrench to remove the wheel nuts and only then lift the car with a jack. Immediately you need to place a stop for belaying.
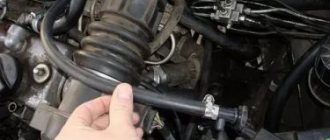
Now you can safely unscrew the wheel nuts and remove the wheel. The brake hose is attached to the strut, so it needs to be released from the mount so that it does not interfere when we remove the strut. Now we will need WD-40; we need to treat all the bolts and nuts that will have to be unscrewed. The main thing is to spray on the lower nuts and bolts of the shock absorber that secure the assembly to the steering knuckle.
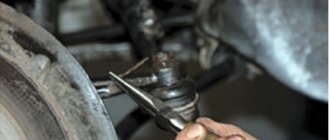
We remove the steering tip nut and hit the eyelet into which the ball pin of the tip is inserted with strong blows, while inserting a pry bar between the steering tip and its mount on the rack.
If you have a special puller, you can press out the finger using it. Unscrew the two self-locking nuts securing the shock absorber to the swing arm. To do this, we use keys 17 and 19.
It is better to use similar heads and knobs.
After removing the nuts, it happens that the bolts do not come out. They have to be knocked out. You must first knock them out through a wooden block so as not to spoil the thread, and then, using a punch with a smaller diameter, knock out the bolt when it is already sunk into the steering knuckle.
Purpose of the front strut support bearing
Let's take a specific technique - the VAZ-2110 car. This model has independent front suspension with hydraulic struts.
The main purpose of the strut is to dampen vibrations that occur when the spring moves.
How does this happen? For example, a wheel of your car falls into a hole. This, in turn, causes one side of the vehicle to sway. In the absence of a stand, such vibrations could continue for a long time.
Fastening is of particular importance. In the upper part the rack is fixed directly to the body, and in the lower part - to the rotary cam.
To ensure a movable connection between the body and the shock absorber, a special transition element is provided - a support bearing.
The name “support” reveals the essence of this unit and its location - at the junction with the car body.
Structurally, the device must withstand maximum radial and axial loads.
Guide to replacing front support bearings (using the example of the Hyundai Elantra).
- Jack up and remove the wheel.
- Using two appropriately sized keys, unscrew the stabilizer link from the shock absorber, first from the top with a 17 key, then from the bottom with a 19 key.
- Remove the 12mm bolts securing the brake hose and ABS.
- Next, disconnect the lower shock absorber mount from the hub.
- Remove the support post by unscrewing 3 12 mm nuts.
- Clamp the shock absorber in a vice. Using a special compressor, compress the spring so that it moves away from the cups - the top and the shock absorber.
- Holding the shock absorber rod with a hexagon, unscrew the fastening nut, and then remove one by one: the strut support, the cup with the bearing, the spring, the bump stop with the boot, the lining rubber.
- Reassemble the removed elements in the reverse order, replacing the faulty bearing with a new one.
- Check that the wheel alignment is set correctly and, if necessary, adjust it - at a service station or with your own hands using the methods described in the article “Do-it-yourself wheel alignment.”
Types and features of support bearings
Today, VAZ-2110 cars use several main types of bearings:
1. With built-in ring (can be internal or external). In such products, the manufacturer provides special holes for installation. Therefore, there is no need to use additional flanges.
The peculiarity of such a bearing is that it ensures rotation of any units when using different rings (internal or external).
2. With detachable ring (installed inside).
3. With detachable ring (installed externally). The peculiarity of this option is that the inner ring seems to “merge” with the body, and the outer ring can be separated if desired.
4. Single split bearing. In principle, its features are not very different from the nodes described above. The only difference is the greater rigidity of the ring.
Video - Uncle Mitya repairs his Granta 2 (Replacing support bearings)
Hello, reader of the blog RtiIvaz.ru. Today we will look at the front suspension strut supports of the Lada Granta SEVI expert from the manufacturer AT-Holding LLC. First, let's look at a schematic representation of the Grant strut support to see where this element in question is located:
FIGURE 1 Grant front suspension strut
1. Upper rack support. 2. Spring cup. 3. Shock absorber rod. 4. Front strut spring. 5. Upper shock absorber rod mounting nut. 6. Support bearing. 7. Top cushion under the spring. 8. Front bumper. 9. Protective cover. As can be seen from Figure 1. Using the upper support, the front shock absorber strut is attached to the car body. These mounts support the weight of the entire front end of Grant's car. And at the same time they must also provide effective noise insulation. For this purpose, rubber cushions are built into them.
Next, look at the internal structure of the support:
FIGURE 2. Internal structure of the support
1. Rubber cushion. 2. Studs securing the support to the body. 3. Internal metal sleeve. 4. Bearing support. 5. Metal support body. What the support and packaging looks like is shown in the figure below. On the hood of the car there is a SEVI expert support for the Grant strut from the manufacturer AT-Holding LLC:
FIGURE 3. Upper support of the front strut of Lada Granta
Usually the inner metal sleeve (Fig. 2. item 3) is located exactly in the center of the support. And in the Lada Granta they use supports with an offset center. And they come in two types:
- With an offset of 6 millimeters, it is used when there is no EMUR. EMUR-Electric power steering.
- With an offset of 12 millimeters, it is used when the EMUR power steering is installed.
The advantage of the strut support from the Lada Grant is that the center is shifted back. This is good because in this case the stand stands at an angle and absorbs impacts more effectively. The caster angle is increased and the steering is better.
FIGURE 4. Visual representation of displacement
Caster angle is the angle at which the front strut is tilted along with the vehicle's movement. Caster is considered positive when the stance is tilted back and negative when the stance is tilted forward. The higher the caster, the better the car's handling. But you can’t increase this angle too much either. That’s why rubber cushions were made with an optimal offset of 6 mm and 12 mm.
FIGURE 5. Caster angle
SEVI - Expert upper supports with offset are installed on Lada Granta cars, and they can also be installed on Lada Kalina. This is good for Kalina because it increases the caster angle. However, there is one nuance for Kalina. The design of Kalina's body, namely the location of the holes for the studs, does not allow the support to be installed with the arrow pointing straight forward. On this car, the airbags are placed so that the arrow points approximately to the middle of the radiator grille. Advantages of SEVI supports – Expert in the following:
- The surface to which the support bearing adjoins is covered with rubber, which improves the sound insulation of the body.
- The repair kit includes a high-quality support bearing.
- The rubberized surface improves shock and vibration absorption.
- New technologies used in the production of AT-Holding LLC, namely the chemical composition of rubber, make it possible to increase the resistance to destruction and reliability of the cushions.
- The reinforced frame reduces the possibility of body deformation at the points where the rubber cushions are attached.
- The offset allows you to increase the caster angle, thereby achieving sharpness and precision in car control. The response time to turning the steering wheel is significantly reduced.
In addition to the advantages, the manufacturer of supports SEVI expert LLC AT-Holding front strut provides a guarantee of up to 2 years.
I liked the SEVI Expert supports, the quality of their workmanship and the positive feedback on the forums of VAZ 2190 car owners. And 100 percent on the forums, the feedback about the SEVI Expert rubber cushions is only positive!
Causes and malfunctions of the support
Most often, problems with the support bearing occur due to dirt getting inside the device. In our off-road conditions, this process occurs much faster.
In addition, the quality of new components is often far from perfect, so even newly installed parts wear out very quickly.
The problem is further aggravated by the fact that there are no protective devices in the support bearing, which opens access to various debris.
Excessive wear or contamination of the bearing may be manifested by the appearance of knocking (crunching) when turning the steering wheel or driving over any obstacle.
Attention! Symptoms of a malfunction of the prop support include deterioration in the car’s handling and disruption of its driving performance, a crunching sound in the front of the car.
While driving, you may notice that the car has lost its former maneuverability and steering ability.
The downside is that it is very difficult to accurately determine the cause of the malfunction only by ear or based on your personal feelings.
What to do in a situation where the support bearing is knocking? - It's simple. At the first suspicion of a unit failure, the support bearing should be checked. We’ll look at how to do this and in what order below.
How to check the strut support bearing yourself
Please note that it is advisable to check the support not only when it fails, but also as a preventive measure.
For example, manufacturers recommend doing simple diagnostics every 15-20 thousand kilometers. But how to check the strut support bearing?
Proceed in the following sequence:
- Turn off the car (if it was started), put the handbrake on or put the wheel chocks on.
- Open the hood.
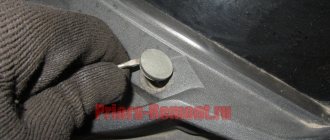
- Remove the “cup” cover, which is located on the hub bearing.
- Touch the support with the palm of your hand and ask your assistant to swing the car to the sides. It is very important here that the stand does not “play” during such vibrations.
If during the swinging process you hear strong creaks, crunching or knocking noises, then there is a high probability of bearing failure. In such a situation, replacement is required.
How to check the front and rear strut support bearing
An important element of a car suspension is the struts and support bearing (OP). It is installed in the front or rear pillar, or rather in the upper support. The bearing ensures mobility and at the same time rigidity of the connection between the shock absorber and the car body.
The strut effectively dampens vibrations that occur when the car moves on uneven roads. This allows you to reduce the load on the steering, chassis, suspension, and transmission.
The connection between the shock absorber and the car body must remain movable when the wheel is turned. To do this, it is necessary to install an intermediate rolling element between the shock absorber and the body shell, which is subjected to high loads and fails after a certain period of time.
The name “support” indicates the main functional purpose of the part. It is this one, located inside the support, that rests on the car body.
The unit ensures smooth running and appropriate controllability of the machine. In addition, the rear wheels receive greater stability on the road. The design and arrangement of the support bearing allows it to withstand fairly high axial and radial loads.
The main signs of a faulty support bearing
- Creaks, knocks, breakdowns in the suspension, the pillar area.
- Increased play between the body body, part, and seat.
- When overcoming rounded irregularities (for example, a speed bump), there is no squeaking, it only appears in the pits.
- Wear of rubber bands between the lower cup and spring.
Knocks in the rear suspension - replacing the support
- Broken support. This is when the rod pierces the rubber (see photo).
- Wear of the rubber base of the support.
- The appearance of knocking noises when turning the steering wheel;
- A sharp, peculiar crunch that occurs when a wheel overcomes an obstacle.
- Metallic knock.
- Deterioration in vehicle controllability.
- Loss of maneuverability.
- Violation of driving performance, knocking, crunching of the front part of the vehicle body.
- Changing the direction of movement of the front wheels while maintaining a constant steering wheel position.
- Rocking of the body in the direction of travel.
- The distance from the support to the cup is higher than permissible (see photo).
How do support bearings knock?
Clicks when turning the steering wheel
vazoved
I drive a LADA VESTA CROSS, Moscow
Then there will simply be no one to pay the fines! This is a Korean 7 in 1 car tablet video recorder for Android..
I forgot about fines and Yandex Navigator.
There is FULL HD shooting, radar detector and GPS with 32 satellites. I got it at a reasonable price for just a few thousand HERE
Removing the shock strut assembly with the steering knuckle
We carry out the work on a lift or inspection ditch.
Loosen the front wheel mounting bolts.
We remove the hub cap, unscrew the hub mounting nut with a 30mm socket and remove the washer.
Remove the front wheel.
We unscrew the nine screws and two bolts securing the engine mudguard and remove the middle engine mudguard.
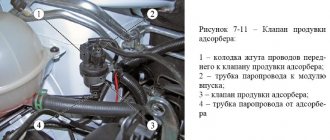
Using pliers, undo the cotter pin and use a 19mm wrench to unscrew the nut 3 (Figure 2) securing the ball pin of the outer tie rod end 1.
We press the ball pin out of the swing arm 2 of the front suspension strut.
Using a 19mm socket, unscrew nut 3, Figure 3, securing the ball pin to the lower arm of the front suspension and press ball pin 2 out of lever 4 (article - Repair, removal of the ball joint).
Using a TORX E8 socket, unscrew the bolt securing the speed sensor (if the car has ABS) to the bracket on the steering knuckle and remove the sensor from the bracket.
We remove the sensor harness from the guide bracket on the front suspension strut.
Unscrew and remove the pad guide with the caliper and cylinder assembly.
We tie the bracket to the brake hose bracket (Figure 4).
We remove the outer CV joint from the wheel hub and fix it in a suspended state using a wire or a technological hook.
If after removing the shock strut you need to disassemble it, then use a 22mm spanner to loosen the tightening of the rod nut (Fig. 5), holding the rod from turning with a 6mm hexagon.
Using a 13 socket, unscrew the three nuts 2, Figure 5, securing the upper support of the telescopic strut 1 to the mudguard 3 of the body and remove the washers.
Remove the strut assembly with the steering knuckle and ball pin.
Remove the lower support from the upper support 1, Figure 6.
Installing the shock strut assembly with the steering knuckle
Install the speed sensor bracket onto the steering knuckle and secure it with a bolt. Bolt tightening torque 7 – 15 Nm.
We install the lower support on the upper support of the rack.
When installing the lower support, the direction of the arrow on it must coincide with the arrow on the upper support. On the left support to the right of the hole, on the right - to the left.
When installing the rack into the car body, the arrow on the support should be oriented in the direction of travel of the car.
We install the strut assembly with the steering knuckle, brake and ball pin into the car body, install the washers and tighten the three nuts securing the strut to the body mudguard. Nut tightening torque 20…24 Nm (2.0…2.4 kgf.m)
We insert the splined part of the outer drive joint into the wheel hub, put on the washer and tighten, without tightening, the new wheel hub nut.
We press the ball pin into the suspension arm and tighten the nut securing the ball pin. The tightening torque of the nut is 67…82 Nm (6.7…8.2 kgf.m).
We thread the front wheel speed sensor harness into the guide bracket of the front suspension strut, install the sensor in the sensor bracket and secure it with a bolt. The bolt tightening torque is 6…9 Nm (0.6…0.9 kgf.m).
Before installing the speed sensor, apply lubricant (LSTs-15 lubricant) to the surface of the mating hole.
We press the ball pin of the tie rod end into the swing arm of the front suspension strut and tighten the nut securing the ball pin. The tightening torque of the nut is 28…34 Nm (2.8…3.4 kgf.m).
We tighten the nut. If the cutout of the nut does not coincide with the hole in the ball pin, retighten the nut to an angle of no more than 60˚ to ensure cotter pinning.
Install the wheel and tighten it without tightening the front wheel mounting bolts.
We lower the car, tighten and lock the front wheel hub fastening nut, deforming the locking belt of the nut into the grooves of the shank of the outer drive joint housing. We install wheel caps. The tightening torque of the nut is 230 - 250 Nm (23 - 25 kgf.m).
Tighten the front wheel mounting bolts. The tightening torque of the bolts is 76 – 92 Nm. Install the engine splash guard.
Causes of support bearing failure
Taking into account the specifics of Russian roads, as well as difficult climatic conditions, it can be determined that the load on the suspension elements is high. For any “opornik” the service life is on average 100,000 km. But when driving on bad roads, this figure decreases by 1.5-2 times.
Rear support
Malfunction of the rear support bearing and its failure is possible in the following cases:
- Wear by mileage;
- Moisture getting inside;
- Late suspension maintenance;
- Driving on bad roads, exposure to dust, dirt;
- Strong shocks (breakdowns) of the suspension when hitting a deep hole;
- Exceeding the maximum permissible weight of cargo placed in the trunk and rear seat.
Front support
Aggressive driving style, poor road conditions or a defective part most often causes a breakdown. Failure occurs earlier for the following reasons:
- Driving on dusty roads.
- Low quality spare parts.
- Natural wear and tear.
- Sharp turns of the steering wheel, drift;
- Sudden braking immediately before an obstacle.
- Wear of the rubber elastic seal.
- Loosening the mounting bolts.
- Malfunction of strut elements (spring, shock absorber, buffer, etc.).
How to check the support bearing on a VAZ yourself?
The suspension of a modern car is a complex structure that includes a lot of different parts, which, in turn, form the chassis components. The main parts of the suspension are: shock absorbers, springs, brackets, silent blocks, levers, as well as bearings and much more.
Each part has its own function, its own purpose; a malfunction of one of the suspension parts can cause a chain reaction, as a result of which the entire suspension will fail. Malfunctions in the suspension can lead to an accident, so to ensure safe driving, you must constantly monitor the condition of the vehicle's chassis.
Suspension malfunctions most often manifest themselves in the form of extraneous knocks, creaks, friction, as well as disturbances in the ride quality and handling of the vehicle. So, for example, a support bearing can cause poor steering, maneuverability, etc.
How to check VAZ support bearings?
- To check, you need to do a number of simple manipulations. It all starts with the fact that you need to open the hood.
- Next you need to remove the cup cover, which is located on the wheel bearing.
- Place your hand on the support, and meanwhile the assistant should swing the car to the sides, but in such a way that the stand does not play. During the swing, you will feel how the support bearings work; if you feel knocking or hear squeaks, the support bearings are most likely faulty and require replacement.
The assumption of a malfunction can be confirmed only after removing and disassembling the support bearings. As a rule, VAZ support bearings fail after 40 thousand kilometers. Read how to replace support bearings here.
How to check a support bearing
There are three methods for checking the support bearing at home: Remove the protective caps and press the upper element of the front strut rod with your fingers. Now we begin to rock the car from side to side by the wing. We do this both longitudinally and transversely. If the bearing fails, you will hear the same knocking noise as when driving. At the same time, the car body will swing, but the pillars will either stand still or swing with less amplitude.
You can place your hand on the front shock absorber spring coil. Then you need to turn the steering wheel in different directions. For this you will need an assistant. If your hand feels a recoil and a metallic knock sounds, things are bad with the bearing. You can also drive first on a flat road, and then on a rough one, and listen to what sounds the car makes. If you hear metal knocking from the front arches under extreme loads, then the problem is most likely in the support bearing.