Signs of the need to replace stabilizer bushings
The main signs of wear on the stabilizer bushings are knocking and squeaking noises when the car is moving on an uneven road. In this case, it is necessary to immediately replace them with new ones.
To check the condition of the bushings in a garage, you need to strongly shake the stabilizer in the vertical direction. The wear of the bushings will certainly manifest itself as a creaking or knocking sound, and play will be felt in the connection of the stabilizer with the side members and levers. With serviceable bushings, the “stabilizer-spars-levers” combination creates the impression of a single whole.
Replacing anti-roll bar elements
Rubber elements of the stabilizer - bushings and cushions - are replaced when the rubber cracks, ruptures and bulges, as well as when they are significantly worn, which causes play to occur in the connection of the parts.
We carry out the work on an inspection pit or overpass.
We hang out the front of the car.
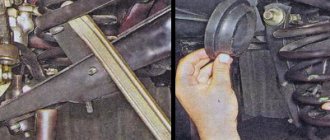
Before unscrewing the nut of the screw securing the stabilizer bar to the front suspension arm, you must thoroughly clean the screw head from dirt, into the socket of which you will need to insert a Torx key. If the key does not fully fit into the screw head, then the significant force generated in the corrosion-damaged threaded connection when unscrewing the nut can damage the screw and the key.
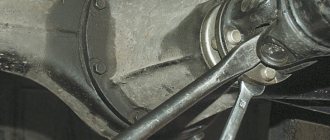
Using a 13mm spanner, unscrew the nut securing the stabilizer bar to the suspension arm, holding the screw from turning with a Torx T-40 wrench
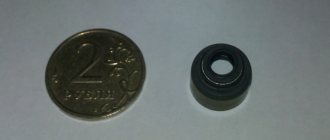
Remove the lower rubber bushing
A metal washer is installed in the recess of the end of the bushing facing the nut.
Remove the screw with the upper rubber bushing and plastic washer
Pull the end of the bar down with your hand...
...and remove the rubber-metal intermediate bushing
Similarly, remove the parts attaching the stabilizer bar to the other lever. We install new parts in reverse order.
We tighten the nuts of the screws securing the stabilizer bar to the levers to the prescribed torque in the “car on wheels” position.
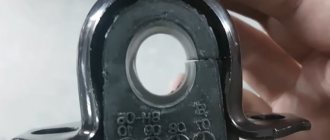
When installing the intermediate sleeve, we orient it with the grooves located on the outer surface of the sleeve upward
To replace the stabilizer bar cushion...
... using an 18-mm socket with an extension, unscrew the bolt securing the cushion bracket and subframe to the body
Using a 10mm spanner, unscrew the nut securing the cushion bracket to the subframe
We lower the bracket, moving its pin out of the hole in the subframe...
...and remove the bracket by removing its front end from the groove of the subframe.
Removing the cushion from the barbell
Install the new stabilizer bar cushion in the reverse order.
Similarly, we replace the cushion on the other side of the stabilizer bar.
If it is necessary to dismantle the bar, disconnect both of its ends from the suspension arms and remove the cushion brackets (see above).
Removing the stabilizer bar
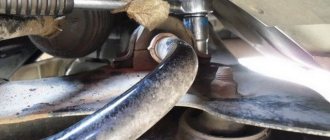
We inspect the stabilizer bar. There should be no deep abrasive wear in the places where the cushions are installed. Areas with deep wear significantly increase the likelihood of rod failure.
Install the anti-roll bar in the reverse order.
Replacing stabilizer bushings
There is no need to remove the sway bar to replace the outer bushings. It is enough to remove the mounting brackets. Bracket connections are exposed to water and dirt. Therefore, in addition to a set of keys and a mount, you will need a tool that makes it easier to work with rusted threads. For example, WD-40.
The procedure for replacing the outer bushings is as follows:
- Treat the threads of the studs holding the brackets with an anti-rust agent.
- Unscrew the nuts and remove the brackets, remembering their location.
- Press the stabilizer up, inserting a pry bar between it and the lower arm.
- Remove old bushings.
- Inspect the stabilizer at the bushing attachment points. If significant wear is noticeable, replace it with a new one.
- Put on new bushings.
- Install the brackets and tighten the nuts. It is better to tighten smoothly, in three stages, gradually increasing the force.
To replace the inner bushings, the anti-roll bar must be removed. To do this, you will have to unscrew the brackets at all four mounting points.
Replacing stabilizer bushings for VAZ 2107
1) Lubricate all threaded connections with WD-40; after treating with this liquid, the fasteners will be much easier to release
2) We jack up the front part of the car, using wrenches we unscrew the nuts holding the lower brackets to the arms
3) Pry up the brackets using a flat-head screwdriver and remove them. Then we can remove the VAZ 2107 stabilizer bushings themselves
4) Remove the bushings located under the central plates. But, do not forget to remove the stabilizer itself before doing this, since it will interfere with all the work.
With the stabilizer removed, we can replace the bushings themselves. To do this, we clamp the part in a vice and try to remove the bushing by turning the rod. Installation of a new copy is carried out as follows: the bushing is placed in the bracket, and then pulled to its seat. that's all, good luck!
If the transverse stabilizer bushings in the suspension fail, this can hardly be called a critical failure requiring immediate repair. Because of this breakdown, the car will not lose control and its wheels will not fall off. But in order to drive a car with broken bushings, the driver will need very strong nerves. Because knocking and grinding noise caused by worn bushings will be heard in any cabin. In this article, we will tell the reader how to replace roll bar bushings in passenger cars, both domestic and foreign, with your own hands.
Rear anti-roll bar VAZ 2107
In the rear suspension, the role of a stabilizer is performed by the VAZ 2107 transverse link. If you need to further increase the stability of the car, it is necessary to carry out tuning by installing a rear stabilizer bar.
The rear stabilizer of a VAZ 2107 can be made from the front stabilizer of a VAZ 2110. You will also need studs, clamps (or a pipe for their manufacture), one VAZ 2110 torque rod, two VAZ 2110 stabilizer struts and stabilizer rubber bands with fastening clamps.
To work, you need a grinder, a welding machine, a blowtorch, a drill, and a vice.
The procedure for manufacturing and installing the rear stabilizer is as follows:
- Prepare clamps for attaching the rear stabilizer to the bridge by cutting them from a pipe with a diameter of 57 mm.
- Shorten the VAZ 2110 stabilizer by 5-6 cm and bend it 90 degrees, preheating it with a blowtorch. It must be cooled in air; the use of water or oil for cooling is unacceptable.
- Make two stabilizer mounts to the suspension from the VAZ 2110 jet rod, welding them to the stabilizer strut.
- Assemble the structure by installing the bushings.
The steel stabilizer bracket 2107 in the form of a bracket is used to attach the transverse link connecting the lower arms of the front wheels. In classic models of Zhiguli 2101-07 there are 6 such elements. As is the case with other components of these machines, maintenance of the anti-roll bar can be performed by the owner himself, if he so desires. The main thing is to have time and understand what this service involves.
Replacing the cushions and stabilizer bar
We remove the anti-roll bar when the bar is deformed or when all rubber pads on its mounting brackets are replaced. We replace the rubber pads of the clips securing the stabilizer bar to the levers without removing the bar itself.
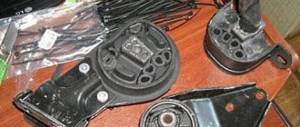
Parts of the anti-roll bar: 1 – cushion clip (21012906048/49); 2 – M8 nut (16100811); 3 – spring washer (10516670); 4 – stabilizer (2101-2906010); 5 – stabilizer bar cushion (21012906040); 6 – outer bracket (2101-2906042); 7 – internal bracket (2101-2906043)
Removal
1. Place the car on an inspection hole or overpass and hang the front part of the car (see “Preparing the car for maintenance and repair”).
2. Mark the position of the stabilizer pad clips relative to the arms for correct installation during assembly.
The right and left clips for attaching the stabilizer pads are non-interchangeable.
If we replace only the cushions, then mark their position relative to the stabilizer bar.
3. Using a 13 mm socket wrench, unscrew the two nuts securing the stabilizer pad cage to the lower arm.
4. Using a mounting spatula, remove the cushion clip from the lever studs.
5. Remove the pillow from the stabilizer. Similarly, remove the pillow from the opposite side of the stabilizer.
To replace the stabilizer or the pads of its mounting brackets, remove the mudguard (see “Splash guard - removal and installation”).
When removing the stabilizer bar, it is necessary that the load on the right and left front suspension springs be equal. Otherwise, when removed, the twisted rod may straighten out and cause injury.
6. Using a 13 mm socket wrench with an extension, unscrew the two nuts securing the stabilizer bracket to the body side member.
7. Similarly, unscrew the nuts securing the second bracket and remove the stabilizer. We clean the stabilizer bar from dirt.
8. To replace the stabilizer bracket cushion, clamp the bracket in a vice. If the stabilizer bar does not require replacement, then mark the position of the bracket pads relative to the stabilizer bar to facilitate subsequent assembly. Lubricate the stabilizer bar with soapy water to make it easier to remove the bracket with the cushion.
9. Turning the stabilizer bar in different directions, pull it out of the bracket cushion.
10. Use a slotted screwdriver to remove the rubber cushion from the bracket.
11. Similarly, remove the cushion of the second bracket.
Installation of anti-roll bar
1. Installation of the anti-roll bar is performed in the reverse order.
2. If the stabilizer bar has not been replaced, then we orient the stabilizer pads according to the previously applied marks.
3. Tighten the nuts securing the stabilizer brackets.
4. First, install the cage on the lower pin of the lever and tighten the nut 2-3 turns. Using sliding pliers, tighten the cage and attach the second nut.
5. After making sure that the cushion protrusion is in the hole in the cage, finally tighten the nuts. We install the stabilizer clip on the other side in the same way.
Purpose and design of the unit
VAZ 2101-07 cars use a front stabilizer, whose task is to distribute the load on the chassis when turning, keeping the car in a horizontal position. Without it, under the influence of various forces, the car body will begin to tilt strongly to one side, which, even at average speed, can lead to a coup.
The main part of this unit is a long rod, shaped like the Latin letter U and made of steel with increased elasticity. Car springs are made from the same steel. The ends of the VAZ 2106 stabilizer are attached to the lower arms, and the middle part is attached to the front part of the body. The node consists of the following elements:
Spare parts, maintenance
Products from the Dustershop77 range that may be of interest to you:
| Name | Manufacturer | Price | Availability | Add to cart |
| BR-001-GARD-URDP | Mud flaps enlarged (widened) Duster-GARD front | Duster-Guard | 1300 / 1100 rub. Discount: 1000 rub. | >10 |
| DC495 | Discount card (Dusterclubs.ru, Dustershop77.ru) | 700 / 500 rub. Discount: 500 rub. | >10 | |
| DC218 | Air deflector “Warm feet” for Duster, Logan, Sandero, Largus | 500 / 300 rub. Discount: 250 rub. | >10 | |
| 005-008502 | Trunk sill protection | Russian Artel | 1000 / 800 rub. Discount: 700 rub. | 1 |
| NRD-009102 | Frill under the windshield (RA) | Russian Artel | 1800 / 1600 rub. Discount: 1500 rub. | 2 |
| PT014-7010402 | Trunk sill trim PTGroup | Pt GROUP | 1200 / 1000 rub. Discount: 800 rub. | >10 |
| R12711 | Wind deflectors (window deflectors) COBRA/Autoplex | COBRA/Autoplex | 2000 / 1600 rub. Discount: 1500 rub. | >10 |
| DC654 | Frill with fastening without 3M tape (Duster/Terrano) (ArtForm) | ArtForm (Yuago) | 3500 / 2500 rub. Discount: 1900 rub. | >10 |
| def-001 | Hood deflector Vip-Tuning | VIP-Tuning | 2000 / 1500 rub. Discount: 1100 rub. | >10 |
| PT010-07010408 / RDU112101 | One-piece frill for Renault Duster windshield | Pt GROUP | 2900 / 2300 rub. Discount: 1900 rub. | 5 |
Node maintenance
During the operation of classic Zhiguli models, several malfunctions associated with stabilizing traction occur:
- wear of stabilizer bushings on VAZ 2107;
- breakage of the upper or lower pin on which the ends of the rod are screwed to the lever;
- separation of the U-shaped fastening strip welded to the lever at the factory.
Broken studs are quite rare and are the result of metal fatigue. The malfunction is characterized by sharp rolls when turning, accompanied by loud metallic knocks. This unpleasant sound is produced by the released end of the rod clinging to the side of the lower arm. It’s quite easy to fix the damage, even while on the road in the middle of a field: a regular bolt and nut are put in place of the torn stud.
The fastening U-shaped strip of thick metal comes off very rarely. Which entails a labor-intensive process of replacing the lower arm, since welding it to the old one is useless, the part will very quickly break again. If any of these two troubles occur, it is possible to drive a car, but only very slowly, especially on turns.
The VAZ “classic” stabilizer bushings are replaced when they wear out approximately once every 20 thousand km. mileage Wear is clearly visible visually; you just have to look under the front of the car and make sure that the rubber bands are cracked and do not cover the traction properly. In advanced cases, bad bushings make themselves felt while driving, when the car sways and tilts dangerously.
To install new bushings, you will have to completely remove the VAZ stabilizer. It is most convenient to carry out work from the inspection hole, although if necessary, you can do without it. To disassemble and replace, you will need a pry bar, 2 13 mm wrenches and a powerful screwdriver. Replacement is carried out as follows:
- It is easiest to remove the rod when the springs are completely unloaded. Therefore, it is recommended to hang both front wheels of the car.
- Using a 13 mm wrench or socket, unscrew the nuts on all brackets.
- Using a pry bar, remove the brackets from the studs one by one.
- Remove the rod and use a sharp tool to mark the position of the old bushings, as well as the right and left sides.
- Old rubber bands can be cut off with a knife.
When finished, the rod must be thoroughly soaped (do not lubricate it with oil!) and new bushings must be tightened, and then the assembly must be assembled. When assembling, it is undesirable to confuse the right and left ends of the stabilizer, which is why marks were placed on them. In the end, you need to check the car while driving and go to a car service center to correct the wheel alignment of the front wheels.
We install a stabilizer from a VAZ-2110 on a VAZ-2109
I didn’t notice any pitfalls when replacing the eggs - I took it off and put it on. All the same, they will take the correct position relative to the bar during the subsequent ride...
I didn’t notice any pitfalls when replacing the eggs - I took it off and put it on. All the same, they will take the correct position relative to the bar during the subsequent ride...
While on the nuts, I removed the “eggs” from the new rod; On the car, I unscrewed the fastening of the “eggs” to the brace, the nut-bolt was 19, one on each side. I waited a little longer, refilled the bracket nuts and began to unscrew them.
For this purpose, I decided to use a regular open-end wrench size 13, rather than a socket wrench: they feel the applied force better and can see the movement of the nut. I was lucky - two of the 4 turned away immediately, another one also almost without problems, but I did not expect to see the last one separately from the hairpin. The main thing here is not to rush, so I carefully, 5 degrees there - 5 degrees back, began to rock it, periodically pouring WD on the threads and taking breaks to allow the liquid to penetrate. Apparently, I was lucky again, because the technology of swinging “back and forth” gave results and all four nuts turned out to be unscrewed.
On the left, the bracket has already been removed, and on the right, the nuts are still getting wet. The rubber pad of the bracket can be temporarily removed so that it does not interfere when dragging the rod under the resonator.
The rest turned out to be a matter of 15 minutes. I removed the bracket clamps, “eggs” and rubber clamp pads from the old rod, after spraying it with WD. Then he pulled him out, although without immediately finding the optimal route. In the same way, I inserted a new rod, put the clamp pads and “eggs” on it in place (otherwise you won’t be able to insert it between the bottom and the resonator). I attached the rod to the bottom, put the clamps on the pads and fixed them with the same nuts, having previously sprayed them with anticorrosive. By the way, the studs can also bend when tightening the nuts, so it is better to run the thread a couple of times and generally replace the nut if it is in doubt. In any case, it is advisable to clean the stud with a wire brush.
I was unable to take a photo of the stabilizer assembly. But it turned out to be an installation in the place where the stabilizer is highlighted with a red line.
When the stabilizer bar took its place relative to the bottom, the last thing left was to bolt the “eggs” to the brace. This was achieved almost without difficulty, except that the position of the “eggs” on the bar had to be adjusted. In any case, during the first trip, all parts of the stabilizer will independently take optimal positions relative to each other.
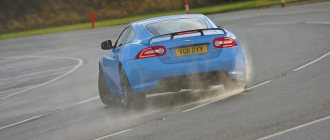
result was noticeable immediately. Roll in corners has been significantly reduced, and when the steering wheel is swayed from side to side at speed, the car “yaws” more smoothly. And in general, the nature of driving a car has changed: those turns that I previously did not risk taking at a speed of more than 80 km/h, now I can completely calmly pass at 100 km/h or even more.
Of course, the suspension has become stiffer - that’s a fact, and all its defects immediately became noticeable. I have a used car, so I felt the desirability of replacing the ball joints, as well as the tie rod ends. And the steering rack had to be tightened a little... And I also found out that the left shock absorber - the gas blue BILSTAIN was already finished - after upgrading the stabilizer... So decide for yourself - if you want to know the truth about your suspension - install the tenth stabilizer Personally, I’m satisfied and don’t regret it at all done.
source
Strengthening stabilizing traction
Some owners of the “classic” VAZ, who love to improve their car in every possible way, have even gotten to the stabilizing unit. There is an opinion that the car behaves better on the road if you install a double stabilizer on the VAZ 2101-07. This modernization improves the car's handling, since rigidity does not allow it to sway and deviate from the trajectory.
To realize the strengthening of the stabilizer, you need to buy the following parts:
- stabilizer rod;
- set of rubber bushings;
- 4 brackets designed for attachment to the lever.
The new rod must be immediately trimmed by 80 mm on each side. Then remove the “original” rod along with the brackets. Further steps - according to the instructions:
- Remove the outer bushings from the “original” rod and clean the ends.
- Place 2 middle bushings on the new rod so that they coincide with the brackets on the old one. Pull the outer rubber bands onto the ends of the rod.
- Pull additional rubber bands on the old stabilizer that match the outer ones on the new one.
- Place the rods together and twist them with brackets placed on additional bushings on both sides.
- Install a reinforced stabilizer on the car.
What is a rear stabilizer
The rear stabilizer for the VAZ 2107 is a curved C-shaped rod installed next to the rear axle of the “seven”. The stabilizer is attached at four points. Two of them are located on the rear suspension arms, two more on the rear side members of the “seven”. These fasteners are ordinary eyes with dense rubber bushings inside (these bushings are the weak point of the entire structure).
Today you can purchase a rear stabilizer and fasteners for it at any spare parts store. Some drivers prefer to make this device themselves, but this is a very labor-intensive process that requires certain skills that a novice car enthusiast simply does not have. That is why the replacement of bushings on a finished stabilizer will be discussed below.
Purpose of the rear stabilizer
The anti-roll bar on the “seven” performs two important functions at once:
- this device gives the driver the opportunity to control the tilt of the car’s chassis, while the force acting on the camber of the rear wheels practically does not increase;
- After installing the stabilizer, the tilt of the suspension between the axles of the car changes significantly. As a result, the driver is able to better control the car;
- The improvement in car control is especially noticeable on sharp turns. After installing the stabilizer, not only does the lateral roll of the car during such turns decrease, but you can also take them at a higher speed.
About the disadvantages of the rear stabilizer
Speaking about the advantages that the stabilizer provides, one cannot fail to mention the disadvantages that also exist. In general, the installation of a stabilizer still remains the subject of fierce debate among car enthusiasts. Opponents of installing stabilizers usually justify their position with the following points:
- Yes, after installing the rear stabilizer, lateral stability increases significantly. But this is a double-edged sword, since it is the high lateral stability that makes it much easier for the car to skid. This circumstance is good for those who engage in so-called drifting, but for an ordinary driver who finds himself on a slippery road, this is completely useless;
- If a car enthusiast decides to install a rear stabilizer on his “seven”, then he is strongly recommended to install a front one, and not a regular one, but a double one. This measure will help prevent excessive loosening of the car body;
- The cross-country ability of a car with stabilizers is reduced. On sharp turns, such a car often begins to cling to the soil or snow with its stabilizers.
Thus, a driver who is thinking about installing stabilizers should weigh all the pros and cons as carefully as possible, and only after that make a final decision.
Signs of a broken rear stabilizer
It’s not difficult to guess that something is wrong with the rear stabilizer of the VAZ 2107. Here's what's observed:
- a characteristic grinding or creaking noise, which is especially clearly heard when entering a sharp turn at high speed;
- a significant increase in vehicle roll when cornering and a decrease in controllability when cornering;
- the appearance of play on the stabilizer. Play can be easily detected by placing the car in an inspection hole and simply shaking the stabilizer bar up and down;
- destruction of bushings. The play mentioned above is almost always accompanied by the destruction of rubber bushings. They are squeezed out of their eyes, crack and completely cease to perform their functions.
All of the above things indicate only one thing: it’s time to repair the stabilizer. In the vast majority of cases, repairing the rear stabilizer comes down to replacing damaged bushings, since the fasteners and rod rarely need repairs. Such a need may arise only in the event of serious mechanical damage, when the driver caught a large stone or curb with the stabilizer, for example.
How should the stabilizer be positioned?
A properly installed stabilizer should be able to twist under the influence of forces on the wheels, and it should do this even when the forces applied to the right and left wheels are directed at completely different angles.
Replacing bushings for the rear stabilizer of a VAZ 2107
Worn rear stabilizer bushings cannot be repaired. They are made of special wear-resistant rubber. It is not possible to restore the surface of this rubber in a garage: the average car enthusiast has neither the appropriate skills nor the appropriate equipment for this. Therefore, there is only one way to solve the problem of worn bushings: replace them. Here are the tools and consumables you will need for this job:
- a set of new bushings for the rear stabilizer;
- set of open-end wrenches;
- flat screwdriver and hammer;
- composition WD40;
- mounting blade.
Sequence of operations
It should be said right away that it is most convenient to carry out all work in an inspection hole (as an option, you can park the car on an overpass).
- After installation on the pit, the stabilizer fasteners are carefully inspected. As a rule, all the bolts on it are covered with a layer of dirt and rust. Therefore, it makes sense to treat all these compounds with WD40 and wait 15 minutes. This time will be enough to dissolve dirt and rust.
- The mounting bolts on the stabilizer clamps are unscrewed with a 17mm open-end wrench.