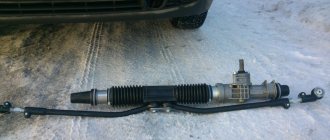
The VAZ 2110 steering rack is one of the most important parts of the car’s chassis. It connects the wheels and steering wheel through a special mechanism into a single whole. The vehicle's controllability, people's lives and traffic safety depend on its serviceability. Therefore, it is important to maintain the functionality of this unit and be able to quickly diagnose problems, given that rack faults can easily be confused with other faults. Knowing the structure of the mechanism and signs of malfunctions will help to simplify their identification.
In today's article we will talk to you about the main faults of the VAZ 2110 steering rack and how to repair them yourself.
Main faults of the VAZ 2110 steering rack
In modern VAZ 2110 cars, breakdowns of the steering rack and power steering are a very common occurrence. The reasons may be the following:
- Frequent driving on uneven roads, getting the car into potholes at high speed, active (uneconomical) driving style. In such a situation, the steering rack and power steering will quickly fail, an annoying knock will appear, and controllability will deteriorate. The result is failure of the unit;
- sudden acceleration when the steering wheel is in the extreme right or left position. This driving practice negatively affects the life expectancy of the steering rack;
- Regular trips to curbs are a big load for such an important mechanism.
Fans of such “obstacle driving” will very soon have to spend money on repairing the steering rack.
We have identified the main reasons. But how to determine whether a steering rack is faulty in practice? For what symptoms? We will look at this issue in more detail.
Signs and causes of failure of the VAZ 2110 steering mechanism
- Increased free play of the steering wheel. The reason for this may be an increase in the gap between the rack stop and its nut. Associated reasons may be wear of rubber-metal parts, loosening of the ball rod nuts, and the appearance of a gap in the hinges.
- Noise and knocking in the steering. Very often, in addition to the reasons described in paragraph 1, the source of the problem may be a weakening of the steering mechanism or the bolt securing the lower flange of the elastic coupling to the gear shaft.
- Stiff rotation of the steering wheel. The source of the malfunction may be damage to the bearing of the upper steering column shaft, a defect in the support sleeve or in the rack stop. The reason may also be wear of the bearing of the upper support of the suspension strut, failure of parts of ball rods or a telescopic strut.
It is also worth saying that troubleshooting the steering rack is a priority task for auto repair, because...
otherwise it can be fatal. At the initial stages of operation, knocking in the rack is eliminated by tightening the corresponding thrust nut. However, after 200 thousand km. To eliminate the play, you will need to replace the VAZ 2110 steering rack.
How to tighten the steering rack on a VAZ 2110 with your own hands
In order to tighten the steering rack on a VAZ 2110, you must perform the following procedure
- Unscrew the nuts inside the passenger compartment and remove the fastening bolts of the lower universal joint to the steering rack gear shaft. To do this, you will need a 13mm socket. The bolt can turn, so hold it with an open-end wrench.
- In the engine compartment itself, remove the nut of the upper fastening of the rack boot.
- At the bottom of the car, remove two more nuts that secure the rack boot.
- Remove the boot.
- Raise the front of the car and remove the front wheels.
If you are going to remove the steering, but not dismantle the rods, follow these instructions:
- Remove the locking plate from the rod mount by prying it off with a screwdriver. Then unscrew the two bolts that secure the rods and rack;
- Using a 13mm socket, remove the nuts from the steering gear brackets connecting to the front panel;
- Move the rack forward a little to remove the gear shaft from the shield hole;
- Remove the rack together with the rods.
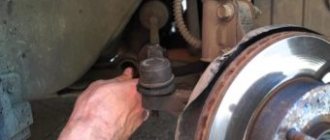
If you want to remove the steering rods, unscrew the rod end from the swing arm of the shock absorber struts. To do this you will have to do the following:
- Remove the cotter pin using pliers;
- Using a 19mm spanner, unscrew the ball pin fastening nut, but not all the way;
- Use a 17 socket to loosen the tension bolt of the rod end;
- Now press out the ball pin. To do this, insert a mounting blade between the swing arm and the tip. Press the tip away from the lever, and apply several blows with a hammer to the end of the rotary lever;
- Unscrew the ball stud nut completely;
- Remove the ball pin from the lever hole;
- Use a screwdriver to open the groove of the tie rod end;
- Remove the tip, holding the threaded adjusting sleeve with a 27mm wrench. Count the number of turns so that during reassembly you can tighten it by the same number of turns;
- On the tie rod, try to maintain the position of the threaded bushing. This way the toe angle of the wheels will remain as correct as possible.
Do-it-yourself repair and replacement of the VAZ 2110 steering rack: instructions and videos
The steering rack is a vehicle component responsible for the car’s ability to turn.
Not only the performance of the vehicle, but also the safety of the driver and his companions and other road users depend on the performance characteristics of the product.
If you suspect that this part has failed, the car owner should immediately fix the problem by repairing or completely replacing the VAZ 2110 steering rack with a new one.
Steering rack device for VAZ 2110
The tens steering unit is mechanical. It consists of a rack driven by a gear, which in turn is connected to the steering wheel. The entire structure is enclosed in an aluminum housing. Its output end with ball joints is directly connected to the steering knuckles of the wheelset.
VAZ 2110 steering control diagram
In the figure: 1 - sealing ring; 2 — protective cover for the tie rod end; 3 - spring ring; 4 — ball pin; 5 — tie rod end; 6 — threaded insert; 7 — left tie rod; 8, 10 — steering gear mounting brackets; 9 — right steering rod; 11 — right steering gear support; 12 - spacer ring; 13 — protective cover of the steering mechanism; 14 — steering mechanism; 15 - seal; 16 - thrust plate; 17 — gasket; 18 — spring washer; 19 - bolt; 20 — coupling bolt; 21 — spacer sleeve; 22 — universal joint; 23 — upper steering shaft; 24 — steering wheel; 25 — steering wheel fastening nut; 26 — steering wheel pad; 27 — decorative overlay; 28 — self-tapping screw, 29, 40 — bearings; 30 — bracket for fastening the upper steering shaft; 31 — retaining ring; 32 — steering column position adjustment lever; 33 — adjusting sleeve; 34, 35 — washers; 36 — self-locking nut; 37 — fixing plate; 38 — spring washer, 39 — special bolt with a tear-off head; 41 — intermediate steering shaft; 42 — rubber elastic coupling; 43 — left steering gear support.
The simplicity of the mechanism is one of the advantages of this design. The minimum number of parts of the unit ensures high efficiency of the product and allows you to quickly make the required repairs. The disadvantages are increased demands on the quality of roads. The mechanism, exposed to the influence of suspension elements, often fails due to strong beating caused by uneven road surfaces.
To prevent breakdowns of this mechanism, it is advisable to follow the following rules:
- periodically check the condition of boots and seals to prevent oil leakage;
- Avoid sharp turns when driving, do not turn the steering wheel all the way;
- use high-quality oil for the steering rack with a high level of resistance to low temperatures, since lubricant hardened in cold weather impairs the performance of the mechanism.
Fault diagnosis
Common signs that your car needs steering rack repair are the following:
- the presence of a knock when driving in the area where the unit is located;
- the steering wheel, compared to the usual effort, is difficult to turn;
- When driving the car manually, play is felt.
If such problems are detected, the motorist must inspect the unit and, if its malfunction is confirmed, take measures to eliminate the malfunction. There are several ways to solve the problem.
Lift
Sometimes a knocking rack is simply enough to tighten. Minor play in it can be eliminated using an adjusting mechanism located in the housing, on the conventional axis of the input shaft.
The mechanism can be protected from dirt by a plastic cover. Adjustment is carried out with an octagonal key 17.
Do not tighten the nut all the way! Gradually turning the nut 10–15 degrees counterclockwise, you need to monitor changes in the operation of the rack and check the tightness of the steering wheel.
If necessary, the nut is loosened. After the adjustment is completed, the nut is cored: it is fixed by hitting the steering mechanism body with a blunt chisel.
Repair
You can restore the functionality of the element if diagnostics reveals one of the following problems:
- the needle bearing located at the junction of the rack and the steering shaft has worn out;
- The contact between the bushing and the gear has weakened.
In this case, the problem is eliminated by replacing the damaged part or additionally tightening the connections. You can find out that these factors were the cause of the malfunction if you manually turn the bearing or try to swing the steering shaft.
Complete replacement of the mechanism
The parts included in it, with the exception of standardized fasteners and bearings, are not commercially available. Manufacturers offer to purchase the product assembled. It consists of components that a car owner may need during repairs. There are the following types of repair kits used for this type of breakdown:
- Full set. They include the steering shaft and rack assembly necessary to restore the functionality of the mechanism: bushings, seals, and hardware.
- Minimum set. It consists of nuts, bearings, sometimes racks, as well as washers and other small parts.
Steering rack repair kits come in a wide variety of configurations and, therefore, price categories.
Advice: If your budget allows, it is advisable to give preference to the option of completely replacing the unit. Imperfect roads on which a car travels contribute to rapid wear of the parts that make up the mechanism.
By selectively reinstalling individual components, the motorist runs the risk of making similar repairs again in the near future, since faults in components installed in the body are often difficult to identify.
Required Tools
To diagnose the malfunction, as well as subsequent repairs, you will need the following set of tools:
- a set of wrenches, including an 8-sided 17-sided one;
- pliers for installing retaining rings;
- bearing puller;
- chisel, hammer, vice;
- jack.
It is preferable to perform the operation over an inspection hole or overpass.
How to remove an old steering rack
Before you begin dismantling the unit, you must remove the front wheels. Without performing this procedure, you will not be able to remove the steering rack. Then you should go into the interior and unscrew the universal joint fasteners under the car pedals.
To dismantle the rack, a car enthusiast in the engine compartment must perform a number of actions in the following sequence:
- Unscrew the nut connection in the area of the “fingers”. Press the hardware out of the fastening.
- Take a 13mm wrench and remove the nuts at the attachment points of the mechanism. The operation is performed with the simultaneous removal of fixing staples.
- Disconnect the mechanism drive gear from the shaft.
The rack moves forward until the splined gear disengages - Remove the steering rack assembly through the wheel niche in the area of the right wing.
Do-it-yourself repair or replacement of the mechanism
Further work after removal can be carried out on a mechanic’s workbench or other place convenient for the driver:
- Remove all fasteners, locking and connecting plates located on the housing.
- Move the steering rod to the side.
- Disconnect the rubber support, remove the protective casing, and pull out the rail itself.
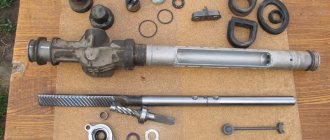
- If you intend to try to restore the product without a major replacement, you should clean the components of the dismantled element from dust and dirt. It is also necessary to completely disassemble it, for which it is necessary to remove the anthers, remove the lock nut, pressure cup, shaft with bearings and replace or restore damaged parts. After this, it is necessary to reassemble in reverse order.
- If you purchase a steering rack assembly, after dismantling the failed unit, you can install it on the car. To do this, the structure should be fed through the wheel niche into the engine compartment and installed. Finally, the gaps need to be adjusted. The size between the fastening nut and the stop must not exceed 0.12 mm. You can check it using the appropriate template.
What kind of steering rack is on the VAZ 2110 - interchangeability of parts
To restore the functionality of the steering rack, as a rule, it is repaired, but sometimes it is necessary to replace the rack assembly. Do you know what steering racks were used on the VAZ of the tenth family, and what racks can be installed instead of the old one?
On the “ten”, the manufacturer installed steering racks of the old model (from VAZ 2108) and the new model with the index 2110. All the racks indicated in the table below are interchangeable, so that there are no installation difficulties, it is recommended to buy the rack together with the rods. Steering racks with power steering are replaced only with similar ones.
By the way, it is not necessary to change the steering mechanism assembly, you can try it
How to recognize steering rack faults
Any mechanism does not last forever, including this part. Most often, a malfunction of the steering rack is indicated by a knock that can be heard when turning. But there are other signs. To accurately determine the cause of the knocking noise, which lies in the steering rack, you must:
- take the steering shaft with your hand where it connects to the rack and move it up and down (if there is a knock, then the steering rack needle bearing in the steering rack needs to be replaced or simply lubricated);
- hold the joint of the steering rods with your hand and check the play of the bushing, as well as the steering gear.
Often the cause of knocking is poor adjustment of the fasteners and then nothing, everything works without dismantling. But if knocking is still observed in the rack itself, then you need to do the following:
- purchase a new steering rack;
- restore it to a service station;
- carry out independent repairs.
Attention: All three options have their advantages, but the most profitable from an economic point of view is, of course, the third method. It will allow you not to spend money on expensive parts and auto mechanic services. But this method will require certain initial knowledge about the mechanisms of the car, dexterity and patience.
How to replace the steering rack of a VAZ 2110 step by step instructions + photo report
In order to independently replace the steering rack of a VAZ 2110, you must perform the following procedure:
- Before you start work, unscrew the wheels so that they are directed towards the front, then hang the front part and remove both front wheels from the car, but before that, carefully secure your car so that it does not fall to the ground, and for this You will need to put it on the handbrake, put wheel chocks under the rear wheels just in case, and most importantly, the area on which you are going to do the work must be flat and must be asphalt, in case the car does fall, place the wheels under it in advance (So that it fell on them).
- Let's go to the salon, while there, you will have to use two keys (one bolt must be kept from turning) to unscrew the nut of the bolt, which compresses the clamp clamp, with the help of which the propeller shaft is held on the splines of the steering rack, after the nut is unscrewed and the bolt removed (see small photo), insert a powerful screwdriver into the slot (where the bolt was located, indicated by a blue arrow) and with its help, unclench the clamp so that the driveshaft can easily come off the steering rack splines.
- Now, on both sides, pull out the steering tips from the holes into which they go, we will briefly explain how to pull out the tip using the example of the right side, in general, take pliers and use them to pull out the key (This is a kind of metal wire), as soon as it is pulled out, unscrew the nut and using a puller, press the tip out of the hole and that’s it, if you need pictures and you have no idea what a steering tip is, then in this case read the article: “Replacing steering tips”, it says everything in detail.
- When both steering tips are removed from the holes, start turning out the bolts that secure the rods themselves (the steering rods are located on these rods), they are directly screwed to the steering rack in the central part (To remove the bolts, pry up the locking plate with a screwdriver, it does not allow the bolts spontaneously unscrew) by unscrewing one bolt at a time, completely remove the rods from the car (you need to pull them out through the wheel arches) and as you already noticed in the small photo, when removing the rod, the person still holds the connecting plate, do not lose this plate, when turning out the last bolt, this Always hold the plate with your other hand.
- And finally, unscrew two nuts on each side that secure the steering rack to the dashboard, remove the metal clamps and through the arch, remove the rack completely from the car, you can get acquainted with all this in more detail by looking at the photos below:
Before buying a rack, you should know something, firstly, before you buy a new rack, look at the markings on the old one and buy according to it, racks are generally interchangeable, but to avoid problems, buy everything according to the index and by the way, if If you have power steering installed, then take the new rack from the power steering!
Replacing the steering rack of a VAZ 2110: yourself or in the service?
Car steering mechanisms are divided into two types: worm and rack and pinion. With different approaches to implementation, they have the same task: to provide a connection between the rotation of the steering wheel and the rotation of the wheels. Worm mechanisms are easier to manufacture, but do not provide sufficient steering accuracy, which is important at high speed.
Therefore, most modern passenger cars are equipped with a steering rack. This unit is more complex to manufacture and repair, but the relationship between the angles of rotation of the steering wheel and the front wheels of the car is more precise. To facilitate steering rotation, a hydraulic or electric power steering is installed to assist the driver.
This makes driving less tiring, but adds hassle when repairing or replacing the steering rack, including on a VAZ 2110.
Design and arrangement of the rack on the VAZ 2110
The operating principle of the steering rack is as follows. A gear is installed at the end of the steering shaft. It meshes with a rack (hence the name). When you turn the steering wheel, the gear moves the rack left and right, turning the wheels. To do this, the steering arms are connected to the rack by steering rods.
This is what the dismantled mechanism looks like
Rack designers need to strike a compromise between lightness and steering feel. It all depends on the rack-and-pinion ratio.
- If the steering wheel is made light, the control will become blurry, and you will have to make too many turns of the steering wheel to turn. This is unsafe when driving on the highway, where quick reaction is important.
- Sharp steering is more predictable and safer, but also requires the driver to exert considerable effort when maneuvering, especially in parking lots.
- A variable ratio rack partially solves this problem. In the near-zero zone, the steering is sharp, which gives confidence on the highway. It is easier to steer closer to the edges, but you also have to turn the steering wheel more. This is convenient, for example, in a parking lot at low speeds.
To maintain a balance between sharpness and ease of control, amplifiers are installed on the steering mechanism. According to the principle of operation, they are hydraulic (GUR) and electric (EUR).
Three types of steering racks are installed on the VAZ 2110: without power steering (with variable gear ratio), with power steering and electric power steering, and you can install the power steering yourself.
Symptoms of a problem
Without proper care, such as lubricating bearings and checking play, the steering rack can quickly fail. Signs of malfunction that indicate that the mechanism should already be changed:
- A noticeable knock when driving over bumps, which is transmitted to the steering wheel. If a knocking noise is heard when turning the steering wheel, it is unsafe to drive such a car; it is necessary to urgently diagnose the mechanism.
- Strong play in the steering wheel indicates loose fasteners or wear of the rack-and-pinion joint.
- The effort when turning the wheels has increased.
- You can hear noise from the hydraulic booster (if equipped).
- The cause of the knocking noise may be an insufficiently lubricated bearing or wear of the gear-rack pair. If, when rocking the steering shaft, there is noticeable play at the junction with the rack, repair is necessary. If not, just check and tighten the joints between the bushing and the steering shaft gear.
A powerful vice is used to fasten the rail
Video: How to tighten a loose mechanism
Dismantling, diagnostics and installation of the steering rack
Regardless of whether the rack is being repaired or replaced, it must be properly removed and reinstalled.
Replacing the steering wheel on a “classic” is not at all difficult if you have the proper desire. Information on dismantling can be obtained from this material: https://vazweb.ru/desyatka/upravlenie/kak-pomenyat-rul-na-klassicheskih-modelyah-vaz-2101-2107.html
List of DIY tools
For dismantling and repair you will need the following tools:
- flat screwdrivers of different sizes;
- pry bar or mounting blade;
- small hammer;
- pliers;
- torque wrench;
- a set of socket and ring wrenches ranging in size from 10 to 27;
- open-end wrenches for 10, 13, 15;
- special key for adjusting the steering rack. Such a key can be purchased at a car dealership or made independently.
Example of a wrench for tightening a steering rack
How to remove a part from a car for inspection
You need to know the location of the parts in the rack in order to carry out diagnostics carefully and scrupulously
Removal sequence for the rack:
- We unscrew the fastening of the steering cardan to the steering rack shaft in the cabin.
Remove all mounting bolts
- Unscrew the fastener and remove the steering gear boot.
- We lift the front part of the car and install it on supports.
- Remove the front wheels and left fender liner.
- The steering rack can be removed with or without rods.
- To remove the rack without rods, you need to unscrew the locking plate and the bolts securing the rods to the rack. Then we move the rods to the side.
- If the mechanism is dismantled with rods, they are first disconnected from the swing arms.
- When pressing out ball pins, a puller is used.
- When unscrewing the steering end from the rod, it is necessary to fix the number of turns of the adjusting bolt. This will make it easier to set the wheel alignment during reassembly.
- Using a pry bar, we move the entire mechanism forward until the steering rack shaft completely exits the hole in the engine shield.
- The entire mechanism is removed through the wheel arch.
Removing the dismantled part
The need to replace the steering rack: diagnostics
To restore the performance of the steering rack, it is not always necessary to replace it; often the problem can be solved by carrying out maintenance with the replacement of tips, covers and bushings. Beginners should not service the steering wheel on their own.
The design of this mechanism has many springs and pressing washers, and not everyone can disassemble the mechanism, sort through the parts and correctly replace them with new ones. Unprofessional installation of these parts will lead to incorrect functioning of the mechanism. The same applies if you need to loosen the mechanism or tighten it.
It is also necessary to remember that repair work may well be more expensive than replacement, so the choice is sometimes obvious.
Steering rack repair kits of different compositions are produced for VAZ 2110 vehicles. They also differ in the year of manufacture and the presence of an amplifier.
Experienced car owners restore the slats themselves, but this is not always possible
The steering wheels of VAZ 2113-2115 cars do not have an outstanding design, so many car enthusiasts prefer to replace them. To carry out an independent replacement procedure, it is recommended that you read this article: https://vazweb.ru/desyatka/upravlenie/kak-snyat-i-zamenit-rulevoe-koleso-na-vaz-2114-i-2115-svoimi-rukami.html
It is necessary to change the part in the following cases:
- a crack in the rack body or the threads for fastening the tips are broken;
- very strong knocking in the rack, increased play in the steering mechanism;
- corrosion of the internal parts of the steering rack caused by rupture of the rubber boot;
- the rack was deformed after the accident.
In the above cases, restoring the removed part does not make sense. Restoration by professional craftsmen will cost a lot of money.
Therefore, it would be more expedient to change the entire rail, which will require less time and financial costs.
It will be much easier to purchase a new one in the store and install it assembled in place of the old one, ensuring excellent operation of the steering mechanism for several years to come.
In order to do a wheel alignment in a VAZ 2110 car, it is not at all necessary to contact a car service center. Details of the procedure: https://vazweb.ru/desyatka/hodovaya/razval-shozhdenie-vaz-2110.html
Installing a new
After diagnosing and repairing the rack, we install it in place:
- We set the rack to the middle position. To do this, unscrew the shaft in any direction until it stops and return it 2.5 turns. The shaft flat should be on the right and located vertically.
- Carefully insert the mechanism through the arch and secure it in the reverse order of dismantling. Tighten the bolts with a torque wrench.
If the steering system malfunctions, you should not immediately call a service station or buy the entire unit. If you have basic plumbing skills, you can repair and adjust the steering rack in your own garage. At the same time, you will be sure that you did not spend extra money and the work was done to a high standard.
- Eugene
Source: https://vazweb.ru/desyatka/upravlenie/zamena-rulevoy-reyki-vaz-2110-samomu-ili-v-servise.html
