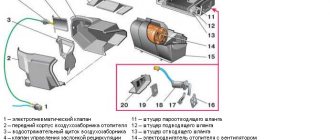
DIY heater replacement
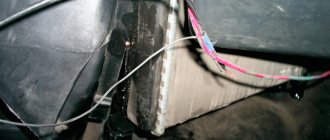
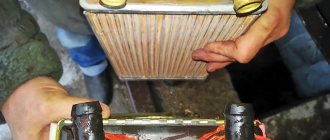
So, your heater radiator is leaking, to make sure of this and not engage in “monkey work”, touch the radiator pipes on the front passenger side, if they are dry, then look for a puddle under the driver’s carpet. If the puddle is from antifreeze, it will taste greasy and sweet. So, if all the signs match, then most likely the radiator is leaking.
We go to the store and buy a radiator. I bought a regular aluminum one for 500 rubles and some clamps just in case. You will also need 10 liters of antifreeze. Also stock up on boxes for self-tapping screws, because there will really be a lot of them!
Drain the antifreeze. To get as much as possible, blow into the expansion tank.
I’ll say right away that you need to remove the dashboard if you don’t want to end up at a gas station, although judging by my guesses, even in that case you’ll have to remove the dashboard.
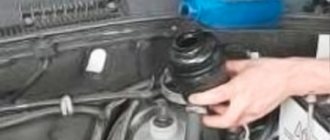
First of all, we remove the glove compartment, it is easy to remove, there should be no problems.
Unscrew the center console along with the radio. There is nothing complicated here either.
Next, unscrew the decorative panel of the center console, which is on the side. We loosen the lining of the checkpoint tunnel. To do this, it is enough to unscrew one (seemingly) extreme screw. On the driver's side closer to the pedals, the passenger moans similarly.
Next, we begin to disassemble the decorative cladding
dashboard, simultaneously throwing off the dashboard and the steering column housing with switches. We take out the air duct, which is located behind the dashboard. Here you will have to suffer with the cables. Why can't you remove the entire dashboard? - you ask. This bolt won't give you anything.
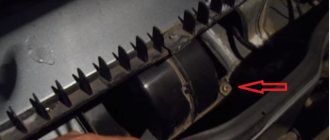
This is the bolt. And how did the designers even manage to make it twist on the evaporator side? So we have this thing. Dashboard frame with steering column.
Unscrew the steering column universal joint. And we begin to unscrew the dashboard frame, having first removed all the wiring from it. We carefully pull it all out of the car and voila. You've almost reached the radiator.
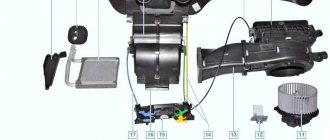
Next, unscrew the radiator housing from the evaporator and the gearbox tunnel. Here you will come across a screw, which is located between the evaporator casing and the radiator casing. This is really an ambush! Unscrews with a tambourine and obscenities.
When assembling, you don't have to tighten it, because... it is even more difficult to screw it on, and it holds practically nothing. We take out the central air duct and the air duct that conducts air to the driver’s feet. That seems to be it. Unscrew 2 screws on the radiator. We take it out and install a new one. And we begin to assemble in reverse order.
If during assembly you have a couple of extra screws left, then you have assembled everything correctly!
Thank you for your attention! If you have any questions or maybe I forgot to add something, please contact me, I’ll be happy to help. The most important thing is not to be afraid of the amount of work and take care of yourself!
Fan relay
As a rule, we don't pay much attention to the heating or air conditioning of a Chevrolet Niva until they stop working. These systems keep you warm in winter and cool in summer. The ability to control heating and air conditioning is a guarantee of comfortable travel regardless of the time of year.
Despite the fact that at first glance these systems only affect the comfort of the driver and passengers during the trip, it turns out that they are closely connected with the defrosting system and remove steam from it. If the system malfunctions, driving the Niva in conditions of limited visibility will significantly increase the danger of movement.
The refrigeration system uses a compressor, condenser, evaporator and expansion valve. The refrigerant is compressed using a compressor, causing it to change from a liquid to a gaseous state, raising the temperature at the same time. The heated gas is cooled to a liquid state and passes to the expansion valve.
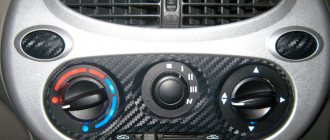
As the liquid passes through the expansion valve, it turns back into a gaseous state where it is cooled by the evaporator. The blower then blows the cooled air directly into the vehicle's interior through the vents. The Niva's air conditioning is also controlled using the control panel.
- System diagnostics from 500 rub.
- Pumping out old freon from 1,100 rubles.
- Radiator flushing from RUB 1,100.
- Leak detection from RUB 560.
- Disinfection and cleaning from RUB 1,100.
- Refrigerant injection from RUB 1,100.
Front bumper (removal/installation) — RUB 1,500 Front bumper (repair) — RUB 2,000 Front bumper (painting) — RUB 6,500 Front right fender (repair) — RUB 2,500 Front right fender (painting) — RUB 6,500. Right windshield pillar (painted) — RUB 3,500. Car wash — RUB 500.
The price is indicated on a turnkey basis (work and materials).
Front bumper (replacement) - 1,500 rubles. Front bumper (painting) - 6,500 rubles. Front right fender (replacement) - 1,000 rubles. Front right fender (painting) - 6,000 rubles. Right wing mounting bracket (repair) - RUB 2,000 Right wing mounting bracket (painting) — RUB 1,250 Front panel (repair) — RUB 2,000 Front panel (painting) — RUB 1,250 Front fog lights (installation) — RUB 1,500 Car wash m — 500 rub.
The designers of the Chevrolet Niva used a dual fan unit in the cooling system. This slightly complicated the connection diagram, but sharply increased the efficiency of radiator airflow. The fans are driven by 12-volt DC synchronous motors with a permanent magnet inductor. Electric motors have a closed, non-demountable design and do not require maintenance.
The power of each electric motor is 110 W. The fan assembly draws 18 amps.
And also interesting: ✅ Niva 2121 tire pressure -
The fans are turned on one by one using an electromagnetic relay controlled by the on-board computer. When the coolant heats up above 99 degrees, the electric fan located closer to the engine air intake starts. The switch-on temperature of the second impeller is 101 degrees. The fan connection diagram is shown below.
The fan power system includes three relays and a resistor, which, if necessary, provides a reduced rotation speed of the first motor. Power is supplied from the battery through fuses that save the wiring and battery in the event of a short circuit. Control signals come from pins 29 and 68 of the motor controller.
Consecutive switching on and off of engines reduces the load on the on-board electrical network. In most cases, it is possible to normalize the temperature only with the help of the first fan. This is especially useful when driving at night, when headlights and side lights put a lot of stress on the generator.
The ability to force fans on can be useful when driving off-road or in city traffic jams. However, the designers of the Chevrolet Niva did not provide the car with this function. It can be implemented independently or at a service station. It is necessary to connect backup relays parallel to the switching contacts and power them from a button installed in the car interior.
It is useful to equip the Chevrolet Niva with a switch that forcibly turns off the fan motors. This will protect their blades when fording water obstacles.
Problems with the electric motor. If the electric motor fails, its rotor will not spin, and accordingly, the impeller will not rotate. You can check the performance of the electric motor by connecting it directly to the battery. To do this, you will need to take two wires, connect them to two battery terminals and two electric motor terminals.
If the fan does not spin when connected directly to the battery, we can conclude that the electric motor needs to be replaced; Problems with the sensor. If the sensor is unable to detect the coolant temperature and transmit a signal to turn on the electric motor, it will need to be replaced. To make sure that it is not working, you need to disconnect two wires from it and short them together.
If the electric motor starts to spin the impeller, this will indicate that the sensor is faulty and needs to be replaced; There is no tension. The third and most common reason for a non-working radiator cooling fan is the lack of voltage in its power supply circuit. If there is a break in the wires or a fuse fails, the circuit will be de-energized.
RADIATOR COOLING FAN IS NOT WORKING: HOW TO USE THE CAR
Try turning on forced operation of the fan from the battery; If the fan is not forced, you should drive at a constant speed of about 60 kilometers per hour or higher so that the oncoming air flow cools the fluid on the radiator without the help of a fan. It is also recommended to turn on the heating system in the car interior so that some of the heat from the coolant escapes into the cabin.
Technical parameters of Chevrolet Niva (2123) 1.7 / Chevrolet Niva (2123) in a 5-door body. SUV with an 80 hp engine, 5 manual transmission, produced from 2002 to 2009.
How to change the heater fan on a Chevrolet Niva video
How not to freeze in a car?! Replacing a fan in a Niva Chevrolet!
Chevrolet Niva. Replacing the stove heater
Niva Chevrolet changing the heater motor
how to change the heater motor on a Chevrolet Niva
Niva Chevrolet whistles heater air filter
Chevrolet Niva heater damper repair
Replacing the heater motor fuse and heater switch Chevrolet - Niva
How to remove a Chevrolet Cobalt heater fan
Niva stove fan replacement
Chevy Niva = replacing the fan motor with a PET bottle
- How to turn off the buzzer when opening the driver's door on a Lexus
- Production of Volkswagen Passat in Germany
- Which shock absorbers are better for BMW E36
- Hyundai Santa Fe 2020 2016 technical specifications
- Choice of BMW x5 diesel or gasoline
- Crackling noise in a Chevrolet Aveo gearbox
- Mitsubishi L200 2008 suspension repair
- Technical characteristics of Volvo ec 290
- Subaru Forester III test drive
- Fuel consumption Lexus gx470 2008
- Kia bongo where is the body number
- Where is the Chevrolet Cruze sedan made?
- Reviews for Mazda 6 2005 2007
- Mercedes 202 with 200 suspension
- Replacing front struts on Toyota Corolla e150
Home » Choice » How to change the heater fan on a Chevrolet Niva video
