Introduction
VAZ-2106 is one of the most common domestically produced cars. Created on the basis of the luxury VAZ-2103 model almost 50 years ago, version 2106 differs from its prototype in the absence of chrome-plated items, which abound in the VAZ-2103. The later VAZ model received new bumpers and redesigned rear optics. However, despite such important, at first glance, improvements, the car is far from ideal, which is why competent tuning of VAZ-2106 headlights can modernize and improve the car, give it a more beautiful exterior and at the same time improve the lighting emanating from the factory headlights.
How to remove the front bumper
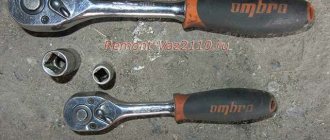
Removing the front bumper on a VAZ 2106 is done using simple tools:
- flat screwdriver;
- wrenches 10 and 13.
The procedure itself takes 10–15 minutes and does not require any preparation:
- Use a screwdriver to pry off the plastic trim on the bumper.
- Remove the trim.
- Using a wrench, first unscrew the bolts from one bracket (behind the bumper), then from the other.
- Carefully remove the bumper from the bracket.
The bumper is mounted on brackets and bolted connections
Video: algorithm
Accordingly, the new bumper is installed on the car in the reverse order.
All kinds of modernization of VAZ-2106 optics
Despite the fact that a domestic car cannot even come close to comparing with respectable new foreign cars from abroad, some motorists still purchase a VAZ-2106, even before purchasing, thinking about various ways of tuning this model. Service center specialists note the striking similarity of the lighting devices of Russian cars with the classic sedans of the West German company BMW. If we talk in detail about tuning the rear lights of the VAZ-2106, then, as a rule, it consists of simply replacing the standard bulbs from the manufacturer with more attractive LED boards. These devices can be purchased ready-made at almost any auto store, however, if you have a soldering iron and basic knowledge of physics, you can assemble a simple design with your own hands in just a couple of hours. With huge savings, the motorist will receive attractive rear view lights.
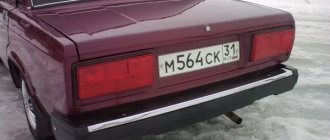
Tuning the headlights of a VAZ-2106 with your own hands is not so difficult; you should take into account the rear optics package, consisting of 4 bulbs (if you look from the side to the license plate). The first turn signal bulb is located closest to the side of the car and is hidden under orange glass. The second one is for reverse, located in the central part of the structure under white glass. The third is side lighting, it can be identified by its location under the above-described lighting element, behind the red glass. The last lighting detail of the rear optics is the brake lights, which are located next to the license plate under the red glass.
A motorist who wants tuned headlights on a VAZ-2106 must remember that the lighting devices go to a network that is protected by safety elements F1, F7, F8, F9 and F16. Replacing standard lighting with LED strips will give the motorist not only an attractive appearance of the vehicle, such a modernization will improve the headlights and make the car more visible at night and in fog.
It is advisable to tuning the rear lights of the VAZ-2106 using ready-made lighting elements that can be purchased at a car dealership or car market. It is worth noting that recently products from Russian manufacturers have become increasingly popular. After the purchase, the motorist will only have to dismantle the previous factory optics and replace them with tuned parts.
The principle of replacing rear lighting elements with tuned LED products:
- the negative terminal is removed from the battery, if necessary, the previously described safety parts are removed;
- the luggage compartment opens, from which you should remove all unnecessary things (things that may interfere with the implementation of your plans);
- using a screwdriver you need to get rid of the screws, and also remove the trunk upholstery for a while;
- the light bulb socket is removed, with the help of which the vehicle’s license plate is illuminated at night;
- Unscrew all the screws that secure the lamp body, after which it is dismantled. It is fundamentally important to disconnect all the wiring and unscrew the four nuts that secure the flashlight.
Tuned headlights on the VAZ-2106 should be positioned in the reverse of the process described above. When improving a domestically produced vehicle, you must remember the need to hook up the wires going to the inner pin of the lamp located on the left side, as well as the outer pin of the right optics.
See you in ten years
Side view Pavel Kim Personal car Renault Duster. A fan of cars for an active lifestyle.
In order for a car to become a historical value, a combination of factors is necessary, such as the impressive age of the car, the smallest possible circulation of the model and the excellent condition of a particular instance. The green VAZ-2106 satisfies only one of these requirements - the car, produced in 1982, has just been restored and is in perfect condition. But the fact is that from 1975 to 2005 more than four million “sixes” were produced, many of which are still running on the roads, like a bucket of tar in a barrel of honey.
But there is one thing that makes me look at this car as a collector's item. The owner of the car was the legendary climber Valery Khrishchaty, and it still belongs to his family. The car was purchased in 1982, when Khrishchaty received the right to buy a car without waiting in line for climbing Everest at night. Compare with those Kruzaks and apartments that are given to Olympic medalists today, but the first ascent of the western face of Everest is better than other Olympic gold. To understand: Khrishchaty in mountaineering is like Gilles Villeneuve in motorsport. An incredibly strong athlete who stood up for the purity of the sport and left us at the peak of his career.
This fact makes the regular “six” something special for me: this is no longer the car that bombers use to taxi or workers carry construction materials with. All the difficulties, problems and shortcomings seem, if not features of the machine, then at least something that creates intrigue.
And yet the car fits surprisingly easily into traffic today. If you don’t yawn and change gears in time, the engine makes it easy to stay in the left lane; braking behavior is annoying, but the dynamics are quite acceptable, and the suspension performance will give a head start to many modern cars. In addition, many drivers realize that in front of them is an enthusiast driving a lovingly restored rarity, and they kindly let them pass. I left for the city in the evening, when the heat had subsided and the traffic was quite moderate, but an hour behind the wheel here is worth two in any modern car. True, surrounded by the same “sixes”, only younger and in worse condition, the feeling of touching automotive history disappears...
In 10–15 years, this car will shine, and when it reaches fifty dollars, it may well become, if not a collector’s rarity, then quite a museum piece. When the VAZ classics roaming the roads finally fall apart, we will look at these cars with trepidation. Guys, keep the VAZ-2106 in the garage, roll it out regularly and don’t forget to send the address if you move. I hope that in 10 years I will come to visit, find you and show the children what their parents were driven in when they were children.
Handmade production of LED lights
Due to insufficient funds or the impossibility of finding the best option for tuned headlights, the motorist decides to make LED optics with his own hands. In fact, making your car truly unique is not that difficult. To build LED boards you need to purchase:
- LEDs designed for 3–5 V, the diameter of which is 10 mm;
- 500 mlA resistors (1 resistor provides 4 diodes);
- plastic or textolite blanks (the base must be created exclusively from dielectric materials). It is preferable to paint the structural element black.
In order for a tuned car to have an attractive appearance, it is extremely important to correctly assemble the LED boards. To do this, it is necessary to cut elements of the required size and shape from pre-prepared blanks. The second step is to create small holes using a drill, in which the purchased LEDs will later be located.
It is best to install LEDs using superglue, placing the contacts of the lighting fixtures in the holes made and placing the “pluses” and “cons” on different sides. When creating unique headlights, you need to use a soldering iron to connect together the positive contacts of each three elements, connecting in addition to them one resistor. The same rule applies to negative contacts of lighting fixtures.
After the previously described manipulation is completed, it is necessary to solder an additional wire to the ends of all resistors present on the segment. Using the same principle, you should connect the “cons” of the LED contacts with a separate wire.
At the final stage of assembling a new lighting fixture, the light bulb should be broken, in the place of which the diode base will subsequently be located. Using a soldering iron, attach the wire coming from the resistors to the positive side of the base contact, and to the negative side - the wire with which the negative contacts are connected. At this point, the work on creating original LED boards can be completed; the car owner will only need to check their performance.
How to properly lower a VAZ 2101, 2106, 2107
I welcome you, dear readers, to the website about tuning and repairing VAZ cars, or, more simply put, . In this article we will talk about such a common tuning as lowering a car with your own hands , and most importantly, how to do it correctly with less harm to your car. Let's first look at what methods exist to lower your car .
- 1. The simplest is sawing the springs.
- 2. Special suspension with lowering.
- 3. Air suspension.
Of all these methods, we will consider the first and partially the second method since they are the simplest, fastest and cheapest, although not entirely correct, since after this the suspension will lose its, therefore, not the best properties. So, for the first method (regular sawing of springs) you will need a minimum of tools, namely a wrench for unscrewing wheels, springs (sold in many car stores and auto markets) and a grinder.
With their help you will have to make understatements . I think there is no need to explain to you how to work with all this tool, since there is nothing complicated here, you just need to remove the springs from the car and cut them straight, try so that after sawing the springs, the front and back of the car are as smooth as possible same height. Why is this method the worst available? With such a lowering , your suspension will not work quite correctly, since you still have old shock absorbers that are longer than your sawn springs, and if you get into a nice hole, the length of the spring is not enough to properly handle the unevenness; in other words, when lowering you need to do this so that the length of the spring and shock absorber is as equal as possible. This is where the second method comes to our aid, but partly because we only need lowered shock absorbers, and not the entire set, which also includes lowered springs. As a result, we get a third option that combines the first and second and will be correct, albeit more expensive than the first option. In this case, let’s say we take -70 shock absorbers and cut our old springs along their length and even get a very good lowered suspension that will cope well with uneven asphalt and, most importantly, please your eyes, as well as the eyes of passers-by. I also recommend that you do this after lowering , so that you can adjust the rear axle in the center, since when lowering, the axle goes to the side, good luck. If you have any questions, ask us in the comments, and also join our VKontakte group.
VAZ-2106 photo
Read more:
Hennessey Venom F5
The German company VW is preparing in full for the presentation of its own new SUV, the Volkswagen Tacqua.
Chevrolet Lacetti
Bugatti Centodieci
BMW 7 suddenly became an emka


