We replace the wheel bearing of a VAZ 2110 with our own hands
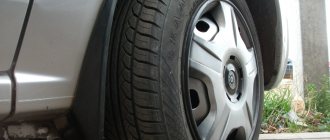
If, when the car is moving, an unpleasant noise is heard in the area of the wheel, which may disappear when entering a sharp turn, then this indicates a malfunction of the VAZ 2110 wheel bearing.
This is a fairly common malfunction; it occurs on every fourth car with high mileage. It’s not difficult to correct the situation; you just need to have a garage with a pit and detailed instructions for work.
Experienced technicians recommend not delaying the replacement of this component in order to avoid unnecessary troubles.
Tools and spare parts
The fact is that the VAZ 2110 wheel bearing is a small part, and in order to work with it, you need sufficient lighting and some convenience. Therefore, a car prepared for repair should be driven into an inspection hole and sufficient light access should be created to the repair unit.
Before going down into the pit, you need to prepare all the tools and materials. It should also be noted that replacing the front wheel bearings is much more difficult than doing the same work on the rear components.
Therefore, you need to start work from the front node.
Front wheel hub diagram
A list of required tools should be provided:
- A special puller to remove the bearing;
- The so-called mandrel, that is, a pipe cut of the required size. This device is used to knock out hubs;
- Head 30, equipped with a high-quality wrench;
- Socket wrenches 19 and 17 sizes.
In addition, you need to purchase new suitable bearings that will be needed for replacement. For a VAZ 2110 car, you should choose Russian-made bearing parts rather than giving preference to Chinese analogues. The difference in price for these products is small, so there is no need to experiment.
Stages of work
Work begins with the car being placed in a comfortable position and in first gear. To prevent it from rolling, it is better to install special wheel chocks under the wheels.
Now you can go down into the inspection hole and begin actions that are carried out in the following order:
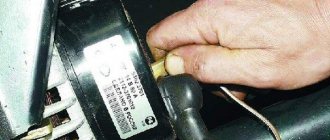
- Using a wrench, unscrew the wheel bolts, followed by unscrewing the bearing nuts from the front wheel hubs with a 30mm wrench. It is worth noting here that if a VAZ 2110 car has alloy wheels, you will have to remove the wheels. In order to turn the front hub nuts, you must press the brake pedal at the moment of turning, so an assistant is needed here;
- Now you need to use a screwdriver and use it to press out the calipers;
- As soon as they are pressed out, you need to use the 17th key to unscrew the calipers from the steering knuckles. As a result of these manipulations, the caliper may hang on the brake hose; to prevent this from happening, you must carefully tie it up;
- Next, you need to carefully unscrew the brake discs directly from the hubs.
In addition to the listed types of work, you may also need to remove:
- Trunnion assembly;
- Hub cap;
- Retaining ring.
After this, the hub part is available to the master and can be replaced. There are several options for reinstalling a component, so a few words should be said about each.
Step-by-step method for replacing the rear wheel bearing on a VAZ 2109, 2110
- stop the car from the front;
- tear off the wheel bolts;
- tear off the central nut (7) of the hub, having first removed the cap (9);
- jack up the side and set the trestles;
- remove the wheel;
- fill the brake drum mounting area with WD-40 or other special liquids (you can use diesel fuel or brake fluid);
- unscrew the guide bolts (it is advisable to tap lightly with a hammer);
- we try to carefully remove the brake drum (if it doesn’t work, we screw the appropriate bolts into a special thread on the brake drum, apply tension and very lightly try to knock it out with a hammer. In most cases, the result will be positive. There are special drum pullers on sale, just in case , if all else fails);
- unscrew the central nut completely (of course, it is possible to unscrew it immediately, and even remove the hub along with the wheel and drum, but then there is a high probability of damage to the brake pads);
- we tighten the hub (if one of the inner races of the bearing remains on the axle, you need to use a puller or just a sharpened chisel to try to move it from its place);
- inspect the axle for signs of bearing rotation (if there are any, we replace it, it is advisable to replace the hub assembly);
- inspect the brake cylinder for leaks and pads for wear;
- remove the retaining ring from the hub using pliers and/or screwdrivers.
- Be sure to clean the edge from rust, moisten it with WD-40 or whatever you have on hand.
There are three options for pressing out the bearing:
- A special press (not everyone has one).
- A puller (not expensive, can be purchased, will be useful for the future).
- Using a heavy hammer (at least 2 kg) or a sledgehammer. AT first glance, the method may seem a little aggressive, but it is practiced by an overwhelming number of masters and service stations, and we will consider it.
- The hub must be firmly installed on a hard surface, and with several sharp blows through the mandrel, the bearing must be moved from its place. When this happens, you need to install the hub, for example, on a yew tree (so that there is a stop for the hub and free space for the bearing to exit)
- a few more blows and the bearing will come out (don’t rush to throw it away);
- We inspect the seating plane under the bearing, clean off the rust with sandpaper, lubricate it with regular engine oil (you can polish it off);
- the new bearing must be screwed with any suitable bolt through washers (washers must be selected according to the inner races, the bearing is double-row and during installation there is a high probability of its disassembly);
- install the hub on a hard surface.
– we place a twisted bearing on top, and lightly lubricate its mounting plane with oil (a new good bearing usually does not need to be lubricated inside, but if you have doubts and a little experience in assembling and disassembling, you can use Litol -24 lubricant)
– with an ordinary 500-gram hammer, very lightly, we try to align the bearing in the plane;
– take a suitable mandrel (for example, a pry bar), and try to press the bearing in with gentle blows.
The basic rule is no strong blows, if it doesn’t work, it means it’s crooked
– after the bearing has passed halfway, you can no longer apply much force, since it can no longer warp.
When we reach the cut of the hub, it is necessary to use the old clip as a mandrel (no strong impacts, the metal is high-carbon, and with a strong impact it can burst and cause very serious injury)
– we push it all the way and install the stopper (if there are problems with installing the stopper, then most likely you did not finish it all the way) the stopper should easily spring into the groove;
Replacement methods
First way
- In the first case, it is necessary to use a puller to remove the bearing;
- Simply carefully remove the bearing and replace it with a new one;
- After installation, all the steps above should be carried out in reverse order.
The main advantage of this method is the fact that the technician will not need to touch the camber adjustment bolt, which is very difficult to put in place later.
Bearing puller from the hub
If we talk about the disadvantages, we can note the following: the master will have to take a very uncomfortable position to perform actions. That is why it is necessary to prepare a lift and climb into the inspection hole.
But it is still very inconvenient for a car enthusiast to knock out the hubs in this position and press in the bearing assembly.
Second way
Consists of the following steps:
- To remove the bearing using the second method, you must carefully dismantle the steering knuckle and completely remove the hub;
- After this, the master will need to go to the workbench;
- The VAZ 2110 wheel bearing is replaced directly on the workbench;
- After this, everything is installed back, just as it was removed before.
This method is undoubtedly much easier than the first, but since it affects the camber, problems with adjustment cannot be avoided. Before you begin to unscrew the knuckle mounting bolts from the strut, you need to mark their position with chalk or a marker.
The first mark in this case will indicate the location of the adjusting bolt on the rack. The second mark will indicate the previous position of the fists.
After the master begins assembly, he will focus precisely on these marks. Of course, it will be difficult to achieve great accuracy and it will not be possible to return the parts to their place. But with careful work, installation errors can be minimized.
There are some steps to follow:
- The master puts marks;
- Knocks out the knuckle bolts;
- Unscrews the mounting bolts from the lower ball joint;
- The bearing must be knocked out of the hub;
- The retaining rings are dismantled;
- Using a vice, the bearings are pressed out.
The second method of replacing the bearing
If the second option is chosen, we continue repair work according to the following instructions:
- Labels are set. Using a soft guide, the steering knuckle mounting bolts are unscrewed and knocked out. The two fastening bolts of the lower ball joint to this steering knuckle are unscrewed, which is successfully removed.
- Using a tool of the required diameter, the hub is knocked out from the bearing. The retaining rings are removed. A puller is installed in a vice and the bearings are pressed out.
Note. The bearing mounting areas in the steering knuckles must be cleaned of dirt and lubricated generously.
- The bearings are pressed in and retaining rings are installed. After such actions, the assembled knuckles with new bearings are mounted on the hubs. Using the same mandrel, hammering is done until it stops. The force must be concentrated on the inner races of the bearings.
Note! The bearing must be pressed in using a press, puller or vice. You cannot use a hammer, as this will lead to destruction of the element. When pressing, apply force only to the outer rings.
- Subsequent assembly is carried out in reverse order.
Note! As a rule, the hub contains a double-row ball bearing; it does not require adjustment or lubrication during use. When pressed out, this element is always destroyed, so it is recommended to press out the hub only to replace the bearings.
In one case or another, replacing the front wheel bearings yourself will cost much less than work at a service station. For a better understanding of the process, it is recommended to watch the video. It is also recommended to use visual aids, such as photos, during the work process. When working with your own hands, it is recommended to do everything as required by the instructions in order to avoid mistakes. The price of bearings is not high, so you can easily start replacing them if there is such a need. You can also find out about replacing the rear wheel bearing on our website.
1200 rub. for the photo report
We pay for photo reports on car repairs. Earnings from 10,000 rubles/month.
Write:
Nuances
In the process of reassembling the entire node, you must proceed as follows:
- Press in the bearings;
- Install retaining rings;
- Collect your fists;
- Mount new bearing components on them;
- Mount the assembly on the hub;
- Using a mandrel, you need to drive the hubs until they stop.
You can use a puller or press to press in bearing parts. But in no case should you use a hammer, since in this case cracking of the component will inevitably occur. The forces should be directed to the outer rings.
It should also be noted that double-row ball bearings are installed in the hubs, which do not require lubrication and adjustment measures.
Due to the lack of such care, the VAZ 2110 bearings will certainly be destroyed when removed from the hub, so this measure should only be resorted to for a complete replacement.
Step-by-step instruction
1. Using a flat-head screwdriver, remove the hub nut cap.
2. Loosen the hub nut using a 30mm socket. The nut is tightened with great force, so you can put a pipe on the knob to pull through a larger lever.
3. Loosen the wheel bolts and jack up the car.
4. Completely unscrew the wheel bolts and remove the wheel.
5. Now you need to remove the brake drum. To do this, unscrew the drum studs using a seven-deep socket. Next, screw the drum studs into the other holes only. This should be done evenly, twisting each pin a little. As you twist, you will see the drum move away.
After the studs have been completely screwed in, unscrew them and remove the drum by hand. If it doesn’t work, you can hit it with a mallet from the back side.
If it is difficult for anyone to imagine how to do this, watch the video.
6. After removing the drum, completely unscrew the hub nut and remove the washer.
7. We put on the puller and pull the hub off the shaft. She doesn't sit very well.
8. Remove the bearing retaining ring.
9. Remove the ring on the hub. We clamp the hub in a vice and knock it down with a blunt chisel.
The ring must be removed for subsequent pressing of the bearing.
10. We select the head according to the size of the bearing, put it in the hub, clamp everything in a vice and squeeze the bearing out. He will reach the jaw of the vice and rest against it. We install spacers, for example, as in the photo below and press them out completely.
In general, if you have a service station on hand, then it is better to take the hub to replace the bearing. The guys will do it on the press in 5 minutes.
11. Clean the bearing seat from dirt and rust.
12. Lubricate the bearing seat with oil.
13. Place the bearing in the hub, clamp it in a vice and press it flush with the hub. Make sure that at the beginning the bearing moves without distortion.
Next, we substitute the old bearing as a cage and press it in until it stops.
14. Install the retaining ring.
15. Install the ring. We hit it through the spacer with a hammer so that it sits in its place.
16. We put the hub on the shaft and attach the hub nut.
17. Tighten the hub nut with a torque of 185–225 Nm. If there is no torque wrench, then tighten it with a 1 meter lever with a force 2 times greater than the tightening of the wheel bolts.
Make sure that the car does not fall off the jack; it is better to place a stop.
18. After tightening the nut, tighten it so that it does not unscrew.
19. Next we do the assembly in reverse order:
- install the drum
- install the wheel
- cap the nut
The work takes about an hour.
Working with the puller
If you still don’t want to damage the bearing, then you can replace it without knocking it out of the hub. In order to remove it from there, you can use a special puller. Removal is much easier with this device.
To do this, you need to carefully insert the puller's paws into the grooves on the hub and remove the ring. Sometimes this requires some effort; the ring must be pryed with a screwdriver and removed. Using the device, the part is removed and the nicks on the component are smoothed out.
Then, using a puller, you can also press the new part into the steering knuckle. This tool allows you to press the hub with high quality. Working with a tool of this type greatly simplifies the entire process, and the technician will need less time for all removal and installation. But operating the unit requires some skill and great care.
As you can see from this article, even such a simple repair job as replacing a wheel bearing can have many nuances.
VAZ 2110: replacing the front hub with a proven method
Front wheel hub
A malfunction of the vehicle's chassis is always dangerous. A professional motorist knows that it is impossible to drive such a car, and all measures should be taken to eliminate malfunctions. This also applies to the front hub of the car, which plays a very important role in the design of the vehicle. On a VAZ 2110, the front hub can be replaced due to the appearance of strong noise or knocking while driving. Also, in many cases, a hub malfunction is characterized by the wheel unscrewing, which is why the car on the road can “jump,” move unevenly, or pull to the side. When the first symptoms of a malfunction appear, the front hub of the VAZ 2110 should be replaced immediately.
Replacing the hub is an important matter
Replacing the front hub of a VAZ 2110 diagram
If you do not take any action, then very sad consequences are possible, because a faulty hub cannot hold the bolts that secure the car’s wheels. Therefore, at high speed the wheel can simply fly off.
Note. Replacing a hub on a VAZ 2110 is quite difficult. But, having patience and certain knowledge, this process does not imply anything terrible or impossible.
Removing the old hub
To complete the work you will need the following tools:
- two wrenches “17”;
- a universal wrench designed to remove a wheel;
- set of heads;
- wrench “22”;
- ball joint remover;
- jack.
Front hub VAZ 2110
When starting work, first of all, a support is installed under the car. Shoes are also installed under the wheels of the vehicle for stability. So:
Note. If your car has an anti-lock braking system, you will need to remove the ABS sensor from the front wheel.
- Using a punch or screwdriver, remove the protective cap, which is located in the center of the wheel hub.
Note. In cases where the protective cap is damaged, it must be replaced.
- Then, if there is a spring, it is removed from the hub axis.
Replacing the front wheel hub of a VAZ 2110
- After this, the clamping bolt is loosened, which secures the hub fastening nut from unscrewing, then the nut is unscrewed and removed from the hub axle. If there is a thrust washer, it must also be removed.
- The front wheel hub is removed from the steering knuckle.
Front wheel hub VAZ 2110
Note. If the hub cannot be removed, you will have to use a puller.
- If the inner bearing ring remains on the steering knuckle, it is removed from the hub axis using a puller, after which the hub sealing ring is removed.
- The condition of the steering knuckle axle is checked. If necessary, it must be replaced.
Before installing a new spare part, several procedures will need to be carried out to ensure that the part lasts a long time. For this:
- The inner ring of the outer bearing is removed from the hub.
- Then the o-ring is removed from the rear of the hub and the inner race of the inner bearing of the hub is removed.
VAZ 2110 front hub
- The hub is installed on the appropriate mandrel and the inner ring of the outer bearing is knocked out using a drift and a hammer.
Note. In this case, you should not warp the ring, because the bearing seat in the hub can be damaged.
- After this, the hub turns over and the outer ring of the inner bearing is knocked out.
Lada 2112 ᵀᴴᴱ ᴼᴿᴵᴳᴵᴺᴬᴸ › Logbook › WHEN DO YOU NEED TO REPLACE THE HUB BEARING FOR A VAZ 2112
Free rotation of the wheel on the axle is ensured by the hub bearings.
They are installed in the hub body, and the inner race is put on the wheel axle. The ball mechanism is reliably protected from moisture and dust by plastic plugs secured between the clips. Timely replacement of bearings in the VAZ 2110 hub ensures long-term operation of the unit under heavy loads. The article offers instructions on how to properly replace bearings on a VAZ 2110 car with your own hands. DIAGNOSTICS OF VAZ 2112 HUB BEARINGS The wheel hub has two single-row roller bearings installed. During operation, constant maintenance of the elements is required, which consists of adjusting the gap and replacing the lubricant in the bearings. To check the play or clearance, you need to hang the wheel and shake it. If the play cannot be eliminated by adjustment or noise appears while driving, then there is a high probability that the hub bearing has failed. Only one element or two at once can come out. The bearings should rotate on the axle without jamming and freely. Rollers and rings should not show any chips, pits or signs of wear. If they are detected, the bearing on the hub of the VAZ 2110 needs to be replaced. To check the bearing in the front wheel hub, you must: Raise the front wheel with a jack. Remove the wheel. Using a chisel, remove the protective cap from the front wheel bearing. Remove the brake pads. Attach a clock type indicator holder to the steering knuckle. Place the indicator leg against the wheel hub as close as possible to the adjustment nut. Place ring wrenches on the studs and tighten with nuts. The keys are taken to “14”. Holding onto them, the hub rotates and moves in the axial direction. The indicator measures the amount of axial movement or clearance. If it exceeds more than 0.15 millimeters, the gap must be adjusted. The wheel is installed in place without a protective cap and secured with two diametrically located bolts. Use a bevel or chisel to straighten out the jammed shoulder on the bearing nut and use a socket wrench “27” to unscrew the nut. The new adjusting nut is tightened to a torque of 2.0 kg-cm. Tip: The wheel needs to be rotated in both directions, this will make it possible to correctly install the wheel bearing rollers. The nut is loosened and tightened again, but the torque is already 0.7 kg-cm. The adjusting nut is gradually released by 20-25 degrees, the wheel is rotated in a vertical plane until a barely noticeable play appears. The gap is checked; its value should not be more than 0.08 millimeters and less than 0.02 millimeters. In this position, the nut is locked with the collar caulked in the grooves located at the end of the axle in the steering knuckle. The old grease is removed from the protective cap of the hub and approximately 25 grams of new grease Litol-24 or similar is added. The protective cap is installed on the hub bearing. The wheel is put in place. The cost of such operations is not high, but it will prolong the life of the wheel bearing. After adjusting the gap, it does not correspond to the required parameter, then the wheel bearing on the VAZ 2110 needs to be replaced. How to replace a VAZ 2112 wheel bearing. The work is best done in an inspection hole or overpass: Remove the hub cap. Using a narrow chisel, straighten the dented shoulder of the wheel bearing nut in two places. The car is put on the handbrake, and shoes are placed under the wheels. First gear is engaged. Use the wrench head at “30” to loosen the hub bearing nut. Tip: The nut in the assembly is tightened with a large torque. This requires the use of a knob and head of sufficient strength when unscrewing it to transmit the required force. The bolts securing the wheels are loosened. The front of the car is hanging out. This is done so that the anti-roll bar does not interfere with dismantling; it will push up the suspension elements of the VAZ 2110 car. The wheel, along with the caliper, the brake pad guide and the brake disc are removed. The brake pad guide and caliper are tied in such a way that they do not hang on the brake hose. The wheel bearing nut is finally unscrewed. The washer is removed. Two bolts with an M12x125 mm thread and a total length of 130 millimeters are passed through diametrically opposite holes located in the brake disc. The mounting bolts are screwed into the holes of the hub to a depth equal to its thickness. The bolt heads are sharply hit by the brake disc, the hub is pressed out. The fastening to the steering knuckle of the ball joint is unscrewed and the CV joint is removed from the bearing hole. The CV joint is disconnected from a VAZ 2110 car. Another dismantling method involves first disconnecting the ball joint and removing it from the CV joint hub. The hub rotates and is knocked out of the steering knuckle with a soft metal drift. Use pliers to remove the retaining ring. The VAZ 2112 bearing is pressed out with a puller into a cup located outside the steering knuckle. Then the bolt will press on the inner ring of the product through the washer located inside the fist. When pressed out, the bearing ring almost always remains on the hub, and it is difficult to remove it due to the tight fit. Tip: You can remove the ring using a puller; its paws should fit into two small grooves on the VAZ 2110 hub. If the puller fails to remove the ring, you can pry it off with a screwdriver and, moving it, remove it, as shown in the photo. If necessary, nicks on the hub are cleaned with a file. The mud ring is installed and sealed on the hub. The inner surface of the car's steering knuckle is cleaned and lubricated. Replacing the VAZ 2112 wheel bearing ends with pressing the new element into the steering knuckle of the VAZ 2112 car. In this case, the large puller washer rests on the steering knuckle from the inside so that its mud rings are not damaged. You can press through the old bearing when pressing in a new bearing, while the old one will transmit force through the outer ring. The retaining ring is installed. Installation of the retaining ring The hub is pressed into the bearing using a puller.
The puller washer should rest against the hub and bearing race. Replacement of VAZ 2112 wheel bearings has been completed. Further assembly is performed in the reverse order of disassembly. The bearing nut is tightened to the required torque, and the shoulder is locked by jamming it. As on a VAZ 2112 car, replacing the hub bearings is done correctly and can be clearly seen in the video. If you carry out preventive measures in time and replace worn wheel bearings of a VAZ 2112 car, you can increase the reliability of operation and the period between major repairs of the car. Like 21 Subscribe
Causes and signs of VAZ 2110 hub failure
On a VAZ 2110, the front hub may be replaced due to the appearance of strong noise or knocking while driving. Also, in many cases, a hub malfunction is characterized by the wheel unscrewing, which is why the car on the road can “jump,” move unevenly, or pull to the side.
The hub can also be damaged if the wheel is replaced incorrectly or during chassis repair. An example of a breakdown is a thread breaking due to excessive tightening force of the bolts. After removing the bearing from the hub, be sure to note that if the new bearing is pressed in very easily, then such a hub must be replaced with a new one . If you leave it with a lot of wear, there will be play in the bearing, which can lead to its failure. As a result, even with a new bearing, the wheel will wobble due to wear on the hub.
Signs of need for replacement and diagnosis
In addition to the hum in the area of the front wheel, other signs may indicate the need to replace the bearing on the VAZ 2110. Even inexperienced drivers will notice deviations from the norm while the car is moving. The change in the trajectory of traffic around turns will be clearly visible. Due to the uneven ride, the front of the car will sway from side to side.
This is interesting: Replacing the clutch on a VAZ 2114 with your own hands
To further check the condition of the wheel bearing, release the steering wheel on a level road . If the car skids to one side or the other, the part is worn out and requires replacement. You should not delay such repairs, since if the bearing is destroyed while driving at high speed, you will get an emergency situation and an uncontrolled skid, which can lead to an accident.
Advice: Bearing destruction is caused not only by a long period of operation of the machine, but also by poor quality of roads. At races, the likelihood of damage to a part increases significantly; a particularly dangerous situation arises when purchasing low-quality spare parts from China.
Checking the condition and installation procedure for a new VAZ 2110 hub
Using sandpaper, the hub is cleaned of grease and dirt, and burrs are sanded off. The condition of the hub is checked for mechanical damage, cracks and wear. If defects are found, the hub will have to be replaced.
- First, a thin layer of lubricant is applied to the rear of the hub O-ring and the hub is installed onto the steering knuckle axle.
- A thrust washer is installed and a nut is screwed on to secure the hub.
- The hub fixing nut is tightened and the inner ring of the bearing is pressed onto the steering knuckle axle.
- Once the hub is installed, the hub bearing end play is adjusted .
- After the adjustment is completed, the clamping bolt is tightened, which secures the fastening nut from unscrewing.
- Then the brake disc is installed and, if equipped with anti-lock braking system, the sensor is installed.
Above is a step-by-step photo instruction on how to independently replace the hub on a VAZ 2110.
For work we will need:
- two wrenches “17”; key “19” and “12”;
- a universal wrench designed to remove a 30" wheel;
- ball joint remover;
- puller for pressing out the steering tip;
- jack;
- a piece of wire or rope;
- hammer and pliers.
We jack up the car. Apply the handbrake, engage first gear and place shoes under the wheels.
Remove the hub cap. Using a narrow chisel, straighten the dented shoulder of the hub bearing nut in two places. Use a 30mm socket to loosen the hub bearing nut. The nut is tightened with a large torque, so the head and knob must be strong enough to transmit the necessary force.
Installation of parts for repair and replacement
Replacing the front hub is not difficult if you have sufficient qualifications. To do this, you need to study its structure and the sequence of work. Then you need to prepare the following tools:
- jack for lifting a car;
- a set of different heads;
- wrenches for “17” and “22”;
- a special puller used to remove ball joints;
- a universal key for unscrewing the wheel.
To ensure safe work, a rigid and reliable support is installed under the vehicle, and the wheels are secured with shoes to prevent rolling. Replacing the rear hub requires the same measures. Removing the front hub of a VAZ 2110 is carried out in the following order.
- Use a punch or screwdriver to remove the protective plastic cap covering the bearings in the center. If it is damaged, you will need to install a new one.
- Using a chisel, the shoulder of the bearing nut is straightened.
- The car is secured using the handbrake and boots. You also need to engage first gear.
- The nut is loosened using a strong 30mm socket.
- The wheel nuts are loosening.
- Both front wheels are supported using jacks or a lift, following the safety precautions described above. It is important to suspend both wheels, otherwise the transverse stabilizer will not allow the hub to be removed.
- We remove the wheel and the brake caliper, which is bolted to the back of the VAZ hub along with the pads, and move it to the side so as not to damage the hose. If you have an anti-lock braking system, the ABS sensor is removed.
- Remove the brake disc. It should move freely, since it is attached only to the wheel studs.
- Completely unscrew the nut from the front hub axle. Remove the support washer.
- Using a little force, we remove the main part. If this does not happen, then you need to pass two diametrically opposed bolts through the brake disc, which are screwed into the holes of the hub. Then pull the disc forcefully.
Replacing the bearing on the front hub of a VAZ 2110, 2111, 2112 with your own hands
Replacing the front wheel bearing of a VAZ 2110 is carried out independently according to the instructions, without specialized tools, knowledge and experience. If when traveling you notice noise and buzzing in the suspension, then the reason is in the front wheel hub. This occurs if the car has a mileage of 50-60 thousand kilometers.
The causes of failure are usually poor operating conditions (road, weather conditions, maintenance), service life and wear of suspension parts, lack of lubrication, and others.
The following actions can serve as simple diagnostics:
- put the car on a jack, namely the side of the car being repaired;
- spinning the wheel manually, during which you may hear noise and crackling;
- checking for increased play by moving the wheel in the axial direction.
VAZ 2110 wheel bearing dimensions, number and marking
Before buying a new spare part, make sure its exact dimensions. The dimensions of the VAZ 2110 front wheel bearing are usually standard, as are the markings. Keep in mind that this bearing is also used in VAZ 2108, 2109, 2111, 2112 models.
- Inner diameter (d): 34mm;
- Outer Diameter (D): 64mm;
- Width (H): 37 mm.
Front bearing number for VAZ 2110: 6-256907 (marking)
How to choose a ball bearing for a VAZ 2110 hub
When purchasing a front wheel hub bearing for a VAZ 2110, focus on three options:
- JSC Saratov Bearing Plant - professionals claim that the company produces the best wheel bearings. The plant's products are additionally marked "SPZ".
- The Samara Bearing Plant produces inexpensive products that are not of good quality. Suitable if you want to save money. The front wheel bearing will need to be replaced after 20,000 kilometers. The price of a VAZ 2110 wheel bearing from this brand is two times cheaper: 150-320 rubles.
- 23 GPP (VBF, Vologda) – this manufacturer is considered the best among its competitors. These products are rarely counterfeited, are of high quality, are inexpensive and are now in demand among domestic car owners.
The price of a part for a hub from these manufacturers: from 800 rubles.
Recommended bearing manufacturers
How to change the wheel bearing on a VAZ 2110
You need to familiarize yourself with the design of the hub (figure below). Disassembly of the unit is carried out strictly on a flat surface, a lift. It is necessary to engage first gear and put the wheels on the “shoes”. You will need a standard set of tools:
- needle file;
- socket head at “30”;
- narrow chisel;
- hammer;
- spanners for 17 and 19;
- mandrel for knocking out clips;
- torque wrench for tightening the hub nut.
First, we remove the bearing from the hub, to do this we do the following:
- Remove the hubcap from the wheel.
- Use a chisel to straighten the dented collar of the nut. This is done in 2 places at once.
- A key set to “30” is necessary to loosen the nut. The front wheel mounting bolts are loosened. If this is not done, the stability stabilizer will interfere with disassembly, as it will push the suspension elements upward.
- We dismantle the caliper with a screwdriver, unscrewing the nuts with a 17mm wrench. To prevent the caliper from hanging on the brake hose, we attach it with wire, then unscrew the brake disc mounts.
In addition, it may also be necessary to dismantle the trunnion assembly and the retaining ring.
egoIST
I drive a Ford Focus ST in Moscow
The engineers did a great job - 15 devices in 1 case.
An entire car on-board computer with FULL HD footage. We are pleased with the clear rear view camera and GPS navigator with 32 satellites.
I've been using it for 6 months and already forgot about the fines
.
I am sharing a link to the official website of this miracle recorder: MORE
Methods for replacing the front wheel bearing on a VAZ-2110
The replacement procedure is not the easiest, but you can save a thousand or one and a half thousand. This is exactly the amount they ask for just for work at a service station.
For everything to go smoothly, we will need a wheel bearing puller 2108-2112. Unfortunately, without it we will not be able to remove or press in a new bearing. The screw puller is very simple in design and costs about 300-380 rubles, so it will not become a burden on the budget and will come in handy more than once. We also need a 30 mm wrench or socket and a standard set of tools.
The technology for replacing a bearing depends on whether we will carry out incidental repairs or replacement of suspension elements, braking system or steering. You can go one of three ways:
- Removing the bearing without removing the steering knuckle . The fastest and easiest way. You don't even need a viewing hole. It is also good because we do not violate the set wheel camber. The downside is that pressing out the clips while hanging is not very convenient.
- Replacement with removal of the fist . There is a lot more work, but the bearing itself can be removed in a vice on a workbench.
- Dismantling the hub assembly with the strut . This option is the most labor-intensive and is used when we simultaneously change the strut, silent blocks, ball bearings, strut swivel bearing or other parts. Completely removing the strut to replace the bearing is irrational and time-consuming.
If you remove the fist, you can press out the bearing without a puller.
Replacement algorithm
Having all the necessary tools, you can start working without delay. We will replace the bearing following the first algorithm, that is, without disassembling the strut and knuckle
- We place the car on a flat surface, tighten the handbrake and put stops under the rear wheels.
- Remove the protective cap of the bearing nut.
Remove the protective cap.
We place a support under the bottom of the car.
We move the caliper to the side.
Unscrew the nut completely and remove the washer.
Screw in the bolts to the full depth of the hub.
By sharply hitting the bolt heads with the brake disc, we press out the hub.
We unscrew the ball joint bolts and remove the CV joint from the bearing hole.
Use pliers to pull out the retaining ring.
Use a puller to remove the old clip.
Reassembling the front hub is carried out in the reverse order. Strong chassis and smooth roads to everyone!
After assembly, we tighten the new bearing nut until it stops, put the wheel on, lower the car, tighten the nut with a good lever and lock its side.
Three ways to remove and replace a VAZ 2110 wheel bearing
Let's consider 3 options when replacing the front wheel bearings of a VAZ 2110 is required.
Method No. 1. The idea is to replace the wheel bearing using a puller, without removing the steering knuckle (without removing the strut). The advantage of this replacement is that there is no need to loosen the camber fasteners. It is best to work on a lift or on a viewing hole. The inconvenience is knocking out the hub and then pressing it out. You risk damaging the bearing even before replacement.
The replacement process with this method, after performing steps 1-4 above:
- Use a puller to remove the bearing from the assembly.
- Using the same puller, we press the new part back into the hub.
- We assemble everything in reverse order (at the beginning of the article).
Method No. 2. It is the most labor intensive. Suitable if it is impossible to replace using method No. 1, or if you want to carry out a full repair of the chassis.
- Remove the tie rod end and unscrew all the nuts necessary to attach it to the body.
- Place the stand in a vise
- Change the front wheel hub bearing on the removed car strut
- Putting everything back together in reverse order (at the beginning of the article)
Method number 3. It is much easier than method No. 2, since we do without a puller, but there is a difficulty in its implementation, namely, further problems with adjusting the camber during assembly (in the previous method the strut was not removed).
- Dismantle the fist and remove the hub completely
- We take out the locking ring
- We move on to a vice, where we press out the old p/sh
- Clean the inside of the hub from grease and dirt
- We mount the new bearing in a vice using a hammer and a mandrel or puller
- We assemble the unit in the reverse order (see points 1-4 at the beginning of the article)
How to replace the front wheel bearing
Before starting repairs, it is better to put the car in 1st gear and install small supports under the wheels. For more comfortable work, you will need an inspection hole, since it is not easy to get to some of the mechanism’s fastenings. From the tool you need to prepare:
- A puller to remove the bearing itself from the assembly.
- A cut of a pipe of a certain diameter, with the help of which the hub will be knocked out.
- Socket wrenches for 17 and 19.
- 30mm head with a good wrench.
Don't forget to purchase new bearings from the store. It is better to give preference to original spare parts that meet all quality standards.
Methods and options
Let's start the preparatory work. They are necessary in any situation.
- Slightly press out the wheel bolts.
- Using a 30 mm wrench, unscrew the bearing nut. For alloy wheels you will need to remove the front wheel completely.
Press the wheel bolt to gain access to the caliper - We press the caliper using a screwdriver and unscrew it from the front knuckle.
Using a screwdriver, press the caliper and remove it - Next, remove the brake disc from the hub.
Further replacement work can take place in several ways. Each of them has its own advantages and disadvantages. Choose the one that is best for you based on the availability of the necessary equipment and tools.
- Replacing the bearing without dismantling the steering knuckle. Its advantage is that we do not need to remove the camber adjustment bolt. But at the same time, the process itself will not be entirely convenient, and you cannot do without a good inspection hole. To knock out the hub and remove the bearing itself, you will also have to put in more effort. This method is often chosen by experienced mechanics to save some time. It requires good practical skills.
- The second method is more convenient and is suitable even for beginners. Unlike the first, the camber adjustment will be disrupted and additional adjustment will be required after replacing the front wheel bearing.
We make notches for further camber adjustment - The third method will take you the most time; it involves completely dismantling the front strut and replacing the bearing using a vice. To do this, you must first unpress the steering tip and remove the bolts securing the mechanism to the body.
This is interesting: Daimler AG engines
We will dwell in more detail on the second method, since it is best suited for novice car enthusiasts:
- remove the steering knuckle by first unscrewing the two bolts on the stand and the two bolts securing the lower ball joint;
Remove the steering knuckle by unscrewing the bolts - Using a pipe of the required diameter, we knock the hub itself out of the bearing;
We knock out the bearing with a pipe of suitable diameter - remove the bearing using a vice;
- We clean the seat from dirt and old grease;
- press the bearing in and secure the retaining ring;
Press in the bearing and install the retaining ring - We fix the steering knuckle together with the new part on the hub;
- Further assembly is carried out in reverse order.
Tip: Don't forget to press down the flange of the nut after assembly is complete.
Video of replacing the front wheel bearing of a VAZ 2110
With the help of these videos, the repair will be much easier. A step-by-step guide will help you achieve your goal, and in just a couple of tens of minutes you will be able to enjoy the results of your work without extra costs or contacting service station specialists.
Replacing the front wheel bearing of a VAZ 2110
How to change the front wheel bearing
A few tips for motorists
- It is quite easy to understand that the front wheel hub of a VAZ 2110 is faulty. While the car is moving, you will hear grinding, humming and knocking noises every now and then.
- To ensure that the wheel alignment remains normal after replacement, perform the replacement without unscrewing the alignment bolts.
- The manufacturer recommends that car owners change the components of the front wheel hub at 55,000 km.
As you have already seen, do-it-yourself repair of front and rear wheel bearings on a VAZ is easy. Such repairs may have to be done every year, because the roads in the country leave much to be desired. But self-service will cost several times less than if you turn to a service station for the service.
If you prepare in advance and do all the work sequentially, taking into account each step, the replacement will not take much time. You do not risk anything, the cost of the part is not that high. But such a simple job involves many nuances that are important to consider.
Ilya Vasiliev
I drive a Ford Focus ST in Moscow
This email address is being protected from spambots. You must have JavaScript enabled to view it.