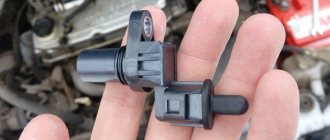
What is a camshaft sensor
Before moving on to the question of checking the camshaft position sensor, you need to find out what kind of device it is, what it is needed for and on what principle it works.
This will help clarify the details of the audit in the future. A camshaft sensor is a device that records the angular position of a specified shaft at a specific point in time. The information obtained with its help is transmitted to the electronic engine control unit (ECU), and on its basis this control element issues commands for fuel injection and ignition of the air-fuel mixture in each cylinder at a specific point in time.
The operation of the camshaft position sensor is based on the Hall effect. So, directly on the camshaft there is a metal tooth, which, when the shaft rotates, changes the magnetic field in a nearby sensor. This tooth is called rapper. The sensor detects a change in the magnetic field, which is converted into a low voltage electrical signal. This signal is sent to the electronic control unit.
In fact, the camshaft position sensor only registers one position, corresponding to the position of the piston of the first cylinder at top dead center. Next, phased fuel injection is performed in the firing sequence of the cylinders. Typically this is a 1-3-4-2 system.
If the camshaft sensor fails (the electronic control unit receives incorrect information from it or does not receive it at all), then it is programmed to switch to emergency mode. It involves the use of pairwise-parallel (group) fuel supply to the engine. This leads to two negative consequences:
- A slight loss of engine power, especially when driving in critical modes (acceleration, driving under load).
- Increase in fuel consumption by approximately 10...20% (depending on engine power, its design features, as well as operating conditions).
As for diesel engines, camshaft position sensors are designed similarly, but there is one difference. It lies in the fact that the sensor records the position of not only the first cylinder, but all of them. This is done due to the fact that the drive disk has a separate tooth for each cylinder.
Thus, if a sensor fails, it makes sense to diagnose it as quickly as possible and, if necessary, replace it.
The operating mechanism of this part is based on the Hall effect. What does this device do? The Chevrolet Niva camshaft sensor controls the gas distribution device, its inclination according to the crankshaft. The signal is received by a system that controls the flow of gasoline and the operation of spark plugs.
The operation of the camshaft sensor is based on monitoring the potential difference between the carriers of the amount of electricity, and its work is associated with another crankshaft position analyzer. The camshaft sensor operates under the influence of the Ampere force acting on a current-carrying conductor in a magnetic field. Using a magnet, it creates a magnetic field that changes under the action of a special iron tooth on the camshaft wheel.
Thus, the part tells where the piston of the internal combustion engine cylinder is located, and the strokes of the cylinder cycle are performed one by one.
More information about testing and troubleshooting
The Niva Chevrolet camshaft sensor creates stable engine operation. The work is based on the Hall effect. Thanks to it, the tilt of the gas distribution device is controlled according to the crankshaft. The system that controls the operation of the spark plugs and the flow of gasoline receives a corresponding signal.
Also interesting: Chevrolet Niva ignition module - Auto magazine MyDucato
It works based on monitoring the potential difference of the required electricity, and is associated with the operation of the crankshaft position analyzer. Simply put, it informs the location of the piston of the internal combustion engine cylinder, while all cylinder stroke cycles occur sequentially. If it stops working, the device and indicator turn on, thanks to which a mixture of air and fuel occurs, dosing is suspended and the reserve mode is activated. Replacement is recommended every five years. If it is faulty, the on-board computer will display the following errors, PO343, PO342, PO340.
Connecting scanners or computers equipped with special software is the best option for identifying most faults. The main thing is to choose software that matches the current car brand.
If the camshaft sensor is faulty, the following error options appear:
- P0339. In this case, intermittent signals are received from the sensors.
- P0343. The signal is at a high level, but it exceeds the norm.
- P0342. The signal level for the electrical circuit is too low.
- P0341. The compression/intake strokes of the cylinder-piston group differ from the current valve timing.
- P0340. There is no position locator signal.
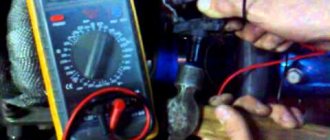
Most buyers do not have scanners or laptops with software. Therefore, a simpler method is to check with a multimeter.
In total, there are no more than 3 stages in such diagnostics:
- The wiring is subjected to visual inspection. Next, the circuit is rung to check for a break.
- The outgoing current is measured at the control contact of the sensor. There is definitely a malfunction if there is something wrong with it.
- Check functionality by approaching a metal object.
During the first stage, the most important thing is to make sure that the wiring remains intact and that the contact of the connecting block is reliable enough. Conducting cables should be inspected additionally to ensure that there is no melting of the insulation or cracks or kinks. Using a multimeter it is easy to make calls and search for a break. An additional responsibility is cleansing from oxidation. This is the first sign of problems.
After diagnosing the entire system, you can move on to the sensor itself. Standard alligator clips are easily replaced with wires with needles. The main thing is to correctly determine the location of the two power contacts and the third wire going to the controller. The voltage between the bus ground and the contact is checked by turning on the power. The signal should remain at normal level.
If the values obtained are higher or lower than normal, the sensor must be replaced.
The part is completely removed from the engine in order to perform final diagnostics and make a final decision.
Before testing the sensor using a multimeter or other electronic tools, you must check its mechanical integrity. In particular, it is installed in a housing with an O-ring, ensuring its secure fastening. We need to check its condition. It would also be useful to check the integrity of the sensor body, whether there are cracks or other damage on it. It is advisable to check the drive disk to see if the teeth are damaged or if there are metal shavings on the sensor body or nearby.
On the Internet you can find information that supposedly the DPRV can be determined to work by simply checking its magnetic properties. In particular, bring a small metal part to its end (the working sensitive part), which should “stick” to the sensor. In fact, this is not the case, and a non-working DPRV may or may not have magnetic properties. Accordingly, verification must be performed using other methods.
There are two main ways to test the camshaft position sensor - using an electronic multimeter and using an oscilloscope. The first method is simpler and faster, but the second is more accurate and provides more diagnostic information.
How do Niva Chevrolet cooling fans work and through which fuses and relays are they connected?
To maintain the optimal temperature in the engine, a cooling system is installed in the car. One of the main elements in this system are fans, thanks to which the required amount of air is supplied to the engine through the radiator core. If it stops working, the Niva Chevrolet cooling fan overheats as excess heat begins to accumulate.
Unlike classic cars, it has two fans, making the functioning of the systems much more complicated. If the arrow that shows the temperature is in the red area, and the cooling system refuses to work, and at the same time the cooling fan does not turn on, then the car should be taken to a car service center as quickly as possible, or you should try to find the cause of the malfunction yourself.
Fans of the Niva Chevrolet cooling system are used for forced ventilation of the radiator. They increase the intensity of heat dissipation while driving at low speeds and are the only way to cool the antifreeze in a plug or “toffee”.
In addition to the reasons already mentioned, problems may arise with the vehicle's electrical network. It is best not to try to diagnose and fix the problem yourself - this can lead to unpleasant consequences.
But if you have the necessary knowledge, then pay attention to the sensor itself; moisture may get into the connector, which affects the correct operation of this device.
The red block of the instrument cluster may cause a temporary loss of contact - an error was made during installation and the block was not installed evenly.
Main types of faults.
Like any car part, the sensor is subject to vibration and is susceptible to contamination and oxidation. Therefore, its failure is possible from time to time. To understand the cause of the breakdown and what to do in each specific situation, the following problems should be eliminated:
- broken wiring
- the appearance of oxide on the contacts
- destruction of wire insulation
- mechanical damage to the housing or its internal components
To do this, you can carry out a certain set of measures to check the condition of the sensor. Typically, such work requires a multimeter. The sensor is removed from the seat. A positive probe is connected to the contacts. The negative one is connected to the ground of the vehicle. The multimeter must be set to minimum power measurement mode.
There is a second diagnostic method. This does not require dismantling the sensor. The car is raised with a jack, then a multimeter is connected to the sensor. To appear, you need to rotate the wheel, observing the readings of the device. If the value does not change, the sensor is faulty.
The first thing you should pay attention to when the system is not working is the state of the fuses, which are located under the front panel, on the passenger side, in a special mounting block. A pair of fuses are responsible for the cooling operation; if the right one fails, then both fans stop working, and if the left fuse blows, then one element can continue to operate.
In addition, the mounting block has three relays that are responsible for operating the fans at different speeds. And if the relay responsible for operation at low speeds burns out, then the cooling system works correctly only at high speeds, and at low speeds the engine begins to heat up. Power is supplied to the relay through a special fuse, which can also fail, causing system failure.
Failure of temperature sensors also affects proper cooling operation. They are located on the engine. They operate when the desired temperature is reached, one when it reaches 90 degrees, and the second when it reaches 101 degrees. It is recommended to start checking with them, this is done this way: the connector is disconnected from the electric motor, and power is supplied to them directly through the battery; if the electric motor is running, then the reason is in the sensors.
If after checking everything, fuses, relays and sensor are in order, you should pay attention to the fans.
1.Both fans do not work. The electric motors may fail, the temperature sensor may malfunction, or the power wires coming from the battery or ignition switch may be broken.
Also interesting: Standard-type Chevrolet Niva car alarm
2. The second fan does not work. Causes: sensor malfunction, fuse or electromagnetic relay failure. It is also possible that the power cable may be broken.
3. The left fan does not turn on. Causes: faulty power resistor or temperature sensor, blown fuse or relay. It is also possible that the power cable may be broken.
4. Only two fans turn on at a time. This happens when an additional resistor in the circuit of the first electric motor breaks.
5. The fan does not turn off. Typically, the fan runs constantly when the relay is broken or the coolant temperature sensor is faulty.
Repair of fans, sensor, relays, fuses and additional resistor is not provided. If these parts break, they should be replaced with new ones.
What is a sensor
In the cylinder head of each car there is one or a pair of camshafts, on which there are petals that are necessary for the normal operation of the exhaust and intake valves. The cylinder block contains a crankshaft, thanks to which torque occurs from the movement in the piston block, transmitted via gears, a belt or timing chain to the camshaft itself.
One of the most common types is:
- Magnetic sensors
- And which are based on the Hall effect
They transmit a voltage signal to the on-board computer or to the car's engine control unit.
The first type is magnetic; it reproduces its own alternating current, which has two wires; it is also called a sine wave. The second type, based on the Hall effect to obtain a digital signal, uses an external power source and already has three wires. There may be several sensors in a car.
Also interesting: Review of the standard Niva Chevrolet alarm system
In the cylinder head of each car there is one or a pair of camshafts, on which there are petals that are necessary for the normal operation of the exhaust and intake valves. The cylinder block contains a crankshaft, thanks to which torque occurs from the movement in the piston block, transmitted via gears, a belt or timing chain to the camshaft itself.
- Magnetic sensors
- And which are based on the Hall effect
The first type is magnetic; it reproduces its own alternating current, which has two wires; it is also called a sine wave. The second type, based on the Hall effect to obtain a digital signal, uses an external power source and already has three wires. There may be several sensors in a car.
In order for the driver to comfortably use it at night, it has a backlight that is activated when the side lights are turned on. The brightness of the backlight is adjustable thanks to six light bulbs. The important thing to know is that it has a special electronic design, and if it fails, it cannot be repaired. Therefore, if one indicator fails, then the entire panel on the Niva Chevrolet is replaced.
The speedometer and tachometer are the largest indicators and are located in the center of the dashboard. Under the tachometer itself there is a liquid crystal screen that helps determine the temperature outside, and there is also a dial on it that helps you find out the time. Below the speedometer there is a similar electronic display that helps the driver track daily and total mileage.
- On the left side of the tachometer, there is a designation scale that shows the coolant temperature, and on the right side of the speedometer there is a device that helps determine the fuel level in the tank.
- At the bottom left side there is an indicator light indicating the discharge of the Battery. As well as parking brake lamps and emergency oil pressure in the engine. On the right side of the corner there is an indicator that informs you that the headlights and high beams are on, and also notifies you when the brake fluid level is low.
- Between the speedometer and tachometer scales there are turn signal arrows, and at the bottom in the center there is an alarm system, and below it CHECK.
Thanks to these devices, the car owner will always be aware of the condition of his car and will be able to prevent malfunction of his car.
Signs of DPRV failure
There are several typical signs that indicate that the camshaft position sensor has failed. It is immediately necessary to clarify that the symptoms listed below may indicate completely different malfunctions. Therefore, it makes sense to perform additional diagnostics.
- Problems with starting the engine, under any conditions - “cold”, “hot” and in other modes. This usually results in having to crank the starter longer.
- Unstable engine operation, “floating” operating and idle engine speeds.
- “Dips” in the movement of the car; when you press the accelerator pedal, it does not respond immediately, the dynamic characteristics of the car are lost (it accelerates poorly, does not pull, especially when loaded and when moving uphill).
- When the accelerator pedal is released, the engine stalls.
- Increased fuel consumption (by 10...20%).
- The Check Engine warning light on the instrument panel activates. It is necessary to perform additional diagnostics using an electronic scanner (for example, an ELM 327 device or its equivalent). In this case, typical errors regarding the operation of the sensor are numbers P0340, P0342, P0343.
In fact, the camshaft position sensor is a fairly simple and reliable device, so it rarely fails. More often, its wiring is damaged - the wires fray, the insulation on them is damaged, the so-called “chip”, the place where the sensor is connected to the car circuit, fails.
However, for cars that run on gasoline, the problems described above are not so clearly expressed. But a failed camshaft position sensor will cause many problems for owners of cars equipped with gas equipment, in particular the fourth generation. The malfunctions and problems described above can appear on such machines “in all their glory.”
Main symptoms of malfunction
Sooner or later this element becomes unusable. As a rule, it fails due to the fact that the internal winding wears out, in which case the engine operates intermittently. And how worn out the sensor is can be judged by the operation of the engine. The following signs may indicate that the camshaft sensor has failed:
- The gearbox may get stuck in one of the gears, and while the engine is running, it will be impossible to unlock it. This can usually happen from time to time.
- There is a loss of speed and the vehicle moves jerkily
- There is a loss of power
- The engine stalls
- Popping noises appear in the exhaust system, dynamism is lost, misfires occur when the ignition is turned on
- Lost spark
Read more: How to get moving quickly with an automatic transmission
If there is a malfunction, the on-board computer may display an error, Check Engine, and to make sure that this is the reason, computer diagnostics should be performed using special equipment. Error table:
Checking and removing fans
- Disconnect the negative terminal from the battery
- We remove the decorative casing to gain access to the element we need
- We press the block and disconnect it from the sensor
- Unscrew the bolt that secures the part to the cylinder block
- We remove the part from the existing hole in the block head
- We change to a new element, doing all the steps in reverse order.
It is recommended to replace it every five years, even if it is working properly. The replacement job takes about twenty minutes, everything will depend on what technical skills you have.
Before testing the sensor using a multimeter or other electronic tools, you must check its mechanical integrity. In particular, it is installed in a housing with an O-ring, ensuring its secure fastening. We need to check its condition. It would also be useful to check the integrity of the sensor body, whether there are cracks or other damage on it. It is advisable to check the drive disk to see if the teeth are damaged or if there are metal shavings on the sensor body or nearby.
On the Internet you can find information that supposedly the DPRV can be determined to work by simply checking its magnetic properties. In particular, bring a small metal part to its end (the working sensitive part), which should “stick” to the sensor. In fact, this is not the case, and a non-working DPRV may or may not have magnetic properties. Accordingly, verification must be performed using other methods.
There are two main ways to test the camshaft position sensor - using an electronic multimeter and using an oscilloscope. The first method is simpler and faster, but the second is more accurate and provides more diagnostic information.
The easiest way to check the camshaft sensor is to connect a car scanner or a computer with an installed program corresponding to the make of the car to the diagnostic connector of the car. If the element is faulty, then after starting the engine the device will display the following error codes:
- P0340 – there is no signal from the camshaft position detector;
- P0341 – valve timing does not coincide with the compression/intake strokes of the cylinder-piston group;
- P0342 – the signal level in the electrical circuit of the DPRV is too low;
- P0343 – the signal level from the meter exceeds the norm;
- P0339 – an intermittent signal is received from the sensor.
Since the vast majority of car enthusiasts do not have scanners and laptops with software at their disposal, a more affordable method is practiced - checking with a digital multimeter. Diagnostics is carried out in 3 stages:
- Visual inspection of the wiring and continuity of the circuit for breaks.
- Measuring the outgoing current at the control contact of the DPRV.
- Testing functionality by approaching a metal object.
To understand whether they work or not, you need to disconnect the connector from their motors, and connect a lamp to the wires through which voltage is supplied; we do the same with the sensor; if both lamps light up, then the problem is in the fans.
To remove them you need to do the following:
- Disconnect all wires
- Removing the upper pipe
- Removing the bumper
- If there is an air conditioner, bend the tubes (this must be done carefully, as they may burst) or drain the freon (filling it back will not be cheap), then remove the air conditioner radiator.
- You need to loosen the nuts on the radiator casing
- Tilt the radiator so that you can remove the fan unit
- Unscrew the bolts that secure the block and remove it
After removal, it is recommended to immediately replace both with new ones, since there is a possibility that a little time will pass and the second element will fail and all replacement work will need to be done again. You can do this procedure from below, but you will need special equipment, and you will need to move the engine ten centimeters back, which is very labor-intensive.
Before starting work, you must go to the inspection hole and remove the terminal from the battery. For repairs you will need 10-13 wrenches, a screwdriver and a new resistor. The part is installed in the beam below the radiator. The removal procedure is as follows:
- Unscrew the fastening bolts and remove the crankcase protection along with the mudguard.
- Remove the protective strip of the resistor and unscrew the part.
Assembly is performed in reverse order.
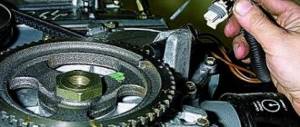
Removing the phase sensor
The Niva Chevrolet phase sensor operates on the Hall effect principle. It works as follows: there is a special pin on the camshaft and when it runs parallel to the end of the sensor, the sensor begins to transmit a voltage pulse to the existing controller, which should have the same position as the piston of the first cylinder in the compression position. That is, it is needed so that fuel injection and the order of operation of the engine’s cylinders correspond to each other.
In the event of a failure, it or its chain controller writes a special code into its memory and activates the alarm. And to remove it you need:
- Disconnect the battery
- Remove the decorative casing from the engine
- Disconnect the connector from the sensor
- We unscrew the bolt that secures it to the cylinder block.
- We remove the part from its seat
- Install the new one in reverse order
The part is removed from the engine to finally verify that there is a specific problem. On the cylinder head this structure is inserted into a special hole. Next, everything is screwed on with one bolt. It is enough to unscrew this connecting element, and then pull out the part and wipe it off with engine oil. The main thing is not to disconnect the block to which the additional wires are connected.
The ignition can be turned on after the multimeter is connected - to the middle contact, the ground of the car. The steel element is brought close to the end part of the part. For example, a regular key is perfect for this. All that remains is to monitor the readings that appear on the display. If everything is normal with the sensor, it reacts to the approach of any metal whose voltage is 02.-0.4 V. A high indicator is not taken into account.
If there are no changes in the tester’s performance, the device definitely needs to be changed. The main thing is to remember about the possibility of missing an o-ring even with new original spare parts. This part of the structure must be purchased separately, or an old one must be used.
- Disconnect the negative terminal from the battery
- We remove the decorative casing to gain access to the element we need
- We press the block and disconnect it from the sensor
- Unscrew the bolt that secures the part to the cylinder block
- We remove the part from the existing hole in the block head
- We change to a new element, doing all the steps in reverse order.
Also interesting: Cooling fan Niva Chevrolet
It is recommended to replace it every five years, even if it is working properly. The replacement job takes about twenty minutes, everything will depend on what technical skills you have.
Speeds
The work is carried out in an inspection pit. Before dismantling, you must disconnect the battery.
The sensor is located on the rear cover of the transfer case. Before removing it, you must disconnect the terminals. They are held in place by a plastic retainer.
Then, using a wrench, the device is unscrewed from the seat.
If the device is firmly “stuck”, it is forbidden to use excessive force; it is better to treat the threads with a lubricant like WD-40.
Before installing a new device, you should carefully examine its condition. On the sensor, the assembly points and contact group must be carefully filled with varnish to prevent the penetration of water. Otherwise, the device may soon fail.
The Chevrolet Niva speed sensor helps to determine exactly how fast the car is moving. The received information is transmitted to the speedometer. In addition to this, it also performs such functions as:
- Controls fuel consumption
- Displays information on the dashboard
- In cars with automatic transmission, it is part of the system that is responsible for engine control.
If for some reason it fails, then further movement becomes difficult. The causes of failure may be contamination or oxidation. If the device stops working, first of all you need to check for the following problems:
- Contacts have oxidized
- There was a break in the electrical wiring
- Wire insulation is damaged
- There are mechanical damages
Diagnostics can be done both visually and using a multimeter. To do this, the sensor is removed, after which you need to connect the plus to the contacts, and the minus to the ground of the car. We switch the multimeter to power measurement mode and if it shows that the voltage has increased, then the element can be considered faulty.
Reasons for a non-working speedometer: from simple to complex
In the Niva Chevrolet, the speedometer needle is driven not by a cable and a magnetic device, as in classic VAZs, but by electronics. The speedometer itself, like the rest of the instruments on the panel, are nothing more than voltmeters or ammeters with different scales.
This is for information, because it is useless to poke into the speedometer itself, it is not repairable and if at least one element fails, you have to buy the entire instrument panel on the circuit board.
The speedometer receives an impulse from the speed sensor, and it is installed on the transfer case housing. These impulses are also monitored by the electronic engine control unit and, receiving them, draws its conclusions about the operating mode of the motor.
The signs of a non-working speedometer are quite clear - the needle either lies shamelessly, showing 160 at a speed of 20 km/h, or twitches, or falls dead to the zero mark.
Since there are not many elements in the electrical circuit of the Chevrolet Niva speedometer, there are only a few reasons for the device not working:
- Mechanical damage to the speedometer itself.
- No contact in any of the terminal connections.
- Broken or shorted wire.
- Failure of the speed sensor.
- ECU malfunction.
Read news about the new Niva
- Additional light for an SUV - you need to know this!
- Lada Niva 4x4 2131 (5-door) - prices, specifications. Mos BRONTO: Moscow, St. Petersburg, Nizhny Novgorod, Rostov, Tula, Yaroslavl, Minsk, Mogilev, Grodno.
- Niva VAZ 21213 engine: characteristics, malfunctions and tuning
- Vacuum brake booster VAZ Lada 2108.14, Niva 21213 DAAZ 2108351001001 DaAZ. Wholesale and retail.
- Niva Chevrolet air conditioning installation - Online auto workshop
- Competitors of Chevrolet Niva || Website about Chevrolet Niva 1st generation
- Trouble P0441 - Incorrect EVAP Purge Flow
- Changing brake fluid yourself is very easy
Replacing a faulty Chevrolet Niva speed sensor.
The Chevrolet Niva SUV, which is popular in our country, is equipped with a high-quality cooling system that allows you to constantly maintain optimal engine thermal conditions. A special role in this unit belongs to two fans, which provide the required air flow through the radiator core.
Also interesting: Chevrolet Niva camshaft sensor
If the cooling fan on a Chevrolet Niva does not turn on, excess heat will no longer be removed from the engine, which will lead to overheating of the engine. Since the number of cooling fans on this car model has been increased, the electrical circuit of their operation has become much more complex than in classic passenger cars.
Why doesn't the cooling fan work?
If the cooling fan does not turn on on a Chevrolet Niva, the first thing you need to do is check the condition of the fuses responsible for the operation of the unit. The fuses are located in the mounting block under the front panel, near the front passenger's feet. This car has two fuses that protect the electrical circuit of the fan motor.
The mounting block contains three relays responsible for connecting the left fan at high speed and the right fan at low and high rotation speed. The additional relay is activated when a signal is applied from terminal number 46 of the ECM to terminal number 86. In this case, the voltage to the fan motor terminals passes through a resistor.
If this resistor burns out or the relay fails, the cooling fan on the Chevrolet Niva will stop turning on at low speed. The right fan relay is activated after a control signal is received from terminal number six to terminal number 86. This allows you to switch to high fan speed.
If there is no control signal, we can talk about a failed relay. At the same time, the cooling fan on the right side of the Chevrolet Niva does not turn on. It is important to remember that the same control signal is responsible for turning on the left fan. In this case, a jumper process occurs between terminals 85 and 86. However, the fan motor on the left is powered via a separate fuse.
The cooling fans on the Chevrolet Niva do not turn on even if the sensor that detects the coolant temperature breaks down. According to this sensor, the system understands how much the coolant temperature has increased or decreased. In this case, the controller determines whether to turn the fans on or off.
It happens that fans do not turn on due to deformation of the plastic casings of the parts. This can happen if the temperature in the engine compartment is too high. In this case, the fan blades will touch the casing, which will lead to overheating and melting of the tips. When the fans stop, the blades will simply weld to the casing and will not be able to work the next time they are turned on.
Replacing this part is relatively easy. The on-board computer registers errors such as P0340, PO342, PO343.
Error P0340 appears on the self-diagnosis system if the crankshaft rotates. Code P0342 - the camshaft electrical circuit shows a low signal and code P0343, accordingly, shows a high signal. It is necessary to check the wiring - for this purpose it is good to use an oscilloscope or other testing device.
Mechanical specialists, even if the sensor is in good working order, still recommend changing it every 4-5 years - such prevention will protect you from breakdowns and accidents, especially since the part is very cheap despite its importance. After all, the semiconductors inside the sensor react poorly to temperature fluctuations - remember your school physics course.
There is a special offer on our website. You can get a free consultation with our corporate lawyer by simply submitting your question in the form below.
Device location.
Each vehicle is equipped with only the appropriate equipment, designed for a certain number of shaft rotations and installed in the appropriate seat. The Chevrolet Niva speed sensor is installed on the gearbox.
The sensor itself is a small steel or, more often than not, plastic device that is mounted in the shaft area. Inside the case there is a core that transmits impulses to a special controller responsible for displaying information on the instrument panel.
When carrying out work, it should be taken into account that the device can be quite fragile, so installation should be carried out with care.
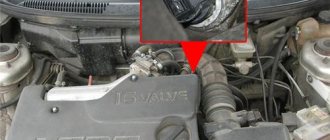
To check the camshaft position sensor, you need to know where it is located. As a rule, on eight-valve engines the DPRV is usually mounted at the end of the cylinder head. On sixteen-valve engines it is also mounted on the cylinder head, usually in close proximity to the first cylinder.
As for popular domestic VAZ cars, their owners call such units phase sensors. Their location in these motors is similar. So, on eight-valve engines, the sensor is located on the left side of the cylinder head (when viewed in the direction of travel of the car). On sixteen-valve engines - on the right front part of the engine.
Sensor location
To control the speed of movement, a special device is installed on the dashboard - a speedometer. But it only displays the information received, and the speed sensor is responsible for collecting data. If it fails, it will create many dangerous situations on the road, since it will become difficult to control the speed limit in the city and on the highway.
But besides this, thanks to the integration of the electronic control unit into the system, the speed sensor allows you to perform the following functions:
- fuel consumption control
- displaying information on the instrument panel
- in cars with an automatic transmission it is included in the complex responsible for engine control
In case of failure, you are allowed to continue the journey, but this will become difficult.
Historically, there were two types of sensors. Initially, mechanical or optoelectronic were used. They read the number of shaft revolutions, transmitting it to the instrument panel using a cable. Then electronic cableless systems came to replace them.
Each vehicle is equipped with only the appropriate equipment, designed for a certain number of shaft rotations and installed in the appropriate seat. The Chevrolet Niva speed sensor is installed on the gearbox.
The sensor itself is a small steel or, more often than not, plastic device that is mounted in the shaft area. Inside the case there is a core that transmits impulses to a special controller responsible for displaying information on the instrument panel.
When carrying out work, it should be taken into account that the device can be quite fragile, so installation should be carried out with care.
The work is carried out in an inspection pit. Before dismantling, you must disconnect the battery.
The sensor is located on the rear cover of the transfer case. Before removing it, you must disconnect the terminals. They are held in place by a plastic retainer.
Then, using a wrench, the device is unscrewed from the seat.
If the device is firmly “stuck”, it is forbidden to use excessive force; it is better to treat the threads with a lubricant like WD-40.
Before installing a new device, you should carefully examine its condition. On the sensor, the assembly points and contact group must be carefully filled with varnish to prevent the penetration of water. Otherwise, the device may soon fail.
In most cases, it is located near the cylinder head. You need to look for it either in the front part of the engine in the electrical wiring, or where the upper part of the timing belt is located. There are also car models where it is located in a special compartment under the hood. In any case, before making a replacement, you need to look at the instruction manual.
Replacing this part is relatively easy. The on-board computer registers errors such as P0340, PO342, PO343.
Also interesting: Description of signs and symbols on the Niva instrument panel, panel repair, combination diagram
Error P0340 appears on the self-diagnosis system if the crankshaft rotates. Code P0342 - the camshaft electrical circuit shows a low signal and code P0343, accordingly, shows a high signal. It is necessary to check the wiring - for this purpose it is good to use an oscilloscope or other testing device.
If the power supply is not interrupted, then the problem is in this node. Broken wiring may cause the sensor to not see the camshaft. Mechanical specialists, even if the sensor is in good working order, still recommend changing it every 4-5 years - such prevention will protect you from breakdowns and accidents, especially since the part is very cheap despite its importance.
The camshaft position sensor (hereinafter referred to as CPS) is designed to determine the position of the timing belt in relation to the crankshaft. The data that comes from the DPRV is used by the electronic control unit to adjust the injection frequency and restore the ignition angle.
You can often hear that drivers call DPRV a Hall sensor. Another name is quite acceptable, since the operation of the DPRV is based on the Hall effect. This is where the corresponding name came from.
Currently, the production of automobiles has completely abandoned the use of speed measurement sensors consisting of mechanical parts. Modern devices are based on the use of electromagnetic sensors that work due to the effect discovered by the physicist Hall and which received the same name.
The speed of a car has long been measured not mechanically, but electronically. This measurement is based on the principle of the Hall effect, using a special device. The Chevrolet Niva is equipped with the same electronic device, which accurately reads the speed developed by the car.
Each car has a speedometer in its design, which displays the speed of movement of the vehicle. But the speedometer is only a display of useful information; the main function of indicating the speed of movement is performed by the sensor. If it malfunctions, further travel becomes a pain, especially on city highways, where it is necessary to maintain the speed of movement.
Therefore, the main function of the device is to read information about the movement of the vehicle. Indirect functions of the device include:
- possibility of rational fuel consumption;
- regulation of traffic according to road markings and signs;
- makes it possible to regulate speed in order to avoid fines.
It is possible to drive a car without this part, but it is quite difficult.
There are two types of speed sensors:
- Mechanical or optoelectronic. It works by transmitting the number of revolutions of the box shaft using a cable.
- Electronic or cableless. Actually, that’s what we’ll be talking about.
Aloha, brothers. My car is no longer new, it was produced in 2003 and breakdowns have now begun to occur periodically. Not long ago, the speedometer started acting up - sometimes it works, sometimes it doesn’t, sometimes when the ignition is turned on, the speedometer needle jumps like crazy. On top of that, constant engine errors began to appear.
In general, yesterday the speedometer completely stopped working, the needle froze at zero. The speed had to be determined by eye by the gear and the number of revolutions)) But the mileage did not increase)) It’s still not comfortable to drive without a speedometer and I had to use my hands again. I googled a little, understood the problem and went to “execute”.
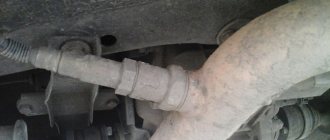
I don’t have a hole, I had to drive the front end onto bricks, lay down a camping rug and climb down. There is mud below, everything falls into your eyes.
It was necessary to find the speed sensor and check what was there and how. It is located on the RK, there are 3 wires going to it, a 3-pin connection connector.
As it turned out, everything there was wrapped in electrical tape, and it was PVC (regular) on top, and rag underneath. Ordinary electrical tape cracked over time, water penetrated inside, saturated the rag electrical tape and the wires began to short-circuit with each other. That’s why periodic errors arose (yellow icon on the panel), I got tired of constantly removing the terminal to reset the error.
In short, to begin with, we tore off the old electrical tape from both the wires and the connector itself (the connector itself was attached to the speed sensor in exactly the same way).
While they were tearing off the old electrical tape, the wires fell out on their own; apparently they had simply fallen apart from the moisture. This was the problem - the wires, the speed sensor itself was working. As I googled, sensors break extremely rarely.
I cleaned the wires, re-wrapped them well, and it was time to plug the connector into the speed sensor. And here’s the problem - the connector does not fit completely into the sensor; there are latches there that should snap into place. That's why the connector was apparently taped together with electrical tape. Not bad, by the way, only I drove “with electrical tape” for 2 years, and how long did the previous owner drive like that))
In general, the speedometer worked, the errors disappeared - the problem was solved. Although it is better, of course, to buy a new normal connector for the wires for normal contact. And it’s even better to have full underbody protection to protect both the RK and all sorts of sensors from water, gravel and other damage that inevitably arise when driving through mud and off-road.
Modern cars are packed with sensors like a Christmas turkey with apples. Moreover, all or almost all sensors are interdependent. If the speedometer on our Niva Chevrolet does not work, it may happen that the electronic control unit also receives incorrect impulses. And this affects engine performance, gasoline consumption, and power. A non-working speedometer is not just an inconvenience, it is a reason to look at the reasons and restore the system’s functionality.
The ECU uses information from the mass air flow sensor to determine the duration of the injector opening pulse.
Structurally, the 2123 car is similar in design to its predecessor, the Niva 2121. But it is devoid of those shortcomings that appeared during the mass operation of this car. Thus, the new model lost the tap on the stove. For the outflow of coolant, a special hole in the thermostat is now used, which is ensured by the operation of a special damper system.
Also interesting: Chevrolet Niva rear door does not open
The main difference is a fundamentally new thermostat design.
How do Niva Chevrolet cooling fans work and through which fuses and relays are they connected?
The designers of the Chevrolet Niva used a dual fan unit in the cooling system. This slightly complicated the connection diagram, but sharply increased the efficiency of radiator airflow. The fans are driven by 12-volt DC synchronous motors with a permanent magnet inductor. Electric motors have a closed, non-demountable design and do not require maintenance.
The power of each electric motor is 110 W. The fan assembly draws 18 amps.
The fans are turned on one by one using an electromagnetic relay controlled by the on-board computer. When the coolant heats up above 99 degrees, the electric fan located closer to the engine air intake starts. The switch-on temperature of the second impeller is 101 degrees. The fan connection diagram is shown below.
The fan power system includes three relays and a resistor, which, if necessary, provides a reduced rotation speed of the first motor. Power is supplied from the battery through fuses that save the wiring and battery in the event of a short circuit. Control signals come from pins 29 and 68 of the motor controller.
Consecutive switching on and off of engines reduces the load on the on-board electrical network. In most cases, it is possible to normalize the temperature only with the help of the first fan. This is especially useful when driving at night, when headlights and side lights put a lot of stress on the generator.
The ability to force fans on can be useful when driving off-road or in city traffic jams. However, the designers of the Chevrolet Niva did not provide the car with this function. It can be implemented independently or at a service station. It is necessary to connect backup relays parallel to the switching contacts and power them from a button installed in the car interior.
It is useful to equip the Chevrolet Niva with a switch that forcibly turns off the fan motors. This will protect their blades when fording water obstacles.
The additional block contains not only fuses. There are also three electromagnetic relays that control the operation of the electric motors of the cooling system. Their control circuits are powered from the ignition switch and on-board controller outputs, and the power current comes from the battery through fuses.
The relay operates as follows:
- Voltage is applied to the control terminals.
- Current passes through the inductor, resulting in an electromagnetic field.
- The steel contacts attract and close.
- The current passing through the relay drives the electric motor.
Also interesting: Generator Niva 2121, 21213, 21214: which one is installed, replacement
As soon as the control voltage disappears, the contacts open under the influence of the spring and the fan stops.
You can check the functionality of the relay in three ways:
- Replace the relay with a known working one and test the operation of the system.
- With the engine off and the ignition on, disconnect the temperature sensor connector. You should hear the relay click.
- Dismantle and test the output contacts with a multimeter, applying voltage to the terminals of the induction coil.
The control unit receives information about the antifreeze temperature from a temperature sensor. It is a resistor whose resistance changes with heating and cooling: from 1.3-1.8 kOhm at 30℃ to 155-196 Ohm at 90℃. You can check its performance using an ohmmeter and a thermometer. To do this, you need to remove the part, immerse it in water and measure the resistance at different temperatures.
The sensor is located on the engine head in the area of the exhaust pipe of the cooling system. You can unscrew it with a socket or socket wrench.
The cooling fan is powered by a constant voltage of 12 V from the battery. They turn on when two sensors located in the engine reach a certain temperature. So, when the first sensor reaches a temperature of 99 degrees Celsius, it is triggered, which causes the first fan to turn on.
It has two rotation speed positions - high and low rotation speeds. When the second sensor reaches a value of 101 degrees, then, accordingly, the second device turns on. Thus, the cooling devices of the Chevrolet Niva engine are briefly activated. But we are interested in what role such a small device as a relay, of which there are three on the Chevrolet Niva, plays in this process.
Replacing the RV position sensor
If during the inspection it turns out that the camshaft position sensor itself has failed, then it must be replaced. As a rule, these units are non-repairable, since their body is sealed and cannot be disassembled. The sensor is inexpensive, and the replacement procedure is simple, and even a novice car enthusiast can handle it.
The sensor replacement algorithm is as follows:
- With the engine not running, disconnect the negative terminal from the battery.
- Disconnect the “chip” from the camshaft position sensor (as when checking).
- Depending on the vehicle model, it is necessary to remove parts that prevent access to the sensor. For example, on modern cars like the Lada Vesta, it is necessary to remove the bracket for auxiliary units.
- Using a wrench, unscrew one or two mounting bolts, depending on the type of fastening. The size of the wrench can be different, usually for VAZs it is a 10 mm wrench.
- After dismantling the mount, you must similarly remove the sensor from its seat.
- Installing a new sensor is performed in reverse order.
- Connect the negative terminal to the battery.
Idle move
The Chevrolet Niva idle speed sensor ensures the supply of air to the engine during idling. When a signal is received by the ECU, the sensor moves the valve, changing the flow hole in the air valve. If it fails, it will not be possible to repair it, since it has a non-demountable design.
To replace it, you need to prepare a thirteen socket wrench, pliers and a Phillips screwdriver and do the following:
- Unscrew the mounting bolts and remove the housing from the throttle valve
- Disconnect the wiring connector of the engine regulator
- Unscrew a couple of screws on the throttle body
- Removing the regulator
- Remove the O-ring from the existing hole.
To summarize, we can conclude that the failure of any of the above elements can seriously affect the operation of the car, therefore, in the event of a malfunction, you need to replace a new part as soon as possible. All replacement work can be carried out independently.
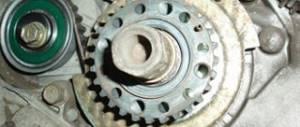
Meter design and location
The operating principle of the DPRV is based on the Hall effect - the sensor reacts to the approach of a metal mass by changing the voltage on the signal wire. The design of the device is similar to another element - the crankshaft position detector. Inside the plastic case there is a coil where the 12 V on-board voltage is constantly supplied.
The meter is installed on the engine cylinder head in close proximity to the camshaft. The latter is equipped with a special plate or gear, whose rotation affects the DPRV. The work algorithm looks like this:
- After turning on the ignition and starting the engine, a supply voltage of 12 V is supplied to the sensor. Through the third signal wire, the element supplies the controller with a voltage of 90–95% of the original one.
- When the protrusion on the rotating part of the camshaft passes next to the DPRV housing, the voltage at the signal contact drops to 0.2–0.4 volts, depending on the design of the device and the vehicle model.
- When the voltage drops, the electronic unit clearly “sees” the valve timing, promptly supplies the fuel mixture to the engine cylinders and directs the spark discharge to the desired spark plug.
When the meter is faulty, the electronics are unable to control the operation of the gas distribution mechanism. In such cases, the control unit goes into error and is guided by the signals of other meters. Spark generation and fuel supply are adjusted according to the programmed program, which affects the operation of the power unit.
Characteristic symptoms of the problem
Practice shows that a malfunction of the camshaft position sensor does not lead to engine failure and immobilization of the vehicle. The engine continues to operate with some deviations that interfere with the normal operation of the car. Symptoms of DPRV failure are quite vague and similar to problems with other measuring elements:
- Unstable engine operation at idle and while driving.
- Instead of dynamic acceleration, after pressing the gas pedal, there is a series of small jerks and a sluggish increase in speed.
- The power of the power unit decreases. The effect becomes noticeable when the load increases - on a hill, sharp acceleration, while towing a trailer.
- The Check Engine light on the dashboard does not always come on. But many drivers note that if the meter is faulty, the display flashes after the crankshaft speed increases to 3000 rpm or more.
- Fuel consumption is naturally increasing.
If the measuring element is faulty, the control unit prepares and supplies an enriched air-fuel mixture to the cylinders. This results in an increase in gasoline consumption and unstable idling. Jerks and drops in power are caused by untimely supply of a spark - the controller “does not see” the end of the compression stroke in the cylinder and cannot clearly determine the ignition timing.
On various car models, additional symptoms of a malfunctioning camshaft sensor are noted:
- the engine suddenly stalls while driving, but starts without problems;
- cold starting of the engine becomes difficult;
- on cars equipped with a robotic gearbox, difficulties arise with automatic gear shifting;
- the engine “troits” - skipping ignition cycles is heard, sometimes popping sounds are observed in the exhaust manifold;
- On some cars, the power plant fails due to lack of sparking.
Driving with a broken air pressure sensor is acceptable for a short period. Jerking, rich fuel mixture and electronic errors accelerate the wear of spark plugs and engine parts. After detecting the listed symptoms, you should send the car for diagnostics or find the source of the problem yourself.
Description of the camshaft sensor on Niva Chevrolet
Where is it located: in engines with a gasoline power system, the DPRV is installed on the camshaft pulley. In an engine with a diesel power system, the control system is somewhat different. Where the upper and lower position of the piston in each cylinder is fixed.
Read more: Peugeot 307 door locks
On engines with a carburetor fuel system, the role of the DPRV is played by the distributor. The design of the injector is different, the system was parallelized, injection and ignition were done in pairs.
During systematic operation, the household equipment wears out and becomes unusable. The process of self-replacement is not at all difficult. The task is feasible for a car enthusiast without technical equipment maintenance skills.
Repeated restart of the engine is the first sign of a malfunction of the DH (DPRV).
To determine which cylinder is on stroke, the electronic engine control unit controls the position of the camshaft using DPRV (SMR)
Data from the sensor is extremely important for setting and dosing fuel, sparks in the combustion chamber, and injectors. The camshaft sensor directly affects fuel consumption, acceleration dynamics, and the amount of emissions in the exhaust gases.
In cars, including Niva Chevrolet, magnetic and Hall effect sensors are preinstalled. Both types are designed to read and transmit data to the electronic engine control unit.
The latter, based on the analysis of indicators, adjusts the fuel supply, ignition timing, and spark frequency.
- The magnetic controller produces its own alternating current. The design has two contacts;
- The Hall effect controller has one contact, powered from a third-party source.
Signs of DPRV malfunction:
- Unstable engine operation at idle speed;
- After stopping, the engine starts again;
- Increased fuel consumption;
- Power reduction;
- Passive acceleration dynamics;
- On the dashboard there are system error indicators (see photo);
- The gearbox can be locked in one position until it comes to a complete stop and the ignition is turned off. Single or cyclic action;
- The car moves jerkily;
- The maximum speed of the car is limited to 65 – 85 km/h;
- Periodically the engine stalls;
- Misfires when turning on the ignition;
- Inability to restart the engine.
Frequent causes of premature wear of the controller:
- Natural factor due to long-term use;
- Mechanical damage to the controller housing;
- Open circuit;
- Short circuit of contacts;
- Sensor breakage due to impact, accident;
- Malfunctions of the electronic engine control unit.
| Name / catalog article | Price in rubles |
| Automega 150097810 | From 800 |
| JP group 1191400200 | From 800 |
| EPS 1953071 | From 800 |
| Delphi SS10814 | From 800 |
| Meyle 3148000038 | From 800 |
Read more: The caliper does not come off, what should I do?