How to remove the front bumper of Lada Kalina. DIY bumper replacement
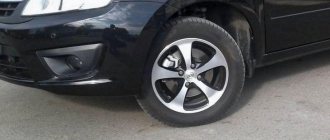
The Kalina plastic bumper is attached to the body using screws and self-tapping screws. Some screws have a good “camouflage”, so when removing the bumper it is important to be careful to prevent any damage. In the photos below you can see the places where the bumper is attached to the body. The average time spent on this procedure is 30-40 minutes.
Required tools:
- crosshead screwdriver;
- flat screwdriver;
- key to "10".
Instructions for removing the front bumper Lada Kalina
- Open the hood, unscrew the 3 mounting bolts that secure the decorative radiator grille. At the same time, try not to harm the paintwork. Place the screws aside so they don't get lost.
- Remove the radiator grille, thereby providing access to the places where the front bumper mounts are located. Unscrew a couple of bolts and a couple of screws.
How to remove the front bumper of Lada Kalina. DIY bumper replacement
- Remove the 2 screws that secure the bottom grille. Then you can remove the grille.
How to remove the front bumper of Lada Kalina. DIY bumper replacement
How to remove the front bumper of Lada Kalina. DIY bumper replacement
How to remove the front bumper of Lada Kalina. DIY bumper replacement
- There is now access to a couple more bumper bolts located below the grille (as in the photo).
- Remove the 3 screws that secure the bumper to the car body. They are located below and can be easily felt by hand. Unscrew the 2 screws securing the bumper to the fender liner.
How to remove the front bumper of Lada Kalina. DIY bumper replacement
How to remove the front bumper of Lada Kalina. DIY bumper replacement
Reasons for removing and replacing bumpers
During operation, these body cladding elements are subject to numerous mechanical impacts, which causes the paintwork of the products to deteriorate, chips and even cracks to appear. Not to mention impacts in accidents or other circumstances.
The front body kit of the Lada Kalina suffers especially badly, as dirt from under the wheels and stones from oncoming cars get into it. Damaged paintwork can be restored, and broken plastic can be soldered, but sometimes it’s easier to replace the bumper, given that you can do it yourself.
The reason for removing and replacing the facing elements of the VAZ 1118 may be other circumstances:
- if it is possible to repair and paint a broken part, it must be removed from the car;
- when you need to carry out other types of body repairs or change headlights (unit - headlights);
- The owner of the car does not like the stock bumpers and wants to do a little tuning - install elements of a different shape.
Also check out
- How to replace the windshield wiper drive and wiper motor of a Lada Kalina with your own hands
- Algorithm for replacing silent blocks of the front suspension of a VAZ 2109
- Instructions for replacing the VAZ 2115 wheel bearing at home
How to remove the front bumper of Lada Kalina. DIY bumper replacement
- To remove the front bumper of the Lada Kalina, you need to unscrew 4 more screws (2 on the left and 2 on the right) located in the wheel arches. For convenience, before unscrewing, you need to turn the steering wheel to the right and left.
How to remove the front bumper of Lada Kalina. DIY bumper replacement
Remove the front bumper of the Lada Kalina by prying it with your hands on both sides.
How to remove the front bumper of Lada Kalina. DIY bumper replacement
How to remove the front bumper of Lada Kalina. DIY bumper replacement
How to remove the front bumper of Lada Kalina. DIY bumper replacement
After this, you can repair the bumper or simply install a new one.
Removing and attaching rear body kits
To remove the rear bumper of the first generation model, the tool kit must be supplemented with a short Phillips screwdriver, since it is impossible to insert a long one between the tire and the wheel arch, and turning it from the side is inconvenient. In addition, TORX key screws (the so-called sprocket) are used for fastening to the fender liner.
Later generations of hatchback and station wagon cars are even more difficult to disassemble, because the rear lights have to be removed to remove the body kit. The primary fastening of the elements is also provided with latches, so they are removed in the same way as the front bumper. But due to the difference in design, disassembly must be considered separately.
To install the rear body kit, you must repeat the presented algorithm in reverse order.
Removing the rear element of Kalina 1
Disassembly work can be carried out without an inspection hole, since the lower bolts are located close to the overhang and access to them is not difficult. The procedure is as follows:
- Unscrew the 3 screws located at the rear of the wheel arch. Two of them hold the mudguard, the third is located a little higher.
- At the back of the mudguard there is 1 more bolt with a 10 mm head, unscrew it.
- Using a 10 mm wrench, remove the 3 bolts securing the bumper from the bottom. Two of them stand in the middle, the third is a little to the left (in the direction of travel).
- Open the trunk lid and unscrew the 4 screws of the upper body kit mounting.
The main thing is to carefully pull the edge of the part and release the latches
Then proceed in the same way as with the front element. Pull the side of the part, unlocking the plastic latches, and carefully remove it with an assistant. If you need to get to the body, then unscrew 3 more bolts and remove the plastic bumper reinforcement.
Places where fasteners are located
One screw is hidden on the back side of the mudguard. Access to the 4 upper bolts is always open. There are 3 self-tapping screws near the wheel, two of them are TORX keys. The part is screwed from below with 3 bolts.
Differences in disassembling Kalina 2
To remove the rear bumper of a station wagon or hatchback, you will need to open access to the bolts that are hidden under the bottom of the lights, for which the latter will have to be removed. Their fastening consists of bolts with 8 mm socket heads located behind the rubber seal of the trunk lid. The bolts need to be unscrewed, and the lights need to be pulled out, disconnecting all the wires.
2 of the 8 bolts are hidden under the taillights
Removing the body kit from the Lada Kalina 2 hatchback body is carried out in the following order:
- From below, the part is screwed to the body with a pair of bolts (located in the middle) and two self-tapping screws (at the edges). Loosen and unscrew them.
- Under the wheel arches, unscrew 3 screws (TORX keys T10 and T20) and remove the rubber retainer from the mudguard.
In addition to 3 TORX screws, there is a plug - Unscrew the 8 top mounting bolts.
Six of them are located near the threshold of the luggage compartment, two more are in the sockets of the removed lights. Location of the lower bolts On the hatchback, a pair of bolts are in the center, and a pair of screws are on the sides - Now unlock the latches and remove the bumper.
The difference between disassembling Kalina 2 in a station wagon is that the element is attached to the body from below with 3 bolts, but there are no side screws. In other places the fastening is the same - 3 screws under the arches and 8 bolts around the luggage opening.
In a station wagon, the body kit is screwed on from below with 3 bolts
Removing and installing the front body kit
Since the bumper of the Lada Kalina car is attached in many places, including from below, it is most convenient to carry out work in the inspection hole. If necessary, you can do it without it, but then you will have to look for the lower screws by touch or lie under the car to see them.
Advice. Change body parts with an assistant supporting one side of the body kit while you remove the other. Otherwise, the element may fall and hit the concrete, causing part of the paintwork to fly off. The services of an assistant will also be needed when installing a new part.
The list of tools for disassembly is quite short:
- Phillips-head screwdrivers of different lengths;
- 10 mm socket wrench or socket;
- extension cord and ratchet wrench.
Learn how to remove the rear bumper on a Lada Kalina.
If you want to remove the rear bumper on the Lada Kalina and change it to the sport version, you will also need a 10 mm wrench and a Phillips screwdriver.
- Again, it’s better to jack up the car and even remove the rear wheels to make it easier to work with the bolts.
- After the left rear wheel is removed, use a wrench to unscrew the 3 screws that secure the wheel mudguard.
- Next, remove the mudguard from the body and separate the other rear mudguard in the same way. We have access to other screws that secure the rear bumper to Kalina and there are 2 of them on both sides.
- Unscrew them using a Phillips screwdriver,
- Using a 10 mm socket wrench, unscrew the 2 screws from the bottom of the bumper mount. The same key fits the upper screws, which we also unscrew.
- Next, picking up the bumper on both sides, remove it from the hooks and easily remove it.
- Don’t forget about the amplifier, which is located under the bumper; we also remove it if necessary (to do this, unscrew the 3 securing nuts with a 10mm wrench).
That's all, you can now install a sport bumper or any other. Installation occurs in reverse order.
However, there are some deviations in operation, which are usually associated with the features of a non-original tuning bumper, when it does not match the parameters very well.
