Cars admin26.02.2020
Car enthusiasts are often interested in why the trunk does not open with a button on the VAZ 2110 and 2112. For modern cars, opening the trunk with a button is quite common. Even on models that were not originally equipped with such an option, it can be found. Usually, the button is installed simultaneously with the installation of the central locking or alarm system.
In the second case, the trunk lock is integrated with the security system. Failure of the trunk lock is quite an unpleasant phenomenon. For example, if necessary, you will not be able to get a spare tire. Therefore, it is important to fix the problem as quickly as possible.
Possible causes of the problem
Why doesn't the trunk open from the button on the VAZ 2110 and 2112? Let's start with the fact that the lock drive is electric, so the problem often turns out to be related to this particular system of the car. We list the main causes of malfunctions:
- Motor malfunction;
- Broken wiring;
- Problem with key fob or button;
- Weak battery.
There are several reasons, each of them has its own symptoms and characteristics. Below we will look at the main nuances of diagnosing a lock.
VAZ 2110 wiring diagram for VAZ trunk button
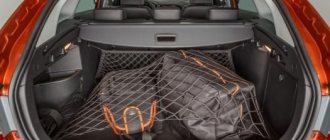
Automatic trunk opening/closing
Automatic trunk closing using ESP in garage conditions
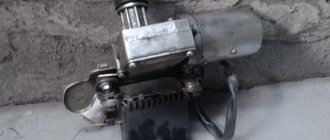
- A set of two electric windows (ESP), in this example, price 3000 rubles;
- Window closing module DenUp-RWC702m. Octopus, price 500 rubles;
- Trunk opening button (21100-3710620), price 50 rub.
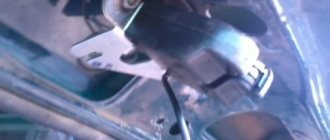
You can buy everything you need in online stores. With the help of engineering ingenuity and imagination, two ESPs were installed in the Priora’s trunk and connected using a simple circuit. The rear end of the ESP rail is screwed to the crossbar, which is behind the backrest; the shelf rests on it. On the ESP there is a bracket with a welded nut, the front end is screwed to the beam to which the rear window is glued. A slot is made in it on the interior side so that an M6 nut can fit through, and it can be held with a key. Why two ESPs and not one? In general, one ESP can hardly close the trunk, but when closing, the lid becomes skewed. Two ESPs perform their work without difficulty, and the absence of distortion makes the system more reliable. The only thing is that you may need to slightly adjust the position of the trunk lock. As a result, when you press the trunk release button in the cabin or on the remote control, the trunk lid rises. The second button is installed on the trunk lid in a decorative element that covers the actuator. When you press it, the trunk lid closes automatically. Connection diagram for automatically closing the trunk: Video of auto closing/opening the trunk:
Button instead of trunk lock
Autostart of VAZ engine through an additional channel
| The severe winter cold has already passed, and I finally got around to building a device with my own hands to start the car from the alarm key fob (using an additional channel) and, leaving the house, get into a warm, warm car, without wasting ten minutes shaking in cold car before you start driving your favorite car. |
What do you need to start the engine using the alarm key fob? channel
Let's start with what we need to build this miracle:
|
Now, as much as I can describe in detail, I’ll chew on what and how I did:
- — the first thing to do is cut off the central yellow wire from the pads, because the relay has only 4 contacts, and there are 5 in the block. And the extra wires will only get in the way and confuse.
- — we fasten 4 pads with electrical tape in a row so that they do not dangle when soldering.
- — we cut the wires of the pads (personally, I shortened them by 2/3) to make it easier to solder and make the launch unit more compact.
Motor malfunction
Let's say the key fob or button works as usual, but the trunk does not open. Most likely the problem is in the electric lock motor. First you need to open the cover to get to the motor. To do this, you will have to remove the back of the rear sofa and, reaching for the lever, open the trunk from the passenger compartment. You can do without this if you did not remove the cylinder when installing the electric lock. In this case, you can get by with a simple key.
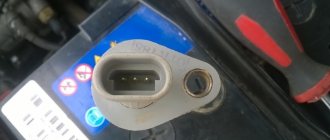
We remove the motor. It should be checked. To do this, we apply a voltage of 12 V to it. A working motor will spin, if not, then it is better to buy a new one. If you wish, you can try to fix it. There are only 2 reasons for the failure:
- Winding short circuit;
- Burnt out resistance.
A shorted winding cannot be restored. But the resistance can be easily replaced. To do this, you need to disassemble the motor and replace the burnt out resistance. It is best to use a copper plate.
Reviews
| № | Positive |
| 1. | Vasily: I bought a Lada Granta Liftback in the “Standard” configuration, the mechanical button is not preinstalled. Since I'm very familiar with electricians, I installed it myself in half an hour. Now everything is working properly, there are no complaints. |
| 2. | Vladislav: my garage comrades recommended connecting an activation button. I first looked at the diagram and bought the necessary spare parts. I installed it a month ago with a friend. My advice to car enthusiasts. |
| 3. | Ivan: I knew from the very beginning that there was no button in the Norma configuration. After the purchase, I immediately installed it at the service station. The guys completed it in half an hour and gave a guarantee. It works properly and has never failed. |
| 4. | Vladimir: installed a mechanical button on the trunk lid, now you don’t need to turn off the engine again or pull the core. The process is not complicated, the diagram is intuitive. |
| 5. | Ignat: last month I installed the “activator”, I didn’t go to the service station, I got by with the help of a friend. It works properly, no complaints. |
| Negative | |
| 1. | Kirill: After installation, the activator worked for two months, after which it was replaced with a new one. Despite the originality of the part, the workmanship is poor. I do not recommend domestic electric locks. |
| 2. | Victor: I regretted installing the electric drive and flew within three months. This is despite the fact that there was moderate exploitation. I can't recommend it. |
| 3. | Vladimir: after a year of use, the limiter broke down, replaced it with a new one. I don't know how long it will last. |
In the Lada Granta “Norma” and “Standard” trim levels, a mechanical button for activating the trunk lid is missing. Provided you follow the installation algorithm and purchase original consumables and spare parts, the service life of the relay will exceed 5 years.
Broken wiring
This is perhaps the most common malfunction on self-installed electric locks. The reason is an unsuccessfully selected place for pulling the wires. As a result, they are damaged, which leads to a short circuit or complete breakage.
Diagnostics can be divided into 2 parts:
- Checking resistance. All sections of the chain are checked for damage. If this indicator is close to infinity, then somewhere the wire has broken off. You can also check this by measuring the voltage;
- Carefully inspect the wires for damage to the insulation. This usually leads to short circuits and current leakage to the housing, which makes the lock impossible to operate.
To check, you will need a multimeter or a tester made from a regular 12 V light bulb. Pay attention to the contacts. Often they oxidize, which does not allow current to flow normally. It is recommended to regularly check the status of the contacts. Be sure to clean them twice a year and lubricate them with a special compound. In many cases, it is poor contact that causes the lock to fail.
Problems with the trunk release button on a Chevrolet Cruze
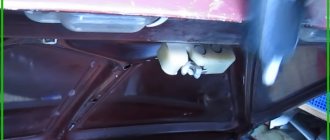
The trunk opening button is located on the outside of the trunk lid. It is located in the panel on which the license plate lamps are mounted. During operation, there is constant exposure to an aggressive external environment. As a result:
- The contacts located inside the key become oxidized. The button stops responding to the driver's attempts to open the trunk.
- The ingress of water causes spontaneous closure of the contacts. As a result, the trunk lid opens at any time without the driver's knowledge.
The unfortunate placement of the button has led to many Chevrolet Cruze car owners classifying it as a consumable item. The key has serious problems with the tightness of the unit, so visiting a car wash can cause it to fail.
Chevrolet Cruze trunk button: replacement, repair. Button output to the salon
During vehicle operation, breakdowns or unforeseen incidents with the vehicle’s equipment are common. One of these unpleasant cases is the breakdown of the trunk button of a Chevrolet Cruze car.
Below in the article possible breakdowns of the unit and ways to fix it are indicated.
Reasons why the button does not work
The trunk release button on the Chevrolet Cruze model breaks due to its extremely poor location. An engineering miscalculation in the form of installing an element on the outside of the car exposes the part to constant exposure to an aggressive environment.
During operation, the digger often gets exposed to water, dirt or snow. This leads to rapid destruction of the seals. Sometimes it happens that a trip to the car wash can also lead to a breakdown.
The main reasons for node failure are the following factors:
- Oxidation of the contact group located inside the key. As a result, the element’s response to driver manipulations deteriorates.
- Short circuit of contact pairs. If liquid or dirt gets in, the working contacts may inadvertently close. In the future, for this reason, the unit may be triggered randomly and the trunk will open.
The basis for such problems is two questions:
- bad location;
- mediocre sealing of the unit.
Replacing the trunk release button
The replacement procedure is applied in case of failure or revision. Sometimes repairing a broken key is limited only to replacing it.
The process itself is technically simple. To do this you will need to perform the following steps:
- Use the key to open the trunk lid.
- Next you need to remove the fasteners from the casing. There are a total of 12 plastic elements, which are very capricious when applying force. They may break. Therefore, you need to remove the fasteners very carefully.
- The protective cap of the lock is removed from the end of the trunk lid. The procedure is performed extremely carefully - the plastic is delicate and is afraid of sudden movements.
- The next step is to dismantle the casing.
- Next, using a “10” key, you need to unscrew the fastenings of the license plate illumination mounting plate. The same part has a button on it.
- The key terminal block is carefully disconnected.
- Remove the rubber seal for the electrical wiring from the cover.
- Remove the decorative strip. The element is fastened with two plastic latches. The procedure can be easily accomplished using a very thin screwdriver or similar tool. It is recommended to exercise great care during work, as there is a possibility of damage to the paintwork at the point of contact.
- Replace old elements with new ones. Some experts recommend upgrading moisture protection by applying a layer of sealant.
Assembly must be done in reverse order.
Articles and cost of the original button and analogues
There are several varieties and analogues of the trunk release button for the Chevrolet Cruze sedan. This state of affairs is due to the high cost of the original spare part, which starts from 2000 rubles. Therefore, many amateurs are trying to find analogues.
Below are the original and analogue articles:
Article Original / Analog
| 95107229 | original |
| 9012141 | analogue |
| 95107229NM | analogue |
| AK95107229 | analogue |
| BU95107229DW | analogue |
You can buy an analogue for a sedan car in Moscow at a price of 500 to 700 rubles.
The prevalence of the solution is due to the similarity of the design and lower cost. However, the original has much better moisture protection and reliability.
Required Tools
Due to the ease of dismantling, a minimum set of tools is required to complete the procedure.
- Flathead screwdriver or similar tool. It is also possible to use special keys to remove the clips.
- Regular open-end wrench number 10.
Such a simple set of devices is sufficient for effective dismantling of the product.
Repair and modification of a faulty trunk button
Sometimes it happens that the lid opens when there is a signal from the key fob, but refuses to obey when you press the trunk button. In this case, it may be possible not to immediately change the part, but to fix the problem yourself.
Repairing the trunk button yourself is quite simple. To do this, you don’t need to take the car to a service station, where specialists will do the same for a significant fee.
To quickly repair your car, you must follow these instructions:
- Using a standard tool, the key itself is removed.
- Next, you need to split the body into two parts. The structure is disassembled into two parts using a blunt knife or a thin screwdriver. The halves are held together with plastic clips, so it is advisable to exercise caution.
- The non-working button is removed from the disassembled case and replaced with a new one. The element itself can be purchased at a regular electronics store or market. The cost is approximately 40–50 rubles.
- Two wires are soldered to the new part by analogy with the original.
- Using silicone sealant, you need to fix the product inside the case.
Repairing the trunk release button
If the trunk is opened normally using the key fob, but the car does not respond to pressing the button, then in addition to replacing the key, it can be repaired. To do this, you must use the instructions below.
- The trunk lid opening button itself is dismantled.
- Using a screwdriver or a blunt knife, the key body needs to be disassembled in half, as in the photo below.
- You need to pull the key out of the case. It must be replaced. You can buy a new one at any electronics store.
- Solder two wires.
- Secure the button in the housing using sealant.
Controlling the trunk opening from the passenger compartment: installation of additional buttons.
I decided to change the operation of the standard opening button located on the trunk to suit my preferences: now my trunk can be opened from the passenger compartment, and the standard external button has become switchable. Opening the trunk using the standard Ford key fob has not changed, it works as before.
There are a huge number of reasons for the alteration, for example. I’m sitting in a car, the door is open, I’m breathing air, a bad person won’t open the trunk now, well, I don’t want to close the central lock (the button on the dashboard) every time in parking lots while sitting in the car. The outer button is often dirty, especially in the off-season. Etc.
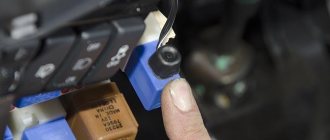
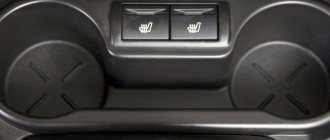
I installed one button and one switch in the cabin on the lower plastic lining of the left front pillar, where the hood opening handle is located (see photo):
1) When you press the button with the “open trunk” symbol, the trunk opens itself and smoothly rises up to the end (I have a sedan, on other body types it may not rise all the way?). This button now works the same way as the standard button on the outside of the trunk lid used to, so naturally, if you locked yourself in the car by pressing the lock button in the center of the dashboard, then my button won’t work either. It is low-current and sends a request to the BCM module to open the trunk, but does not itself control the power circuit of the lock. The button is from a VAZ2110, the price is 55 rubles. 2) The switch serves to block the operation of only the standard external opening button on the trunk lid. In position “0” the external button is completely separated from the control circuit. Well, in “1”, naturally, the external button works as always. The switch was purchased at a car store for 50 rubles.
The specifics of dismantling the trim and removing the glove compartment are described in detail in specialized topics; I will only cite the subtle points.
To remove the left pillar trim, pry off the plug on the hood opening handle with TWO WIDE, VERY SHARP knives. We insert two middle slotted responses into the resulting hole and press out 2 latches on the sleeve and at the same time pull the hood opening handle towards you. Oops, it's taken. We pry up the left side trim on the dashboard and remove it, pull out the pillar trim we need, it is held on by latches, and disengage it from the sill trim below.
You need to install your buttons approximately the same way as in the photo, then there is no risk of them resting on a metal stand or anywhere else. To remove the glove compartment, unscrew 5 TORX25 screws, after first prying and removing the right side trim on the dashboard. Pull out the glove compartment halfway, then remove the glove compartment light bulb module, pull out the plastic box (by pressing the 2 latches on the top) that contains the USB connector, then unplug the USB connector itself (2 latches on the sides). Remove the entire glove compartment.
We need connector C2 - this is the top left connector of the BCM module (if you look directly at the module from the passenger seat). We remove the clip that holds the wiring harness from our C2 connector. We carefully remove the Ford paper labels on the harness (I later glued them back, everything turned out just like the factory one). We remove the black electrical tape from the harness, you need to free about 30cm of the harness, the more, the easier it will be to work with the wires later. We are looking for a thin (0.35mm2) brown wire, there is only one there, you won’t confuse it. We are looking for earth: green-blue of medium thickness (0.5mm2), there seem to be even two of them identical, take any, just don’t confuse them with green-violet, it is thinner (0.35mm2). (I was confused at first) If in doubt, find the big blue one among the neighboring wires and remember what the color blue is, not purple!
Take the wires for pulling from the buttons to the VSM 2.5 meters long, this is the end-to-end length. The cross-section can be small, 0.2-0.5 mm2, there is a low current. Wrap our wires along the entire length with black electrical tape so that it is beautiful and unnoticeable. Immediately at the buttons, I secured the wires and their connectors with zip ties to the plastic from the inside. I stretched it from the pillar facing immediately downwards, away from the hood opening handle, then in front under the floor under the driver’s feet, then at the very, very bottom of the center console (pulled it with a wire), much below the radio and climate control unit (for example, where the controller is located on the VAZ2110 ECU, as if under it), then comes out under the VSM and along the standard harness to connector C2. Secure it with ties everywhere along the way, to standard elements and other harnesses. Then hide our solders or twists (don’t forget about the electrical tape!) inside between the wires of the standard harness at the VSM, wrap everything with black electrical tape, as it was, and glue paper Ford labels onto the harness as it was. We put the standard clip on the harness as it was.
It took me more than 3 hours to do everything. What else could you do in the car?
Removing the trunk button of a Chevrolet Cruze
- Open the hood and remove the trim
- We unscrew the four nuts, squeeze out the two plastic clips and remove the panel and disconnect the central wire
- Now, carefully, so as not to break the wires, remove the trunk release button
Why doesn't the Chevrolet Cruze trunk button work?
Repairing the trunk button
- After the button has been removed from the panel, it must be disassembled. To do this, remove the rubber cover and take it out.
Why doesn't the Chevrolet Cruze trunk button work?
- Remove any remaining glue and disassemble.
Why doesn't the Chevrolet Cruze trunk button work?
- Dry and clean all contacts
- We put everything back together and seal all the joints with hot glue.
Why doesn't the Chevrolet Cruze trunk button work?
- We put it in place and, for complete sealing, fill it again with the same hot glue.
- You also need to pour glue into the joints in the outer part of the panel where the trunk button is installed
Source: https://chevioteka.ru/page/pochemu-ne-rabotaet-knopka-bagazhnika-shevrole-kruz