How to check a ball joint
For those who do not know what a ball joint is, you need to immediately clarify - this is not an inflatable ball under the seat of some person who is leaning on it, but one of the car suspension elements, made in the form of a steel ring, where One end is a ball and the other is a thread. This is a nuance, but it is important for those who want to know how to check the ball joint in case it is damaged and needs to be replaced. Some novice drivers manage to tell the mechanics at the service center that they recently fell into a hole and their ball joint was torn out, but they still managed to make it to the workshop. Although, any experienced motorist will only smile at such a statement, because if the ball joint is torn out, the car simply will not get anywhere unless it is dragged by a tow truck.
Well, God bless them, the beginners, let’s talk about this automotive element in a little more detail. So, the ball joint connects two fixed suspension elements (the lever and the steering knuckle), making them movable due to its round shape. The action is similar to the operation of any bearing. There are suspensions where there is a multi-link system and two balls are used, but this is not important, because everything is checked in the same way, only twice. The ball assembly is necessary for the car so that the driver can control it while making turns. Simply put, without a ball joint there will be no turns - if the car moves, it will only go in a straight line, until the first obstacle.
Symptoms of “disease” and damage
If while driving and, in particular, during turns, you hear a certain knocking or crunching sound in the lower part of the car, then most likely the ball joint of your car is no longer sealed and deformed. No, it is not completely broken, because you would not be able to turn the steering wheel, but something is not as intended by the designers. For example, the protective boot could be torn off and instead of oil, a decent layer of dirt from sand and dust would form in the assembly. Or, even worse, the ring could crack. In any case, if such noises occur, you need to crawl under the car and carefully inspect everything for any deviations or irregularities, because driving a faulty car is life-threatening.
By the way, for the ball joint to fail, it is not at all necessary to drive your car like crazy over potholes and bumps - a banal entry of dust, water and dirt under the boot is enough for catastrophic destruction to begin in the entire assembly. Then a slight backlash appears and driving a car becomes extremely painful and dangerous, because it can easily jam during a turn, and then disaster will follow.
Trust but check
Checking the ball is carried out in two ways.
Either by eye, visually inspect the safety of the boot and, if there are cracks, tears and other damage on it, replace it with a new one, or drive the car onto a pit, overpass, lift (underline as appropriate), and then mechanically identify possible problems. For the mechanical option, you need to crawl under the car and tug the wheel with your hands to determine the presence of play. You can equip yourself with a pry bar and a crowbar to install the pry bar between the lever and the support, and then try to push it upward. By the way, arming with iron is the best way to check for backlash. There is another option.
You need to remove the balls, clamp them in a bench vice, and then check the pin play and axial play. If the finger moves very easily, then replacing the entire ball joint is really necessary. In principle, many experienced drivers have had to deal with similar things more than once. You can check it yourself. Some will even be able to replace it themselves, but for beginners, it is certainly better to go to a workshop where there are all the conditions and experienced mechanics.
Main symptoms of malfunctions
Lada Kalina Universal Logbook Replacing ball joints
1. When the car moves on a straight road, it pulls to the side, as well as deteriorates stability and controllability.
2. Increased wear of the tire is possible on the side of the faulty hinge. As a rule, the inner part of the wheel begins to wear down intensively.
3. A knocking sound may appear when driving over uneven surfaces, moving towards the lower suspension arm.
How to check the condition and serviceability of ball joints yourself.
In order to independently diagnose the condition of the rotary bearings of the steering knuckle, it is enough, first of all, to know their structure and operating principle. Namely, this will allow you to understand all the intricacies of the work.
Methods of diagnostics on your own and without a lift
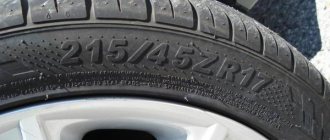
1. Checking the camber angle. The ball joint of the suspension arm, more than any other part, is responsible for the camber angle of the wheel. If it fails, the wheel will fall to the side. On a completely flat area, if you look at the car from the front, you can see a wheel that is not level. For example: a ball play in a Teflon cage of 1 mm gives a wheel tilt of about 1°, which outwardly looks like a wheel displacement from the vertical of about 1-1.5 cm. Read more about self-adjustment of the camber.
2. Open the hood, put your hand on the stand cup and shake the car vigorously 2-3 times. The appearance of pulsed impacts in the cup will be a “bell” about possible malfunctions in the suspension. (the principle of this method is similar to listening to the rails while waiting for a train)
3. Raise the wheel with a jack until it is free, and place an additional support under the car for safety purposes. Then take the wheel with your hands in the extreme upper and lower parts and rock it in a horizontal plane (with one hand towards you and the other away from you). If you feel play or knocking in the suspension, the ball joint is most likely faulty.
!!! Be careful: wheel play in all planes may be caused by worn hub bearings, but the difference in vibrations in this case should be significantly less.
4. Remove the wheel with the car jacked up. Using a pry bar or a wide flat head screwdriver, place it where the arm attaches to the steering knuckle. Using mechanical action, very carefully check the condition of the play. If there is no play and the boot is in good condition, then the ball joint is in good condition.
Interesting fact
Diagnostics of ball joints is conveniently done at the time of off-season tire changeover, when the car is suspended on jacks; you can check the play in the supports without much effort.
Average life of ball joints
The quality of the road surface and the driving style of the motorist make a big difference in the service life of these supports. Also an important role is played by the height of the rubber profile, which has been repeatedly established. In cars with low profile tires, the service life of ball joints is on average 2-3 times shorter than in cars with medium and high profile tires, and this is mainly due to weak damping of wheels, impacts from road unevenness, which in turn are transmitted to parts and suspension units. The average statistical life of ball joints is considered to be 65-90 thousand km, and on a “low” profile, it is a rare case when it is possible to travel 35 thousand km.
A very important argument I would like to note is the fact that ball joints in the design of a car serve as one of the main safety elements in driving a vehicle. It is strongly recommended that they be diagnosed and repaired in a timely manner, using only proven and high-quality manufacturers.
Gaps in the upper hinges of VAZ 2101-2107
To independently diagnose the condition of ball joints, you will need a special device for measuring play and a torque wrench.
The diagnostic procedure looks like this:
- Before checking the ball joint, you need to place the car on a level surface and raise the side on which the diagnosis is being carried out.
- Loosen the bolts on the wheel in advance, and after lifting, unscrew them.
- Remove the wheel and place it under the engine.
- A wooden block must be installed under the lower ball joint. Its height should be 19 cm.
- Lower the car onto the block. The surface on which it is installed must be hard. Work cannot be done on the ground.
- Install the device bushing on the upper ball fastening nut, which is located closer to the brake disc protective casing.
- Place the device on the sleeve and secure it with a bolt.
- Move the tool to position the lever in a vertical position. Its lower edge should rest against the brake disc housing. After this, tighten the bolt.
- Install the indicator in the base stand until it stops. The interference should be no more than 2-3 mm.
- Attach the bracket to the wheel hub using two wheel bolts.
- Install the torque wrench on the hex head.
- Turn the key with a torque of 196 N*m (or 20 kgf/m) in one and the other direction.
- Add up the readings that will appear on the indicator.
The sum of the readings should not be more than 0.8 mm. If it differs from this value, then the ball joint needs to be replaced. Driving with a broken one is not only uncomfortable, but also dangerous - at any moment your finger can be torn out of the clip. And if this happens at high speed, a fatal outcome cannot be avoided.
Removing and installing a ball joint on model 2110
Maintenance
Replacing a ball joint begins with preparing the necessary tools: a special puller, a socket or socket wrench for “17” and “19”, a balloon wrench, a mounting blade or a pry bar. Start the repair by checking the ignition is turned off and the condition of the handbrake lever - it must be tightened. For safety, place chocks under the wheels.
Loosen the wheel bolts on the wheel being repaired. Raise the car using a jack. Remove the wheel. Then, using a “19” wrench, unscrew the ball pin mounting nut, move the steering knuckle to the side, install the puller and uncompress the ball pin. Then use the pry bar to move the suspension arm down. The VAZ ball joint can be easily removed.
If there is no puller, unscrew the ball stud mounting nut only halfway. Then, pulling back the pin bracket with a pry bar, carefully strike the fastening element with a hammer, gradually unpressing the pin. After this, using a key set to “17”, unscrew the fasteners securing the ball joint to the steering knuckle and remove it. These bolts have spring and flat washers, which must also be removed and cleaned.
If you want to finally verify that the unit is faulty, clamp it in a vice to check the radial and axial play of the ball pin. If the finger can be moved fairly easily by hand, the support needs to be replaced. Each VAZ ball joint has a protective cover - boot. Before installation, be sure to clean it from dirt and inspect it. If the protective cover is torn, it must be replaced with a new one.
Before installing the boot, be sure to fill it halfway with lithol or grease. For reliability, seal the installed boot with a special sealant. Bolt the new assembly to the steering knuckle, then, pressing the lower suspension arm down, insert the ball pin into the eye and secure it with a nut. When the Lada is suspended on the jack, do not tighten the nuts and bolts completely.
Remove the car from the jack, rock it from side to side several times with force, then finally tighten: the ball joint nut with a force of 65-95 N.m (6.5-9.5 kgf/m), the bolts securing the ball joint to steering knuckle with a force of 50-65 N.m (5-6.5 kgf/m). After a run of 100 km, it is recommended to check the tightening torque of nuts and bolts.
Required tools and materials for DIY replacement
The table below shows the tools and materials that need to be prepared before replacing the ball joint on a VAZ 2107.
Table - Tools and materials required to replace ball joints
| Name | Note |
| Puller | Special for VAZ 2107 ball joints or universal, for example, fork type. In extreme cases, you can do without a puller by using a hammer |
| Metal brush and rags | For cleaning surfaces and fastenings |
| Penetrating lubricant | For example, WD-40 |
| Key | "at 7", "at 22" |
| Grease | Graphite, ShRB-4, Litol-24 or special for ball joints |
| adjustable wrench | Lasting |
| Hammer | Medium size for easy removal of ball joints |
| Scrap | Can be replaced with a mount |
| Jack | To lift the car |
| Balloon wrench | For removing and installing wheels |
Replacing a VAZ 2110 ball joint, lubrication details
Checking the hub for runout
Changing the support on the ten with your own hands is quite simple. Having placed the car on the handbrake and put the gearbox in first gear, tearing off the wheel bolts, the front part is raised with a jack and installed on a stand. The wheel is removed, the pin fastening nut is unscrewed, after which the pin is pressed out of the lever using a puller. You can remove the finger without a puller; in this case, a pry bar and even tapping on the conical part will help. The support is unscrewed from the steering knuckle with two bolts; now you can install a new support, having previously coated it well.
Special attention must be paid to the lubricant, and the recipe for its preparation is special: a quarter of the transmission, a quarter of the lithol, the remaining part is the CV joint. The new support is clamped in a vice, the pin is spilled with the transmission, and after that the required composition is filled into the boot
The consistency should not be too thick, because after 5 thousand km there will be no lubricant left in the joint. If you lubricate every 45-50 thousand, the support will come off for a very long time, regardless of the brand.
We will answer your questions for FREE regarding deprivation of rights, road accidents, insurance compensation, driving into the oncoming lane, etc. Daily from 9.00 to 21.00
Moscow and Moscow region
St. Petersburg and Leningrad region
Free call within Russia 8-800-350-23-69 ext.418
How to check a ball joint yourself
Today, the most widely used suspension system is the MacPherson system. Ball joints are located only in the lower part. We will take this option for consideration.
For vehicles equipped with double wishbone suspension, the same troubleshooting algorithm should be used, with the only difference being that you will have to check not only the lower, but also the upper ball joints.
Sequencing
Checking the ball joints is carried out in the following sequence:
1. A visual inspection of the unit is first performed. Damage to the boot indicates that the part will most likely need to be replaced. To save money, you can try to get by by replacing the boot. But such repairs do not always give the desired result. Dust that gets inside the hinge is detrimental to its design. If no external signs of damage are found, proceed to the next diagnostic step.
2. Using a lift or jack, the car is lifted and a pre-prepared stop is placed under the support body. It is best to use a height-adjustable tripod stand. After this, the car is lowered down a little, creating a load on the ball joint. The wheel should be in the air and rotate freely.
3. Holding the upper and lower edges of the wheel, rock it in a vertical plane
It is best if someone carefully and smoothly turns the steering wheel. The wear can only make itself known at a certain wheel position.
If you discover a backlash, do not rush to conclusions. It can be caused by a failed or loose wheel bearing, damage to the silent blocks of the lever, or other reasons. This is just a reason to move on to the next stage of verification.
4. Inserting the flat end of the mount into the gap between the pivot pin and the lever, press on the handle and observe the parts of the ball joint. If the unit is working properly, there should be no play. Clicking or tapping when pressed, transmitted to the handle of the mount, also indicates a malfunction.
Video - how to check the ball joint and steering ends:
Final diagnosis
To finally make sure that the part has failed, you will have to disassemble the suspension by disconnecting the ball joint from the steering axle. This is done as follows:
the machine is placed on a lift or jack and raised;
the wheel is removed to provide free access to the unit;
the nut securing the support to the axle is unscrewed. There may be some difficulties with this. If the tip does not have a wrench, it may turn along with the nut. You have to insert a pry bar between the lever and the trunnion and, creating pressure, keep the tip from rotating;
Using a special puller, the cone is removed from its seat on the axle.
After the support is removed, its condition is checked by grasping the conical tip and moving it from side to side. The hinge can rotate freely, but if there is no play, this is not a reason to consider the unit to be faulty.
Video - how to check the suspension yourself:
This is especially true for elements made integral with the lever. But if there is even slight play, the unit must be replaced or, in the case of dismountable ball joints, repaired.
Having learned to determine the malfunction of ball joints, the car owner will protect himself from possible breakdowns on the road, and will be able to move on to mastering the next stage of work - replacing failed parts.
Video - replacing a ball joint on a Ford Focus 2:
May be of interest:
Scanner for self-diagnosis of a car
How to quickly get rid of scratches on a car body
How to check a used car before buying
How to apply for an MTPL policy online in 7 minutes
Diagnostics of the lower ball
And now about how to check the ball joint located on the lower arm on a VAZ. To do this you will need to perform several steps:
- If there is dirt on the bottom of the ball joint, it is imperative to remove it.
- Using a key set to “7”, you need to unscrew the plug, which is located on the bottom of the holder.
- It is convenient to carry out diagnostics on an overpass or inspection pit. To do this, you need to install a caliper in the hole and measure the distance from the ball pin sphere to the bottom edge of the body.
- If it is not possible to install a caliper depth gauge, you can use thin wire or even a match. Place it in the hole, then measure the distance with a ruler.
- The maximum distance from the finger should be 11.8 mm. If less, then the ball joint can continue to be used. But if this value is greater, the hinge will need to be replaced.
If diagnostics show that replacing the ball joint is not required, drive some grease inside. To do this, you can even use a simple syringe installed in the hole in the lower part of the clip. It is advisable to use Litol-24 type lubricant. It can also be driven under the boot.
Ball joint design 2110
The service life of the suspension of front-wheel drive cars, as in the photo, depends on operating conditions
True, in the VAZ 2110 and other front-wheel drive models the unit no longer has such strategic importance as on the classics, where a loose support could lead to complete destruction of the suspension, and fives and kopecks lying teeth on the asphalt with the wheels turned out were constant attributes of bad roads. You still need to be able to bring the suspension to this state. In both front-wheel drive and classic models, the task of the support is simple - to provide an articulated rotary connection between the knuckle and the upper or lower arm, and the design of the unit has remained virtually unchanged, except for the landing planes.
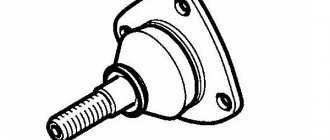
A ball joint is a cone-shaped pin with a ball or mushroom-shaped end that can rotate and change angle through the range of operation of the suspension. The ball is placed in a plastic liner and pressed on both sides with a metal case with a top and bottom cover. At one time they produced supports with a collapsible body, but later this idea was abandoned. There were too many factors influencing the wear of the support - here was the quality of assembly during repairs, the quality of the liners, and the quality of lubrication. And the unit had quite a strong influence on traffic safety, and besides, it was more profitable to sell the entire support than to just replace the pins and bushings. Therefore, collapsible supports are practically never found. They are all welded, assembled at the factory, and lubricated there with lubricant, which, however, must be added immediately when installing a new part.
Video on replacing a ball joint on VAZ family cars
The quality of the support depends not only on the design. It just doesn't differ in variety. The support can be of only two types - with a metal-ceramic bearing, they are used as lower supports, and a filler one. The latter are installed on the upper arms of the front suspension and work only on compression, so there is little demand for them. And the main load falls on the lower supports with a metal-ceramic plain bearing. Visually, they differ in the shape of the hole for the finger and the shape of the boot, which protects the sliding bearing from dirt and moisture.
Ball joint life 2110
Replacing the VAZ 2110 ball joint, oddly enough, becomes relevant only after 150-200 thousand mileage. Not 15-20, but precisely 150 thousand. That's how long a quality support for ten goes. Another thing is that buying one is not so easy. The supports are falling like leaves in October, and the producers are multiplying. Therefore, choosing a human support becomes increasingly difficult. But it is possible. To do this, you need, without paying attention to the boxes and colored packaging, just carefully examine the support, and the scorched part will show itself.
After 150,000 km on the “ten” you need to think about replacing the ball joint
To buy the right support, you need to conduct a detailed inspection and do several tests right at the point of sale:
- Anther quality. No matter what they say on the packaging, the boot should be rubber, elastic and remain that way for a long time. If it still shows microcracks in the store and its design is primitive, one cannot expect good things from such a support. The boot must have a metal ring filled with rubber on the finger side and a clip for shrinking onto the body.
- The finger must have a high class of machining accuracy and in no case should show traces of machining on a lathe. 80% of all supports have just such fingers, which simply gnaw out the liner after 10 thousand km due to poor quality treatment of the ball surface. The thread on the finger should be rolled, not threaded, the finger itself should be forged, no paint should be used.
- The body must be made of hardened steel halves. The three welding points should be clearly visible, the lower half should be cylindrical, without a cone, and a grease nipple can be screwed into the lid.
- The finger can be turned with difficulty, but must be turned by hand. Moreover, it turns without jerking, evenly. If your finger is standing like a stake, this is not a support that will last long. There is a possibility that it will simply tear out part of the lever.
Once again, we emphasize that the price and brand do not matter, because Tracks and Crafts can be made in a garage around the corner, and the hologram and packaging also say little
Useful tips
The main difficulty when replacing a ball joint is squeezing it out of the eye. Many car enthusiasts, in order to make the task easier, are forced to resort to numerous non-standard solutions.
For example, if it is impossible to squeeze out a finger using a special puller, many people use the special tool WD-40.
Many experts advise, if the specified liquid is not on hand, to use ordinary dishwashing detergents from the average price category (not very rare). According to them, they cope with rust no worse than special means, but are cheaper.
The main problem, according to employees of many service stations, is considered to be a longer period of “acidification”. For example, if you can remove WD-40 after 15 - 20 minutes, then after detergent - after about 1 - 1.5 hours.
In addition, many service station employees have recently begun to complain about ball joints from French manufacturers, saying that the quality has dropped significantly compared to previous years.
Many people today consider ball joints from the Kedr company to be the most optimal option (they match in price and quality), but everyone should still rely on their own observations and preferences.
How to check a ball joint with your own hands video
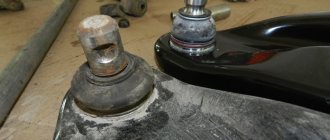
A ball joint is available on any car - both front-wheel drive with MacPherson strut suspension and rear-wheel drive. This is a suspension element with which the front wheel hub rotates relative to the body. For example, on old VAZs of the classic series there are two ball joints - on the upper and lower arms. A hub is installed between them, to which the steering rods are attached. The appearance of this part is quite simple - the lower part is made in the form of a thick steel washer with a spherical thickening in the center. The inside of this thickening is hollow, so a tip is placed there during the manufacturing process of the support. On one side it has the shape of a ball, on the other it has a cone and a thread on the edge.
Now try to imagine an unpleasant picture - the ball joint breaks into two parts. What will happen then? Nothing good, since the wheel will not stand strictly vertically, but at an angle to the surface and rest against the body. And if someone suddenly tells you a story that after the ball joint fell apart, he arrived safely at the repair site, then do not believe this person. Only the service of a tow truck or replacing the unit in the field will help. If there is, of course, it is in stock or there is a store with auto parts within sight. But in order to avoid getting into such trouble, it is necessary to monitor the condition of the suspension and promptly identify shortcomings
It is very important to know how to check the ball joint yourself
First signs of breakdown
Exterior view of a car's ball joint
When the car is moving, a slight crunching or light tapping noise is heard - this is the first sign of a malfunction. It is especially noticeable when cornering. Very often, too light a steering wheel or increased play is accompanied by a knocking sound. The main thing is not to confuse it with a broken CV joint, because when the steering wheel is turned all the way at the beginning of movement, they also emit an unpleasant crunch. If you believe the books, then ball joints last forever (provided that they always have lubrication and are operated under normal conditions). Probably, this mode of operation is lying on the counter in a store.
In fact, during operation, the integrity of the anther is compromised. The rubber from which it is made is constantly exposed to dirt and water. Over time, the surface of the boot dries out, it becomes covered with microcracks, which then turn into full-fledged holes. And then small particles fall inside the ball, gradually breaking the metal. As a result, you will hear unpleasant crunching and tapping sounds. In fact, nothing more is needed for the ball to fail; constant exposure to dirt and dust is enough. And the result of such a breakdown is an increase in backlash and the likelihood of jamming. In the latter case, you will not be able to turn the steering wheel, no matter how much force you apply to it.
The initial check of the ball can be carried out practically with bare hands.
Diagnosis of support
There are two verification methods - visual and mechanical. In the first case, only an inspection is sufficient. During this process, you identify cracks and holes on the boot and assess the condition. If there is damage, the rubber boot must be replaced. Only mechanical diagnostics can provide more complete information about the condition of the suspension. To do this you will have to use a pit, a lift or an overpass. First, try to pull the wheel with your hands, holding it by the top and bottom. For a more accurate diagnosis, you will need the help of a pry bar - install it between the hub and the suspension arm. If there is any play, you will feel it immediately.
The consequences of a ball joint failure, especially at speed, can be quite disastrous.
You can remove the hub from the ball joint pin and check the play. If there are problems, then the finger will easily rotate around its axis and from side to side. In this case, it is best to replace it, and do not even think of using old boots on the new part. Replacing and checking the ball joint is simple; no one should have any difficulties. But if you have never encountered such a procedure, then it is better to visit a service station for the first time or ask an experienced friend to help. Look carefully at how this work is done, what tools and devices need to be used. But next time you can do this yourself.
Interesting on the topic:
loading…
Replacing the lower supports
After checking the ball 2107 and making sure that it is broken, you need to unscrew the bolt from the pin. But you won’t be able to unscrew it completely; first, make a few turns. Further actions:
- Install the puller and remove the ball joint pin and hub. After this, you can completely unscrew the nut.
- Using keys set to “13”, you need to unscrew the three nuts that secure the ball joint housing to the suspension arm.
Before installing new elements, it is necessary to fill a sufficient amount of lubricant under the boot. Be sure to check the integrity of the rubber boots.
Welcome!
Ball joints are a very important element of the front suspension, this is especially true for VAZ classic cars. There are twice as many ball joints there as in front-wheel drive cars (4 pieces), due to which the car becomes more dangerous. After all, if you don’t take care and drive a car whose ball joints have failed, the wheel may simply fall on its side. If you drive at this time, the car will immediately lose control and it will be very, very difficult to stop it. We would like to show you a striking example in the video below, where the ball joint fails and the right wheel of the car simply falls on its side.
Note!
To diagnose ball joints, you will need a mount or a mounting blade or a crowbar; In addition, you will need a very thin stick, either metal or just a twig, but, very importantly, the stick should be smooth, without bends or the like. (It is best to use a 5.6 cm long metal stick). And besides all this, you will also need a ruler and a small knife. Or instead of a stick, ruler and knife, take a good caliper that will replace all these tools!
It all depends on the area where the car is used. If you operate it in very large cities (such as Moscow), in the very center of the city, mostly on ideal roads, or in St. Petersburg, where the roads are clearly not inferior, then you don’t even have to bother with diagnosing the suspension. Just look there once a year or every 100,000 km, check everything and move on. But, basically, Lada cars are used in small towns, villages and similar places where the roads, as they say, leave much to be desired. In this case, diagnostics of the entire suspension as a whole, as well as diagnostics of ball joints, should be performed as often as possible, approximately once every 20,000 km. Or after a good collision into a deep hole at speed. This way, you will always be confident in your car and will not be afraid to use it, since after a thorough check you will know with high accuracy that the suspension is fully operational.
Note!
Few people adhere to this, because every 20,000 km it is quite expensive to look into the car’s suspension for people who drive almost every day, and these 20,000 km will be covered in a very short period. In this case, diagnostics of ball joints can be carried out immediately after a dull knock appears in the front of the car or when hitting a hole. Usually this sound appears when one of the bearings fails, but until you hear this sound, you will not understand whether the ball joints are working correctly or not. Perhaps these knocks can even be imagined. Therefore, to prevent this from happening and to prevent you from just messing with the car’s suspension, take a close look at the video below, which shows a car with a faulty and noisy ball joint.
How to diagnose ball joints on a VAZ 2101-VAZ 2107?
Note!
Ball joints are diagnosed in several ways, the most correct of which is the last (third) method. If you act according to it, you will immediately understand whether the support needs to be replaced or not yet. But there is a big disadvantage in this method, because in order to implement it, you will need to remove the ball joints from the car, and this takes time. Therefore, few people check ball joints for serviceability in this way. On the other hand, if you perform the other two verification methods correctly, they will also give their results. And if the ball joints are very badly damaged, then by checking them in this way, it will also be possible to understand that they are faulty and must be replaced.
Method one (hanging the car and loading the front suspension):
- First, remove all the nuts securing the wheel to the car, and then raise the car using a jack. As soon as it hangs in the air, completely unscrew the nuts and remove the desired wheel from the car (read the article “”). After the operation has been completed, place planks (indicated by a red arrow) under the lower suspension arm and lower the car on them. After this, you should be able to get the car to rest completely on the suspension, or, to be more precise, on the spring. The part on which the wheel is put on (indicated by the blue arrow) will have to hang in the air. That's all, start checking.
- To check the ball joints on a car by hanging the car, do the following. To begin, pick up a pry bar (optionally, a crowbar or a mounting blade), and then insert it as shown in the photos below. The large photo shows how to fix the mounting blade when checking the upper ball joint, the small photo shows how to fix it when checking the lower ball joint. The small photo shows little and it is difficult to understand where the mounting blade should be inserted. But when you work with a car live, you will immediately understand everything and, using the spatula as a lever, move it down, then up, then down, then up, etc. During this procedure, do not damage the boot, be careful. If the support is severely damaged, the suspension will move a lot and will move with a little effort. In this case, the ball joints must be replaced.
Note!
This method is best to check only the upper ball joints, because the lower joints are checked a little differently. For more details on how to do this, read Method 2 below!
Method two (checking the lower ball joints using a caliper):
Let's start with the fact that not all car enthusiasts have calipers. If you find yourself in this number, then take a knife, a thin wire and rulers and also start checking. First, you will need to use a 7 mm wrench (or a socket) and use it to completely unscrew the lower plug of the ball joint (indicated by the red arrow). Then insert a caliper into the hole (some calipers have a special thin part) and measure the distance to which it will go. If you can’t insert the caliper (it rests on the ground, for example, but there is no jack) or if you don’t have one, then take a thin wire, push it into the hole until it stops, make a cut with a knife flush with the end of the ball joint and take it out. Then measure the distance from the end of the wire to this cut using a ruler. If this distance is greater than 11.8 mm, then the ball joint must be replaced.
Method three (removing the ball joints and visually inspecting them):
This is the longest method, but you will know for sure whether the ball joints are working properly or whether they already have play and they are all broken. In order to carry out this method, remove the ball joints you need from the car (How to do this, read the article “”), and then carefully inspect the boot of the ball joints. There should be no cracks, breaks or similar defects on it. Then remove the boot completely; Make sure there is lubrication in the ball joint and that there is no water, dirt, etc. in the ball joint. Next, grab the tip of the ball finger with your hand (see photo below) and swing it from side to side. The finger will have to move with the force of the hand, but it will be difficult. If the pin dangles and moves easily, or if you cannot even move it, then the ball joint is considered faulty and must be replaced.
If you have problems with the wheels, you won’t be able to drive your car far. VAZ 2106 is no exception.
For owners of “classics”, the main headache lies in the ball joints of the wheels, which are not reliable. Taking into account the quality of the road surface, the service life of the parts has never been long, which is why the ball joint needs to be changed every 2 years or more often (depending on the mileage of the car).
ATTENTION! A completely simple way to reduce fuel consumption has been found! Don't believe me? An auto mechanic with 15 years of experience also didn’t believe it until he tried it. And now he saves 35,000 rubles a year on gasoline!
Replacement
Even a novice car enthusiast can replace the lower ball joint of the front suspension. Let's consider the replacement process using VAZ cars as an example.
Getting ready for work
For work we will need:
- wheel wrench;
- metal brush;
- jack;
- VD-40;
- socket and ring wrenches 13;
- open-end wrench 22;
- sliding pliers;
- ball joint remover.
ATTENTION! A ball joint remover is not cheap, but it greatly simplifies and speeds up the replacement process.
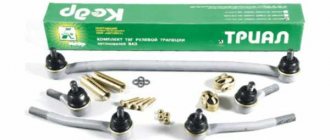
Experts recommend using ball joints, Belmag, Belebey, Kedr, Trek TRS Sport, which are sold complete with or without fasteners. A set with fasteners is more expensive, but it is also more convenient to work with. This kit, in addition to the ball joint, includes a ball stud nut and three bolts with nuts and engravers.
REFERENCE. The upper and lower reinforced ball joints are very similar in appearance. Therefore, manufacturers stamp on them the letters “B” - upper and “H” - lower
Before installation, it is necessary to check the presence of grease under the support boot. If it is not there, add it, but without fanaticism, since excess lubricant can quickly tear the boot.
Progress
We place anti-roll stops under the rear wheels, put the car in gear and the handbrake. Loosen the wheel bolts, lift the car with a jack, finally unscrew the bolts and remove the wheel. We install insurance under the car body; a removed wheel or a wooden block is suitable for this.
If we change the left support, then we twist the steering wheel to the extreme left position, if we change the right support, then to the right. Now we take a metal brush, clean the ball brush and treat it with WD-40 or brake fluid.
We take the 22mm wrench in our hands and unscrew the ball pin nut. Due to the design of the steering knuckle, it will not be possible to completely unscrew the nut. Using VD-40 we process the threads of the ball stud and the nut. Tighten the nut and treat it again with WD-40. We repeat the cycles “unscrewed - poured WD-40 - tightened” until the nut begins to unscrew without effort.
If the replacement is made without a puller for ball joints, then take a soft metal attachment, a sledgehammer and begin to hit the steering knuckle eye with force. As a rule, a few strong blows are enough to loosen the ball joint. If unpressing does not occur, you need to patiently tap the eyelet until the efforts are crowned with success. If you have a puller, dismantling the lower ball joint is greatly simplified and accelerated.
After unpressing the pin, unscrew the fastening nut. If the nut is difficult to unscrew, we use the “Unscrew it, pour it with WD-40, and tighten it.” After the nut is removed, we arm ourselves with 13mm wrenches and unscrew the bolts with which the ball is attached to the lever. We remove the support.
We clean the lower arm from dirt, inspect the place where the support fits on the arm for breaks and cracks. If the lever is damaged, it should be replaced. If everything is in order, then we install a new support, lubricate the finger with lithol, nigrol or motor oil and assemble the parts in the reverse order.
Replacing the upper supports
To remove the upper support you will need to perform the following manipulations:
- Using a “22” wrench, you need to unscrew the nut that is located on the hinge pin.
- Then you need to press out the hinge pin using a special puller consisting of two levers. One edge rests against the lower ball pin, the other against the upper one. You can do this job without a puller, but you will have to hit it very hard with a hammer. As a result, you can easily break the suspension arm.
- After the ball pin comes out of its place, you need to use “13” keys to unscrew the nuts that secure the cage to the lever.
Rules for choosing ball joints
The operational period with which the ball will work is largely influenced by the following parameters:
- part design,
- its manufacturing technology,
- quality of materials used in production.
The issue of choosing high-quality automobile spare parts is always relevant for car owners - repairing a VAZ 2107 using cheap counterfeits is impractical. It is clear that replacing a ball joint requires careful selection of components. When purchasing replacement parts, you will need to check the ball joints. It is clear that first of all you should examine the packaging of the product offered to you and abandon unknown Chinese products in favor of domestic ones. However, you should not limit yourself to studying the packaging - the ball joint should also be carefully considered.
In this case, the main part of the support is considered to be the finger. The best option is considered to be one when the finger is made of high-alloy steel (for example, the specifications for VAZ models provide for 38KhGNM steel in this case). Cold heading followed by heat treatment is recognized as the best manufacturing technology. However, it should be noted that such a technological process is only “possible” for large industrial enterprises with appropriate production capacities. Smaller competitors in this industry use cross-wedge rolling to make pins. This manufacturing method results in less reliable products.
Ideally, replacing ball joints should be done very rarely - a high-quality product can “go through” tens of thousands of kilometers. To ensure this durability, the bearing is coated with a hardening surface layer and the ball pin and housing are hardened. It is clear that, say, it makes no sense to repair a gearbox using components whose quality no one can vouch for. The same applies to ball joints. At the same time, the realities of the modern market are such that there are many unscrupulous sellers on it. The main distinguishing feature of a fake is its price. At the same time, a careful visual inspection of the product will allow you to avoid “running into” a fake. Thus, a finger produced by the cold heading method does not have edges processed by cutting. The color of such a detail is very nondescript, dirty gray and uneven.
Replacing ball joints on a VAZ 2107 - instructions
It is clear that when deciding a number of operational issues - for example, how to replace the front wheel bearing, you must first of all decide on the necessary list of tools and the sequence of actions. As for operations such as replacing the upper ball on a VAZ 2107 and replacing the lower ball, the sequence is as follows:
- a wheel is removed from a car,
- the fastening elements of the ball joint are cleaned of dirt,
- the nut of the upper ball joint pin is loosened,
- the finger is pressed out from the steering knuckle. In this case, you should use a ball joint remover,
- the nut securing the ball pin is unscrewed, after which it is removed,
- loosen the nuts securing the ball joint to the lever,
- the upper ball joint is removed along with the cover and the pressure plate (the sequence of operations is identical for both the upper and lower ball joints),
- replacement parts are installed. First of all, check that there is a sufficient amount of lubricant in the case.
Assembly is carried out in reverse order. Upon completion of assembly work, it is necessary to check the alignment angles of the front wheels.