Features of replacing the heater radiator in a Chevrolet Niva with and without air conditioning
The heating system of any vehicle has its own components that ensure the full functioning of the entire device.
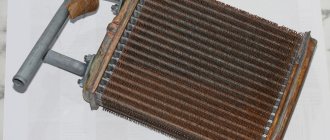
The stove radiator plays an important role in the operation of the system. Situations arise when the device fails and stops working. To fix any serious problem, you will have to dismantle the unit. The radiator is located according to a special design. The article will tell you in what cases the radiator requires replacement and how to replace it yourself.
Where is the heater radiator located on the Chevrolet Niva?
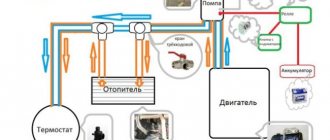
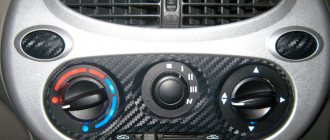
The heating system of a car consists of a number of elements, without which its normal functioning is impossible. One of these is the stove radiator. Sometimes problems occur with the heat exchanger, to eliminate which it is necessary to dismantle the unit. The radiator is located in the cabin behind the heater control unit.
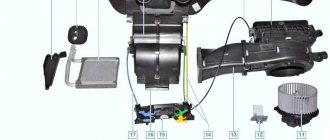
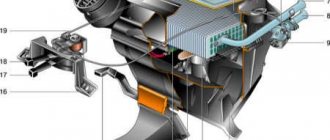
Body interior heating system: 1 — ventilation duct; 2 — air duct for heating the windshield; 3 - intermediate body; 4 - intermediate air duct; 5 — air intake filter housing; 6 — heating system fan; 7 — central cabin ventilation nozzle; 8 — facing of the control lever panel;
Fan replacement
So, if there is an urgent need to replace the stove motor, we recommend that you hurry with the repairs without waiting for frost. Believe me, driving in a vehicle in which the heating system does not function is quite uncomfortable. In addition, in severe frosts such trips are still extremely unsafe, since the lack of heat does not allow the ice concentrated on the windows to thaw. Icy windows limit the driver's visibility of the roadway and, accordingly, provoke emergency situations.
So, pick up a new fan and check the quality of rotation of the blades. If you have not purchased it yet, we recommend that you give preference to a model with bearings, of course, if the auto store offers you an expanded range of heaters suitable for your Chevrolet Niva.
How to replace a heater radiator on a Chevrolet Niva with air conditioning (what are the differences)
Replacing the radiator of a Niva Chevrolet stove with air conditioning is carried out by changing the evaporator. To simplify the furnace reassembly process, it is advisable to mark all connectors using a special marker. After removing the fan, begin dismantling the regulator.
And also interesting: Niva777. Repair and tuning of Niva and Chevrolet Niva. Reviews about Niva777. @ Niva 4×4
To change the regulator, you will need to disassemble the front panel. It is important to remember that after dismantling you need to check the radiator tap and all supply pipes for leaks.
Which brand should you choose a cooling radiator for Niva Chevrolet and how to replace it yourself?
Replacing a radiator on cars is rarely required.
This mainly occurs when the system depressurizes as a result of damage. We will analyze in detail how to replace a faulty part with a new one, what set of tools will be required to carry out this type of work, and how the features of working on cars with and without an air conditioning system differ. The Chevrolet Niva radiator is the main component of the engine cooling system. Through it, excess heat generated during fuel combustion is released into the air.
The specified level of engine operating temperature (or rather, coolant) is achieved through electric fans and a thermostat.
The heater radiator performs an important function in the heating system of every car. If the heat exchanger malfunctions, the performance of the system is disrupted, which not only reduces the comfort of driving the vehicle, but can also lead to overheating of the engine. There are characteristic signs that indicate that there are problems with the radiator and the part requires replacement.
Before you begin dismantling the radiator, you will need to drain the antifreeze from the cooling system. To do this, unscrew the bolt on the cylinder block and remove the expansion tank cap. Another option is also possible, in which you open the tank lid and disconnect the cooling tube of the throttle assembly. Instead of this tube, another hose is inserted, through which the liquid is removed.
To replace the heater radiator, you need to unscrew the bolt on the cylinder block and the expansion tank plug to drain the coolant
When a car is equipped with an air conditioning system, replacing the heater radiator at home is much more difficult, but still possible.
One of the most important elements of the cooling system is the radiator. It is a heat exchanger in which the temperature of the antifreeze is reduced and returned to the engine for further heat removal. The cycle continues as long as the engine is running. The device is located in the front of the car, including the Chevrolet Niva, and is therefore subject to negative influence. A leaking radiator is a sign of a malfunction. If an antifreeze leak is detected, then the radiator on the Chevrolet Niva will need to be replaced.
The radiator provides cooling of the liquid, which circulates in a large circle. Heat transfer occurs when antifreeze or antifreeze passes through its tubes, which come into contact with air.
Additionally, two fans blow over the engine, each of which turns on at a certain temperature.
On the Niva Chevrolet, the radiator is installed in the front part of the engine compartment; the designers have provided good access for its replacement.
Before dismantling, you need to make sure that the radiator is broken.
Many motorists are often interested in the question of how to replace the radiator of a Chevrolet Niva stove without air conditioning. To carry out all the actions, you will initially need to unscrew the bolts located on the cylinder block. To avoid damaging the outer shell of the expansion tank cap, it must be carefully removed.
In addition to this option, experts are considering another method, more practical. For example, you need to use a new hose to remove liquid that gradually accumulates in the container.
Replacing the radiator of a Niva Chevrolet stove with air conditioning is carried out by changing the evaporator. To simplify the furnace reassembly process, it is advisable to mark all connectors using a special marker. After removing the fan, begin dismantling the regulator.
To change the regulator, you will need to disassemble the front panel. It is important to remember that after dismantling you need to check the radiator tap and all supply pipes for leaks.
The device is replaced in stages:
- Remove the glove box and disconnect the air duct.
- To simplify the process of removing the rubber tube to drain the remaining liquid, loosen the bolts.
- The structure is attached using two screws.
- Using a side cutter, remove a piece of plastic that interferes with the dismantling of the structure.
- Then a new radiator is prepared. To prevent air from passing through the cracks, glue is applied around the perimeter.
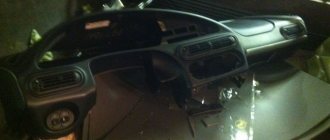
Taking into account the rich experience of car enthusiasts, it can be argued that replacing the radiator of a Chevrolet Niva heater without air conditioning can be done using a simplified technology without removing the dashboard. It is necessary to dismantle the glove compartment by unscrewing the screws with a short Phillips screwdriver, then remove the passenger footwell heating duct. Now there is convenient access to the stove pipes.
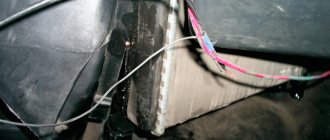
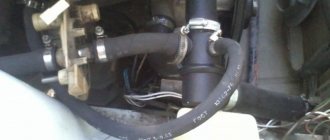
Having loosened the clamps and removed the hoses from them, you need to drain the remaining coolant into a previously prepared container. After unscrewing the two screws that secure the radiator, you need to push it towards the right door until it rests against the heated glass air duct. The next stage is the elimination of the last obstacles that prevent the removal of the stove.
Place for cutting the radiator housing
The heater radiator is an important link in the vehicle’s ventilation, heating and air conditioning system. The microclimate in the cabin and the functioning of the system that prevents icing of windows and rear-view mirrors depend on its effective operation. For a number of reasons, the heater fails. Despite the fairly high labor intensity of the radiator replacement procedure, it can be done with your own hands.
Removing and installing a stove with air conditioning is much more difficult compared to radiator models without it. The process requires dismantling a large number of components: dashboard, steering column, decorative elements. It is better to carry out replacement at a service station, where they will provide a guarantee for the work performed and the installed spare parts.
Also interesting: TOP 10 cool products for Lada Niva 4x4 from China from Aliexpress. Tuning VAZ Niva / Selections, listings, top 10, etc. / iXBT Live
Signs of a leak
Unlike the VAZ 21214, the heater radiator on the Chevrolet Niva is not equipped with a tap and coolant circulates through it year-round. This does not mean that the heating works constantly; with the help of a plastic damper, the flow is switched past the stove, causing cold air to blow into the feet of the driver and passenger. But the stove itself is always hot, which can be felt by the slight heating of the side plastic panels of the center console.
It is impossible to know that a car’s heating system is leaking by external signs. There are no stains under the car, all connections between pipes and fittings are dry, and the liquid goes somewhere. Because of this, the electric fan that cools the engine may turn on even on cold days.
Replacing the radiator of a Chevrolet Niva stove with air conditioning is quite a difficult job, but at the same time it can be done independently. Just first you need to determine whether the cause is really in the heater radiator. Symptoms of malfunction are as follows:
- Poor operation of the stove;
- Regular lack of fluid in the heating system;
- The appearance of an antifreeze smell in the cabin (not always);
- A puddle of greasy liquid under the driver's mat (at the same time, read the article on how to dry it).
Just in case, before you climb to the stove, check the hoses and pipes supplying liquid to it. If they are wet, then that's the reason.
Tool. This work does not require any special tools; almost everything you need can be found in a regular set of keys. You will also need 2 screwdrivers (slotted and Phillips) and pliers. And also a box for screws. In addition, you can stock up on markers.
The causes of the malfunction can be listed in a small list:
- A breakdown of the control unit has occurred.
- Mechanical or operational damage to the radiator surface.
- Failed additional resistor.
- Radiator pipes damaged by external factors or worn out by prolonged use.
- Faulty heater valve.
How to determine what kind of breakdown occurred? Let's look at several different signs by which you can determine the cause of the malfunction and understand where to start repairing the stove.
Replacement process
Because replacing a heater core is not an easy process, it should be started when there are compelling reasons and you observe signs that clearly indicate problems in the heating system. Experienced technicians share recommendations based on which you can make a “diagnosis” for your car, indicating that it is time to replace the radiator.
And also interesting: Tuning the interior of a VAZ 2121 - improving the Niva with your own hands Video | TuningKod
If the stove begins to heat poorly, so you constantly feel chills in the cabin of your vehicle, then there is a problem with the heating. If, in addition, you smell antifreeze, then your fears are even more confirmed. You should be even more concerned if you begin to notice that the level of coolant used is constantly decreasing, and under the carpet in the cabin you suddenly find a “swamp” of greasy liquid.
First, of course, check all the pipes and hoses that are part of the heating and cooling system. Make sure they are intact. If this is so, it means that the culprit of such troubles is, after all, your stove radiator, the resource of which has already been exhausted. Even if you don’t have the knowledge of how to change a radiator, don’t give in to the problem.
There are two ways to replace the radiator. The first method involves carrying out work that does not require removing the torpedo. However, this method is accompanied by a clear disadvantage, namely that during the task the air conditioner will depressurize, so upon completion it will have to be refilled with refrigerant.
The second method can be done by removing the dashboard. Unfortunately, such a replacement of the heater radiator on your Chevrolet Niva will be accompanied by a greater expenditure of physical and time resources. Decide which method will be preferable for you, study the recommendations we offer and get started.
In the process of replacing the radiator
Independent replacement of the radiator is carried out with a set of tools, including a flat and Phillips screwdriver, pliers, and small socket heads (8, 10, 14).
Preliminarily: the battery terminal leading to ground is disconnected. It is better to remove the ignition key. It is advisable to start the process after 2-3 minutes in order to completely discharge the reserve capacitor.
About removing other elements
When replacing the heater on all VAZ cars, questions often arise - how to get to the heater and how to remove the radiator in the easiest way. In this regard, the Chevy Niva is considered an exception; getting to the stove here is relatively easy. No special tools are required for this; all you need is a set of screwdrivers and the following tools:
Also interesting: Rating of winter tires for Chevrolet Niva
You should also prepare a supply of antifreeze for refilling in an amount of 2-3 liters. An inspection ditch is not needed for work; a flat, open area will suffice. The process begins with partial emptying of the Chevy Niva cooling system. Antifreeze is drained only from the cylinder block; there is no need to touch the cooling radiator.
To empty the basin, you need to place the basin under the cylinder block on the left side (in the direction of travel) and pass the hose into it. Using a 13mm wrench, loosen the bolt - the plug on the block - and then unscrew it by hand, holding the hose at the ready. When the plug comes out of the hole, you need to quickly insert the hose and hold it until the antifreeze flows out.
After removing the element, it is worth examining the condition of the rubber pipes supplying coolant to it. If they become sour or cracked, they need to be replaced, otherwise you will have to undergo lengthy disassembly again later. To disconnect the pipes from the engine, you need to remove the plastic casing from the motor and unscrew 2 clamps, then pull the hoses out. That's all, we install the new unit, assemble it and fill it with antifreeze.
Car enthusiasts practice a simpler method, but it involves cutting out the plastic elements of the front panel. Here each motorist decides for himself which method to choose.
Taking advantage of the moment when part of the Chevy Niva’s interior has been disassembled, you can simultaneously replace other parts if they are faulty. If it is necessary to replace the fan, then the disassembly procedure is carried out in the same way, only at the end the motor and turbine located above the removed glove box are dismantled. The sequence of actions is as follows:
- Disconnect the motor power supply terminal.
- Disconnect the air duct from the supercharger.
- We unscrew 3 screws and dismantle the fan with turbine.
- To separate the turbine, simply remove the spring-loaded washer.
About removing other elements
The device is replaced in stages:
- Remove the glove box and disconnect the air duct.
- To simplify the process of removing the rubber tube to drain the remaining liquid, loosen the bolts.
- The structure is attached using two screws.
- Using a side cutter, remove a piece of plastic that interferes with the dismantling of the structure.
- Then a new radiator is prepared. To prevent air from passing through the cracks, glue is applied around the perimeter.
Also interesting: Tuning a Niva 4x4 with your own hands: updating the interior of the Lada VAZ-2121
This procedure is based on the experience of a large number of drivers who have already replaced a part without the complex dismantling of the instrument panel. The work can be divided into several stages:
- We remove the glove box and disconnect the air duct leading to the front passenger's feet.
- Loosen the clamps so that you can remove the rubber tube to drain the remaining liquid. To do this you need to prepare a small container.
- To carry out this procedure more carefully, you can cover the interior with cloth or film so as not to accidentally spill antifreeze.
- The radiator is additionally secured with 2 screws. After removing them, you need to pull it towards you a little until its movement is limited to the air duct.
- Remove the relay cover fastener to remove it. This must be done so that the corner of the plastic frame on the heat exchanger does not interfere.
- Using a side cutter, you can bite off a piece of plastic that interferes with dismantling
- Then you need to prepare the new radiator for installation. To do this, use glue to apply thin strips of foam rubber around the perimeter of the part. This must be done so that the air does not pass through the cracks and warms up as efficiently as possible.
- Then the part is installed in its standard place
Replacing the device
First, you need to disconnect the battery terminal.
1. Remove the side panel and glove box
2. Unscrew the cabin filter, remove the wiring harness
3. Unscrew the screw and remove the engine control system
4. Using a screwdriver, remove the evaporator screws
5. Remove the radiator pipes or cut them
6. Remove the device and replace it with a new one
- Dismantle the side panel, as well as the glove box, by unscrewing all the necessary screws.
- Next, unscrew the bolt and remove the air duct located in the passenger’s feet. Unscrew the electronic engine management system, it will be easier.
- Dismantle the airbag plug, which is secured with four bolts on the inside. Next, cut out the plastic and remove the air duct.
- Now you need to remove the cabin filter element. Dismantle the so-called volute along with the damper body; the structure should be moved to the side. After this, disconnect the supply wires and dismantle the electric motor along with the snail.
- Next, you will need to unscrew the evaporator, which is secured with two bolts on the inside. In addition, disconnect the pipes along with their fastening device.
- The lower plates should be bent. The evaporator itself should be moved slightly to the side (to the right). Be extremely careful here; under no circumstances should you use a lot of force so as not to damage the element. Press the evaporator onto the floor of the vehicle and then simply pull it out.
- The radiator hoses should be removed. If you see that they are in poor condition, then it is advisable to replace them immediately, then the pipes can be cut off. In addition, it will be much easier. The bolts securing the device must also be removed.
- Then all you have to do is dismantle the element and replace it with a new one. All further assembly is done in reverse order. You need to wait a while for the Shumka to dry. Pay attention to the condition of all hoses and pipes; if you notice any shortcomings, we recommend replacing them immediately.
Also interesting: Tuning a Chevrolet Niva: external, engine, interior with your own hands
Replacement of the Chevrolet Niva heater radiator with air conditioning. Difficult, but possible
Sooner or later, you may need to replace the radiator of the Chevrolet Niva stove with air conditioning. This is due to the tendency for this element to maintain a normal microclimate in the cabin to break down. After all, gone are the days when copper radiators were installed in AvtoVAZ’s creations; they were essentially eternal. Aluminum parts are now being installed, which does not have the best effect on the operating life of the stove.
At the same time, many drivers are afraid to do repair work themselves and turn to services. They don’t like this work there, because the volume is large, not very comparable with the payment, and they often do it not very well. In this regard, it is advisable to make the replacement yourself.
Read news about the new Niva
- Air conditioning Niva Chevrolet - design and repair
- Pump for Chevrolet Niva - Auto workshop online
- Niva Chevrolet installation of air conditioning - Auto magazine MyDucato
- Niva Chevrolet installation of air conditioning - Auto magazine MyDucato
- Why the Chevrolet Niva air conditioner does not turn on: reasons and installation (diagram), belt replacement
- Niva Chevrolet installation of air conditioning - Auto magazine MyDucato
- Niva Chevrolet air conditioning installation - Online auto workshop
- Replacing a Chevrolet Niva heater radiator with air conditioning without removing the panel
Selection and replacement of the Niva Chevrolet heater radiator
Having convinced yourself that it is necessary to replace the radiator, even before starting repair work, the question arises of choosing a new element for replacement. Let's consider two options for radiators that differ in price and performance characteristics:
- Aluminum radiators have the following advantages: the products are affordable, have a short heating time, and are also lightweight. As for the disadvantages: low maintainability, low heat transfer rate, steel inserts of such a radiator are susceptible to corrosion;
- Copper stove radiators: high heat transfer rate, sufficient service life, good maintainability. The disadvantages include: heavy weight, high cost of the product, slow heating.
Having decided on the choice of radiator, you need to prepare the following tools: flat and Phillips screwdrivers, a set of open-end wrenches, pliers, a hacksaw and a container for draining the coolant. We also note that the Chevrolet Niva can be either with or without air conditioning. At the same time, replacing a heater radiator on a car with an air conditioning system is somewhat different.
Replacing the heater radiator of a Niva Chevrolet without air conditioning involves the following:
- You need to completely drain the antifreeze from the system into a container prepared in advance (the procedure will take from 7 to 10 minutes);
- from the passenger seat, unscrew the screws holding the plastic panel and glove compartment of the car with a Phillips screwdriver, open access to the pipes and mounting bolts of the heater radiator;
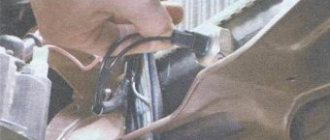
- loosen the metal clamps on the pipes with a flat screwdriver and remove the pipes, first placing a small container under the radiator to drain the remaining antifreeze;
Using a Phillips screwdriver, unscrew the two radiator mounting bolts and carefully pull it out until the right corner touches the edge of the plastic panel. - carefully break off the corner of the plastic frame with pliers or cut off the corner of the plastic frame with a hacksaw and pull out the radiator;
- install the new radiator in the reverse order, having first cut off or broken off a corner on the plastic frame of the new radiator, as during dismantling.
Replacing the radiator of a Niva Chevrolet stove with air conditioning will be somewhat different.
The general procedure for replacing the heater core on a model with air conditioning:
- Use a Phillips screwdriver to unscrew the screws securing the glove compartment and on the side panel in the car interior;
- remove the cabin filter (with an open-end wrench “10” unscrew the four volute mounting bolts, the fourth volute is pulled out along with the damper, moving the entire structure to the side to access the wiring, disconnect the volute wires and remove the electric motor);
We also recommend reading the article about which antifreeze to pour, G11, G12 or G12+, into the car engine cooling system. From this article you will learn how these types of coolants differ, as well as which antifreeze is best to use and why. - remove the evaporator located under the cabin filter from its seat by unscrewing the two fastening bolts with a flat screwdriver and disconnecting all the pipes;
- access to the four mounting bolts and hoses of the stove radiator is open;
Using a “12” socket, unscrew the radiator mounting bolts; in case of severe wear, cut off the hoses with a knife (when installing a new radiator, the hoses are replaced with new ones). - slightly move the mounting strips to the side and carefully pull out the old radiator through the opening in the side panel in the cabin;
- Install the new radiator in reverse order.
