Setting the time for series E, D, B
Instructions for setting the time on the StarLine signaling key fob for models E90, E91, B94, B64, D94 and D64:
- Press button 4 with your finger and hold it until one long and two short beeps sound.
- Wait until the signals sound again (one short and two long) and the main menu functions appear on the display.
- By pressing keys 1 or 4, activate function F-1, which allows you to set the time and date on the key fob.
- Press button 4 and do not remove your finger from the key until there are two short beeps.
- Using buttons 1 (back) and 4 (forward), select settings parameters - gradually add year, month, date, hours and minutes.
- Set the desired value for each parameter using buttons 2 (increase) and 3 (decrease).
Additionally, you can set an alarm, set a timer, select the type of signal you like from the list and adjust its volume.
There are two ways to save changes:
- leave the key fob for 8 seconds, after which the menu will automatically exit, saving all set values;
- press and hold button 1 until two short beeps, which will help exit the menu and save all changes made.
To set the time on StarLine car alarm models A91, A92, A93, A94 and A61, you must perform the following algorithm:
- Press button 3. Do not remove your finger from the key until you hear: 1 short melody, 2 short beeps, 1 short beep.
- When the hour display flashes, use buttons 1 (increase) and 2 (decrease) to set the clock correctly.
- Briefly press button 3 and wait until the minute indicators flash. Adjust the minutes, also using keys 1 and 2.
- Quickly click on key 3 and wait for the key fob to enter alarm setting mode. Set the necessary parameters again using buttons 1 and 2.
- Press button 3 without holding for a long time to go to the timer setting function. Similarly, use keys 1 and 2 to set the correct values.
- To exit the menu, stop any actions with the key fob and after 10 seconds it will automatically hide the programming functions, saving all the entered parameters.
Starline a93 (a63, a39, a36) key fob operating instructions
You may have a keychain with a horizontal arrangement of icons, or maybe with a vertical one. The first ones came complete with signals released before 2020. All modern systems come with vertical icons. The additional key fob is the same in both the first and second cases.
Key rings Starline A93
1.1. Duration of pressing key fob buttons
- short press – a single press of one or two buttons lasting less than half a second; long press – press and hold one or two buttons until the key fob beeps; double press – press the button 2 times in a row within one second; sequential pressing – double pressing of one or different buttons. First, press and hold the button until a sound signal appears, then release this button and briefly press the second (or the same) button.
1.2. Control commands
The table below shows the main commands of the key fobs with feedback, as well as the additional Starline a93 key fob - it briefly shows how to use them.
Basic control commands for Starline A93 key fobs
1.2.1. Arming and disarming
To arm the Starline A93, you need to briefly press button 1, to disarm it, briefly press button 2.
Video of arming and disarming
1.2.2. Silent arming and disarming
To arm without sound, press and hold button 1 until a beep sounds, then release it and briefly press it again. To silently disarm, we perform the same manipulations with button 2. In silent mode, no siren signals will be emitted when disarming and arming.
Video of silent arming and disarming
1.2.3. Silent mode
Starline a93 has a silent mode. Many people confuse it with silent mode. In silent mode, even if any security zone is triggered, the siren will not emit signals. All information will be transmitted only to the key fob.
To turn on silent mode, press button one long and then button 2 briefly.
Video of enabling silent mode
1.2.4. Disable alarm
To turn off the alarm on Starline A93, you need to briefly press button one. In this case, the siren will stop screaming, but the system will still be armed.
1.2.5. Temporarily disabling shock and tilt sensors
To turn off the warning level of the shock sensor, briefly press button 1 twice in a row when the alarm is armed. To turn off the main level, repeat the same procedure with the first button. Then the shock sensor will be completely disabled. To turn it on again, quickly press button 1 twice.
Video of turning off and turning on the shock sensor
To disable the tilt sensor, quickly press the third button twice when the system is armed. To turn it on, follow the same procedure.
Video of disabling and enabling the tilt sensor
1.2.6. Panic Mode
To turn on the Panic mode on Starline A93, with the ignition off, you need to simultaneously press and hold buttons 1 and 3 until the key fob beeps. In the “Panic” mode, the siren turns on for 15 seconds, the doors are locked, and the alarm is armed. To disable this mode, press button 2 briefly - the siren will stop screaming, but the doors will remain closed and the system will be armed.
Video of turning off and turning on Panic
1.2.7. Remote engine start and stop
How to start the engine? You must press and hold button 1 until the beep sounds. If the engine has already been started remotely or automatically, then long pressing button one will increase engine operation by 5 minutes.
The engine is stopped by sequentially pressing buttons 1 and 4, regardless of the alarm version.
1.2.8. Managing additional channels
All channels are turned on and off by successive clicks. Below are the buttons to control the channels.
- 1 – 2+1 2 – 3+1 3 – 4+1 4 – 2+3 5 – 3+2 6 – 4+2
1.2.8.1. How to open the trunk using the Starline a93 key fob
Opening the trunk from the Starline A93 alarm key fob occurs precisely with the help of additional channels. By default, this is channel 1. That is, in order to unlock the trunk, you need to press and hold button 2 until the beep, then release it and briefly press button 1.
In this case, if there is a trunk control via can or its opening is connected via analogue, then the trunk will open. If connected correctly, even if the alarm is armed, opening the trunk will not trigger it. Starline will simply exclude this security zone for a while. As soon as the trunk is closed, the system will arm it again.
It is worth noting that the Starline A93 itself will not be able to open the trunk. It simply happens that the car does not have the ability to electrically control the trunk release. Or maybe the car has the ability, but you didn’t agree with the installer about how to connect it. Yes, this is a separate service and costs money (if the control is in can, then it’s free). In this case, at least press the buttons on the key fob - it will do no good, the trunk will not open.
1.2.9. Adjusting the sensitivity of the shock and tilt sensor
To enter the shock sensor adjustment mode, press button 3 until the key fob beeps, then release it and briefly press button 3 again. We get into the mode for setting the preliminary level of the sensor. By short pressing keys 2 and 3, set the desired sensitivity of the shock sensor preliminary level. Next, press 3 long and 3 short again. We are in the shock sensor main level settings menu. Again, use keys 2 and 3 to set the desired sensitivity of the alarm level of the sensor. Next, press 3 long and 3 short again and exit the adjustment mode.
Functions of the Starline key fob
Several alarm options are tied directly under the clock. The main one is timed autostart. The owner can set the time when the engine will turn on and reach operating temperature before leaving the house. This is convenient because the interior is warmed up at the same time.
Starline can turn on a timer for the turbine. After active driving on turbocharged engines, some elements of the intake tract heat up to about 800 degrees Celsius. Cooling occurs due to engine oil circulating through the system. Therefore, turning off the turbo engine immediately after aggressive driving is not recommended. Starting the turbo timer is a useful function that depends on the clock.
You can set an alarm clock and auto-start on it. This setup will be one-time only. Setting an alarm clock is convenient if the owner is going to do unusual things after hours (pick someone up from the airport, meet someone, etc.). At the set hour, the Starline key fob will play the wake-up melody and give the command for auto-warming.
Why is it necessary and what will happen if you don’t set the clock?
It is important to know
If the user configures the communicator to autostart on an alarm clock, the engine will start at a certain time. Otherwise, the launch will take place according to the time indicated on the key fob.
If the timing values are set incorrectly, the user will have to start the engine remotely several times. This, in turn, will lead to faster wear of engine structural elements. Even if autorun is not used, but the time is set incorrectly, the alarm will not go off when needed.
Instructions for displaying time on a Starline keychain
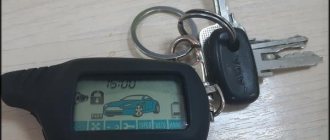
Structurally, alarm systems of type a, b or e series have different functionality and configuration. The a-series key fob received three buttons (see photo), and the Starline e-series remote control received four keys. Therefore, setting the clock has features depending on the type of construction.
The operating instructions provide a clear diagram for setting the parameters.
- To set the time on the Starline A61, A91 or A94 key fob, take the remote control and press the button number three. The key is responsible for programming the parameter. Press it until a short signal is heard and two small melodies are played. Now the system is configured for time programming, and on the Starline key fob itself the clock display began to blink. Pressing the first button increases the number, and using the second key decreases this value.
- After setting the “clock” parameter, you must press the third button again. You can now change the minutes. The desired value will flash on the screen. Use button one to increase it, and key two to decrease it.
- Having set the current time, press the third button again. This puts Starline into alarm settings activation mode. Here you can set the parameters that interest us using buttons 1 or 2, where the first one increases the value, and the second one decreases it.
- By pressing the third button again, we set the minutes for the alarm clock, using the first two buttons in the same way.
- A short click on the third button will activate or deactivate the alarm again.
- Pressing key three again will enter the alarm timer setting mode. Similar to the previous steps, we set the hours and minutes for the Starline system.
- Exit from the setup mode is automatic - just do not press anything for about 8-10 seconds.
Other models have a different programming algorithm, different from the a61 or a91 versions. Setting up Starline E91 goes like this.
- Press and hold button number 4. The Starline key fob will emit one long and two short beeps.
- The sound will be repeated a second time, and then the time indicators will flash on the screen. Using buttons two or three you can lower or increase the value, setting the clock indicator in relation to the real one.
- A short press of button 4 will switch to the minutes setting mode. The procedure is also carried out using keys 2 or 3.
- You can set the time, alarm functions, set the timer, adjust the volume and type of key fob signals.
- Additionally, you can configure the date or year indicators. All Starline parameters are adjusted using buttons 2 or 3, where the second key lowers the values, and the third – increases.
- When all indicators are set, you must not touch any buttons for 8 seconds - the system will automatically fix the current values. Detailed instructions can be seen in the training video.
Timed engine start
It is important to know
Automatic starting of the engine by time is carried out in two ways: by alarm clock or timer.
Alarm clock and timer icons on the Starline A93 communicator
Setting autorun on alarm clock
To set up autostart on an alarm clock you need to:
- Enter the programming menu.
- Press button 2 (to activate cursor selection of functions) and hold until two short beeps and one long beep sound.
- Moving the cursor over the icons by clicking on keys 2 and 3, set it to the clock icon.
- Press the first key on the key fob. External lighting devices should blink once, and the remote control will emit a melodic signal.
- Over the next 5 sec. The communicator display will show the duration of time before the engine warms up. The fact that the option is activated will be indicated by the bell and dial icons located on the key fob screen.
Video: setting up autorun on alarm clock
Shot by user Alex Sila
Setting automatic start by timer
Programming engine autostart using a timer on the Starline A93 key fob:
- Press button 2 or 3 and hold for 3-4 seconds. This will allow the user to enter cursor function selection mode. A quick click on key 2 moves the cursor to the left, and on button 3 moves the cursor to the right.
- Place the cursor on the hourglass icon and briefly press button 1. The system will respond with one melodic sound signal and a short light alert.
- The default autorun value will appear on the key fob screen. Typically this is 4H, which means that the ignition will automatically turn on every 4 hours.
- To change this indicator, you need to click on key 1. Each click on the button increases the auto-start period by 2 hours, that is, up to 6, 8, 12, etc.
- You can save time settings with auto-start by clicking on button 1. In addition, all changes made are saved in the device’s memory in automatic mode. To do this, you must stop any work with the remote control for 4 seconds.
- After successfully setting the parameters for automatic engine ignition using a timer, the key fob will emit two short beeps, and the hourglass icon will light up in the upper left corner of the screen. 5 seconds after entering new autostart values, the system will turn on and warm up the engine.
Video: setting up periodic engine auto-start on the StarLine A93 key fob
Video prepared by Irina Belousova
Photo gallery of key fobs of various versions of the Starline alarm system
StarLine D64
StarLine A93/A63
StarLine B64
StarLine A64
The video from the author Andrey Ambrosimov contains a detailed manual on how to set the time on the Starline model A93 key fob.
Why does the time on the StarLine alarm remote control go wrong?
Sometimes the key fob indicators may be reset to zero. Possible reasons.
- Weak battery. When used, the battery gradually discharges and loses its capacity. As a result, the clock gets lost. When the capacity is too small, an icon will appear on the screen and the key fob will emit a characteristic signal. It is necessary to change the battery on the Starline control panel. The back panel has a cover behind which a standard AAA battery is installed.
- Recent battery replacement. After changing the power supply, the time and date parameters are automatically reset.
- Lack of reliable contact contacts. You can solve this problem yourself. It is necessary to inspect Starline's working contacts and, if necessary, bend them. If it breaks off, solder it with a low-power blowtorch with a thin tip.
- Factory defect or short circuit. The latter can happen due to immersion of the Starline remote control in water or other liquid. You should contact the service center or replace the device with a working one.
Disassembling the Starline E90 key fob housing
The main keychain StarLine E90 is impact-resistant plastic. It is assembled from three main parts - the front panel assembly with edging, the back panel and the battery compartment cover. If the Starline key fob does not open the car, then one of the reasons may be dead batteries.
First, the cover is removed - unlike the usual StarLine key fobs, here it does not move, but is removed from the latches with a fingernail. Having removed the battery, you can see a tiny self-tapping screw next to the contact spring, which additionally connects the panels.
Having unscrewed it, you can begin to disassemble the case. The panels are held together by four strong latches at the edges; to separate them without damage, it is most convenient to use a thin plate like a metal guitar pick.
source
Reasons why the watch on the key fob fails
Failure of the set time indicators in the StarLine car alarm key fob, as a rule, is caused by three main reasons:
- problems with the power supply;
- malfunction of the software;
- mechanical damage.
However, there are other factors that can affect the operation of the device and interfere with the clock, alarm and timer functions.
The main reasons for the key fob to malfunction and reset the time indicators:
- My battery is almost done. When the battery is discharged, the device does not have enough energy to function normally. As a result, serious disturbances in the operation of the pager may occur, including the time indicators being reset to zero. To prevent this, you need to regularly check the battery volume indicator, which is on all key fobs of the StarLine security complex. When the battery charge drops to a critically low level, the key fob emits a corresponding signal, and a characteristic icon appears on its screen. To replace the battery, you will need standard AAA batteries.
- Replacing the old battery with a new one. When you install a new battery, the time, date and timer settings are automatically reset. All other settings are saved in full and will be activated the first time the unit is connected to the alarm system.
- Incorrect operation of the software. In the key fob software system, glitches sometimes occur that can not only reset the time and date, but also disrupt the settings of the alarm’s protective function. With this type of failure, the only way to optimize the operation of the key fob is to reflash the device. It is recommended to entrust this task to specialists.
- Short circuit. The malfunction is a consequence of water getting inside the device body. To eliminate it, it is necessary to determine exactly which part burned out when the contacts interacted with moisture and whether it needs to be replaced.
- Mechanical damage. A fall on the floor or a blow to the key fob can cause mechanical damage to the device, for example, disconnection of some contacts.
- Manufacturing defects. Sometimes the cause of persistent failures in time settings is a manufacturing defect. The key fob may stop working immediately after installing the alarm or after a certain period of time, depending on the severity of the assembly flaw. If the warranty period has not yet expired, you must replace the faulty device with a working pager. Before you start using it for its intended purpose (setting the car on security, turning the alarm on and off), you need to link it to the anti-theft system.
The time and date parameter is extremely important, so you need to periodically check its correctness. There are times when the clock gets lost and this can happen for a number of reasons. The most common one is a discharged power element. Each key fob is equipped with a battery, the charge indication of which is displayed on the main screen. Obviously, with minimal charge or its complete absence, this indicator may go astray.
Mechanical damage is also a common cause of malfunction. Cracks in the key fob, its body or screen can lead to poor contact with the power supply itself. The result is loss of power and constant reset of settings.
If the key fob is completely intact, the nutrient element is in order and the contact is tight, but the time is still periodically lost, then the cause is a software failure.
In addition, it is worth remembering that after replacing a tired battery with a new one, the main parameters of the security system are reset to factory settings. Accordingly, the time after replacing the element will be 00-00.
Reasons for settings failure
During operation, settings 93 may fail. The problem can be caused by:
- The communicator battery is low. Its status indicator is displayed on the key fob, so you can avoid completely discharging the battery in a timely manner. When the battery is low, the clock may lag.
- Replacing the battery in the key fob. When replacing the power source, the previously set time parameters are reset. The only exception is if the alarm has been armed. Therefore, before replacing the power source, it is not recommended to set the clock on the Starline A93 alarm system.
- Incorrect operation of the communicator. If the battery is charged, problems with the remote control software may cause temporary settings to fail.
Reducing the warm-up time on the A91 alarm key fob
The system involves fine-tuning autorun parameters. You can program the engine start time and increase or decrease the warm-up duration.
- Find the service button, turn off the ignition and press five times.
- Turn on the ignition - the Starline alarm will make five confirmation sounds, and the AF indicators will appear on the display.
- Press button three. The screen lights up with the letters SF.
- Press and hold button 3 until a melodic signal sounds. Then release it and briefly press it again. The screen will confirm.
- Press key three depending on the parameter we need. Indicator 2=1 means that the car will warm up for 10 minutes.
- Turn off the ignition so that the Starline system accepts the commands as a basis.
You can turn on the silent mode of the Starline alarm. The car will react to attempts to penetrate only with light. To turn off the sound, you need to press the first button for a long time, and after the sound signal, briefly press button two. The Starline key fob will sound a sound signal, and an indication of the silent security mode will appear on the screen.
Trouble-shooting
Some problems with incorrect display of the clock parameter can be resolved yourself. If the reason is a faulty or discharged battery, then you can replace the part yourself. To do this, you just need to open the back cover and install a new battery.
It is also advisable to check the contacts when replacing. If there is a suspicion of their oxidation or lack of conjugation with the nutrient element, then they need to be cleaned and bent.
Mechanical damage in the form of cracks in the display or breakage of the key fob body is “treated” by replacing the part. The new remote control can easily be “linked” to the old car. If the time is periodically “reset” or displayed incorrectly, then this is a software failure. Service center specialists and programmers will help you here.
If after replacing the battery the key fob still does not work, then perhaps the cause of the failure was a more serious breakdown that requires repair.
What will you need?
To troubleshoot a StarLine car alarm key fob, you need to prepare the following tools, devices and items:
- small Phillips screwdriver;
- a brush with soft bristles;
- cotton buds;
- a bottle of medical alcohol;
- multimeter;
- soldering iron with a thin tip.
To eliminate the breakdown and restore all functions of the remote control you need:
- Remove the battery from the device.
- Using a Phillips screwdriver, unscrew the screw holding the two halves of the key fob body together.
- Take a soft brush and carefully clean the internal parts of the pager from dust and other contaminants.
- If there is stubborn dirt or liquid droplets inside the device, carefully remove them using a cotton swab dipped in undiluted rubbing alcohol.
- Using a multimeter, check the operation of the system board, transistor, diode and other important elements. If, according to the diagnostic results, any part turns out to be non-functional, it must be replaced with a working one. You can purchase components for an alarm key fob at a radio parts store or other specialized sales points.
- Using a soldering iron with a small tip, install the new part into the device. With the same device you can return the loose contact to its place.
- Assemble the pager body and tighten the screw with a screwdriver. Reinsert the battery.
StarLine keychain disassembled
How to reset the key fob settings?
To reset the already configured parameters of the key fob and return the alarm to the factory settings, you will need to do the following:
- Get into the car, turn the key in the ignition and turn on the engine.
- With the engine running, briefly press the service button 9 or 10 times, depending on the security system model.
- Turn off the engine and wait for 9 or 10 short beeps from the anti-theft system, which indicate successful entry into the reset mode.
- Take the key fob in your hands and make one quick press on button 1.
- Wait until one short signal sounds from the security system, confirming that the settings have been reset to factory settings.
- To leave the reset mode, you must turn on the car engine or wait a while until the system automatically exits.
If all reset steps were completed correctly, the car will respond with 5 flashes of side lights and 1 melodic signal, the duration of which will be longer than the previous ones.
Loading …
How to register (bind, add) Starline a93 keychain
A total of 4 key fobs can be programmed into Starline a93, a39, a63, a36, and it doesn’t matter whether they have feedback or not. When adding a new remote control, all old ones are erased from the system memory. Therefore, when programming, you need all valid key fobs.
To program new key fobs, do the following:
- Press the service button 7 times and turn on the ignition - the siren will sound 7 times;
- Simultaneously briefly press buttons 1 and 2 (does not depend on the type of key fob - with or without LCD) - one siren signal and one remote control signal will sound;
- Repeat step 2 for all recordable key fobs. Each successful programming of the subsequent remote control is confirmed by the corresponding number of siren and key fob signals;
- Turn off the ignition - the turns will flash three times.
7.1. Video of programming new Starline A93 key fobs
How to set the clock on the StarLine A91 key fob
One of the most popular Starline alarm models are the A series systems. Setting this parameter here is quite simple and is the same for all types. Below are instructions using the Starline A91 modification as an example:
- The remote control is equipped with three functional buttons, each of which is responsible for a certain number of functions. To set the time on the Starline key fob, you will need to hold down the third button for a few seconds, until it emits a melodic signal. Afterwards, another sound should sound, and two melodies should also be played. Now the owner has entered the time settings mode, and the clock indicator blinks on the display.
- Using the first and second buttons, the “Clock” parameter is changed. In the first case, it increases, in the second, it decreases. After setting the correct parameter, you must press the third button again. The “Minute” indicator now starts flashing. Its adjustment is carried out in the same way, by pressing keys 1 and 2.
- The next click on the third button switches to the alarm setting mode. The procedure for programming it is exactly the same - the first button is responsible for increasing the parameter, the second - for decreasing it.
- Pressing key 3 again allows you to activate or deactivate the alarm. In this case, the first button turns it on, and the second button deactivates it.
- Another click of the third button allows you to go to the alarm timer setting menu. Parameters are reduced or increased in the same way.
- It’s very easy to finish setting the clock on the Starline remote control - just don’t press anything for 5 seconds. The system will remember and save the changes made.
Below is a detailed video review that will help you understand exactly how to fine-tune your watch.
Setting the time on the car alarm key fob has a direct impact on the operation of the timer and alarm clock. For example, if the car owner has not set the correct clock settings in the device, then the automatic engine start function will work with serious errors. This means that the ignition system will turn on earlier or later than scheduled, and the vehicle owner will spend additional time warming up the engine and interior.
How to set the time on a key fob
The Starline A93 alarm system is distinguished by its ease and simplicity of operation. All settings and control of the car are carried out using 4 buttons. Actions and alerts are visualized on the LCD screen.
The time setting is carried out as follows:
- Enter the “Functions Menu”. To do this, press and hold button 4 for several seconds. Upon entry, 1 long and 2 short beeps are heard. The clock on the screen begins to blink.
- To set the time, use buttons 2 and 3 - increase and decrease the value, respectively. First change the clock. Then press button 4 and set the minutes in the same way.
- The next press of button 4 takes you to the alarm time setting menu. Hours and minutes are configured similarly to step 3.
- After pressing button 4, they switch to the mode of turning on (ON) or turning off (OFF) the alarm clock. When turned on, the alarm will sound at the configured time.
- Then the autorun timer is set. The process is similar to adjusting the alarm clock: using button 4, you go to setting the hours and minutes, turning the function on and off.
When entering the menu, the user is given 8 seconds to set the clock on the key fob. If no action has been performed during the specified period, the device returns to its original position.
There is another way to set up a car engine to start using a timer. To do this, press and hold buttons 2 and 3 simultaneously until a long and short beep appears.
The alarm clock icon will flash at the bottom of the display. If you press button 1, the icon will be lit constantly. In this case, autorun will turn on according to the time set on the alarm clock.
If you press buttons 2 and 3, they switch to autorun mode using a timer, and an hourglass image appears. The machine will be turned on when the mode is activated and subsequently after a set time interval.