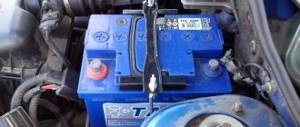
To properly charge your car's battery, you do not need to have deep knowledge or special skills. The basic knowledge of physics that school gives us will be enough. Therefore, any driver can do everything in practice. At the same time, you should not neglect the instructions, because they are included with the battery for a reason. This will allow you to decide how many amps to charge the battery.
About what affects the battery charge
Although most batteries are maintenance-free, they still need to be charged. And this largely depends on the operating conditions of the vehicle. If you travel short distances with frequent stops, turning off the engine and starting it again, this negatively affects the actual battery capacity - it decreases.
In addition, a key role is played by the generator, or rather its operating mode. This is especially true for older cars. The bottom line is that the generator produces its optimal characteristics only when it reaches 2,000 rpm. In other words, the idle mode of operation of the power unit is not capable of properly charging the battery, especially if powerful consumers are involved.
In any case, you should know how many amperes are needed to charge the battery. And from time to time (at least before the onset of winter), you need to charge the battery from another power source. And in this case, special devices are used.
General information about battery charging
Charging itself is usually carried out with direct current; alternating voltage is not suitable. Therefore, most chargers (chargers) contain the necessary rectifiers. But there may be some nuances here too. At the same time, you can use any other device that produces the desired voltage value with the ability to adjust the output parameters.
It’s worth noting right away that the recommendations given in the article apply only to acid batteries. For alkaline analogs, the rules are slightly different. But since cars are mostly equipped with acid batteries, we will further analyze the question of how many amperes are needed to charge a battery, starting from them.
How to properly charge a car battery
Surely, every car owner who has been using his car for at least five years has had problems when a dead battery could not start the engine, or, to be more precise, the voltage was not enough to turn the starter. If you have never had such a problem in several years, then you can say that you are very lucky, since the average battery life is about 3 years. Although it is possible that with careful treatment and operation, the battery can last 4 or even 5 years.
- The optimal charging current should be 1/10 of the full battery capacity. That is, in other words, if your battery has a capacity of 55 Ampere-hour, then the required current is 5.5 Amperes. These are recommendations from manufacturers of both the devices themselves and storage devices. But the ideal option would be to run less current to the battery terminals. That is, in a similar case, supply a current of not 5.5, but already 2.75 Amperes. Of course, the process will be a little slower (twice), but the quality will only increase.
- As for voltage, most chargers that are sold now have an automatic mode. But, you should pay attention to the orientation of the battery: some devices have a switch that changes the voltage for different types of batteries: 6, 12, 24 Volts. Accordingly, you need to choose the mode necessary for your battery. And then the charger will do everything for you, that is, at first the voltage will be supplied stronger, and when the charge reaches 75%, it will automatically decrease, ultimately to a minimum value, in order to prevent the battery from self-discharging.
We recommend reading: You can buy furniture with maternity capital
Preparing to charge
Before starting the process, it is worth taking a number of additional and necessary steps. First, you should remove the battery from the car, not forgetting to unscrew its terminals. There is an opinion that charging the battery can be carried out without removing the battery, even leaving the terminals in their places. However, it is better not to do this. The battery is a relatively heavy thing, but it’s better to take the trouble and remove the battery.
Now you should clean the battery from dirt. While it was under the hood, it was unlikely to remain clean. In addition, any battery (even a maintenance-free one) has a special valve through which the electrolyte evaporates (it then condenses on the lid). It is worth adding other negative effects: adhering dust, dirt, oil. Ultimately, a conductive layer may appear, leading to increased self-discharge of the battery.
Knowing how many amperes to charge a car battery is, of course, necessary (more on this a little later), but preliminary preparation should not be ignored. Therefore, to avoid many troubles, the battery must be thoroughly cleaned before charging, and possibly after. To get rid of many contaminants during battery operation, you can purchase a special case for it.
Battery charging options
Many drivers are interested in this logical question: how long should it take to charge a car battery? To answer this, you should know that there are four main ways:
- Use of direct current.
- Constant voltage charging.
- Combination.
- Accelerated process.
It is worth considering them in more detail, since each option has its own characteristics. On top of that, don’t forget about safety precautions! The electrolyte contains sulfuric acid. Therefore, it is necessary to be careful and work best with gloves and safety glasses.
And it is not so important how many amperes to use to charge a car battery, but to take into account that the procedure itself should be carried out in a well-ventilated area. This is due to the release of hydrogen. Therefore, any work involving open flames and the formation of sparks (welding, cutting) is prohibited near this place.
D.C
This technique is ideal in cases where the battery is heavily discharged. Then it will receive a more complete and uniform charge. Although the process itself is lengthy, this way you can restore the battery capacity to the maximum. The bottom line is that the manipulation consists of several stages, and at the same time the current itself is maintained at a constant level.
This option is not very convenient because it is necessary to constantly monitor the charging process, as well as change the voltage and adjust the current. In other words, simply turning it on and leaving everything for a while will not work. The “set it and forget it” principle is not appropriate here! In addition, the charger should be purchased with the ability to adjust the current.
Battery 60 ampere hours - what charging current to set, how much to charge
I have charged various batteries with capacities ranging from 44 to 60 amp hours. And to be honest, I didn’t notice the difference. So for 60 amperes I charge at 4 amperes. The fact is that they used to write this in the instructions. But if the battery is old, then I extend the charging and charge at 2 amperes. But I determine the charging time in each case by the density of the electrolyte. Well, if this is not possible, such as with maintenance-free batteries, then use a tester. So that the voltage is as in the instructions for a specific battery. But usually 8 hours is enough. But it is better to charge the battery more often and then 4 hours is enough.
The question is not an easy one and I had difficulties at first, until I realized one simple truth: the charging current of most batteries (not counting lithium ones) is 1/10th of the rated capacity. That is, if the battery is 60 ampere hours, then it can be charged with a current of no more than 6 amperes (preferably lower) for 6 hours.
The charging procedure itself
Now it’s time to get acquainted with how many amperes to set when charging the battery. Only for the process you will have to arm yourself with a multimeter.
In the future, proceed according to this scheme:
- Stage I. The current strength is set to 0.1 of the battery capacity (60 Ah - 6 A, 40 Ah - 4 A). It should be maintained until the voltage reaches 14.4 V. This is where a multimeter is needed.
- Stage II. The voltage of 14.4 volts was not chosen by chance - in this case, the electrolysis of water increases, and sharply. As a result, molecules break down into oxygen and hydrogen. The current should be reduced by half. That is, for 60 Ah - 3 A, 40 Ah - 2 A.
- Stage III. When the battery reaches 15 volts, the current must be reduced by another factor of two (1.5 and 1 ampere, respectively). Moreover, the voltage should be monitored every hour or two. And when it becomes constant, and active gas release is observed in the jars, the procedure can be considered complete.
As you can see, with this method of charging the battery it is very difficult to say exactly how long it may take. Everything mainly depends on the degree of discharge, sulfation of the battery, and its age.
We now know how many amperes are needed to charge the battery using this method. As for the deposition of calcium salts on the plates, this phenomenon simply cannot be avoided. Because of this, part of the battery capacity is lost. Accordingly, the smaller this parameter, the faster the battery charges.
How to properly charge a car battery?
08/26/09 |
Category: Battery maintenance. Views: 149,454 (
207 votes, average: 4.08 out of 5)
With the end of the summer season, motorists are increasingly faced with the question of charging their car battery. Due to numerous requests from readers of the portal battery-industry.ru , we are publishing instructions for the “correct” charging of the battery.
Battery charge
Lead-acid batteries must be charged from a direct (rectified) current source. You can use any rectifiers that allow adjustment of the charging current or voltage. At the same time, a charger designed to charge one 12-volt battery must provide the ability to increase the charging voltage to 16.0-16.5 V, since otherwise it will not be possible to charge a modern maintenance-free battery completely (up to 100% of its actual capacity).
The positive wire (terminal) of the charger is connected to the positive terminal of the battery, and the negative wire to the negative terminal.
In operational practice, as a rule, one of two methods of charging a battery is used: charging at a constant current or charging at a constant voltage. Both of these methods are equivalent in terms of their impact on battery life. When choosing a charger, you should be guided by the information below.
Charge at constant current
The battery is charged at a constant charging current equal to 0.1 x C20 (0.1 of the nominal capacity at a 20-hour discharge mode). This means that for a battery with a capacity of 60 Ah, the charging current must be 6 A. To maintain a constant current throughout the charging process, a regulating device is needed.
The disadvantage of this method is the need for constant (every 1-2 hours) monitoring and regulation of the charging current, as well as abundant gas release at the end of the charge.
To reduce gas emission and increase the state of charge of the battery, it is advisable to reduce the current in a stepwise manner as the charging voltage increases. When the voltage reaches 14.4 V, the charging current is reduced by half (3 Amperes for a battery with a capacity of 60 A•h) and at this current the charge is continued until gas evolution begins. When charging batteries of the latest generation, which do not have holes for adding water, it is advisable to increase the charging voltage to 15 V by once again reducing the current by half (1.5 A for batteries with a capacity of 60 A•h).
The battery is considered fully charged when the charging current and voltage remain unchanged for 1-2 hours. For modern maintenance-free batteries, this state occurs at a voltage of 16.3-16.4 V, depending on the composition of the grid alloys and the purity of the electrolyte.
Charge at constant voltage
When charging using this method, the degree of charge of the battery at the end of charging directly depends on the amount of charging voltage provided by the charger. So, for example, in 24 hours of continuous charging at a voltage of 14.4 V, a 12-volt battery will be charged by 75-85%, at a voltage of 15 V - by 85-90%, and at a voltage of 16 V - by 95-97%. The battery can be fully charged within 20-24 hours with a charger voltage of 16.3-16.4 V.
At the first moment the current is turned on, its value can reach 40-50 A or more, depending on the internal resistance (capacity) of the battery. Therefore, the charger is equipped with circuit solutions that limit the maximum charge current to 20-25 A.
As charging proceeds, the voltage at the battery terminals gradually approaches the voltage of the charger, and the value of the charging current, accordingly, decreases and approaches zero at the end of the charge (if the value of the charging voltage of the rectifier is lower than the voltage at which gas evolution begins). This allows charging without human intervention in a fully automatic mode. Typically, the criterion for the end of charging in such devices is the achievement of a voltage at the battery terminals during charging equal to 14.4 ± 0.1 V. In this case, as a rule, a green signal lights up, which serves as an indicator that the specified final voltage has been reached, that is, the end of the charge. However, for a satisfactory (90-95%) charge of modern maintenance-free batteries using commercially produced chargers with a maximum charging voltage of 14.4-14.5 V, it will take more than a day.
Car battery charge
When using a battery in a car, it is charged at a constant voltage. Car manufacturers, in agreement with battery developers, set the charging voltage level to 14.1 ± 0.2 V, which is lower than the intense gas release voltage. As the temperature decreases, the charging efficiency at a constant voltage decreases due to an increase in the internal resistance of the battery. Therefore, the car battery does not always restore its capacity completely after being discharged. Typically, the battery charge level in winter is 70-75% if the voltage at the battery terminals is 13.9-14.3 V with the engine running and the high beams on. Therefore, in severe winter conditions (at low temperatures, frequent and long starts of a cold engine and short runs), it is advisable to periodically (preferably at least once a month) charge the battery from a stationary charger and at a positive temperature.
For a fully charged battery, the density of the electrolyte is 1.28±0.01 g/cm3. It decreases linearly as the battery discharges; it is 1.20±0.01 g/cm3 for batteries whose state of charge has decreased to 50%. A completely discharged battery has an electrolyte density of 1.10±0.01 g/cm3.
If the density value in all batteries is the same (with a spread of ±0.01 g/cm3), this indicates the degree of charge of the battery and the absence of internal short circuits. If there is an internal short circuit, the density of the electrolyte in the defective battery bank will be significantly lower (by 0.10-0.15 g/cm3) than in other cells.
To measure the density of liquids, hydrometers with replaceable densitometers are used to measure the density of various liquids, for example, antifreeze with a density of 1.0 to 1.1 g/cm3 or electrolyte with a density of 1.1 to 1.3 g/cm3.
When measuring, the float should not touch the walls of the cylindrical part of the glass tube. At the same time, it is necessary to measure the temperature of the electrolyte. The density measurement results in +25°C. To do this, the correction specified in the specialized literature must be added or subtracted to the densitometer readings.
If the measurement turns out that the NRC is below 12.6 V and the electrolyte density is below 1.24 g/cm3, the battery must be recharged and the charging voltage at its terminals checked with the engine running.
Source: www.livi-car.ru
Constant pressure
The process using constant voltage is relevant in case of small additional charging. Many devices with a similar mode of operation operate automatically - this is much simpler and faster than the method described above. In this case, you can roughly estimate how long it will take to charge the battery, since the process is affected by the supplied voltage:
- 14.4 V – A 12 volt battery will charge 80% within 24 hours.
- 15 V – the battery can be charged to 90% within a day.
- 16 V – charging percentage can reach 95%.
- 16.3 V - in this case the battery is fully charged.
How many amperes should there be when charging the battery in this case? The point here is that the current value changes throughout the process. At first, when the battery is discharged, the value can reach several tens of amperes, but subsequently the current decreases. At the same time, the internal resistance of the battery increases.
The convenience of this method is that there is no need to control the current strength; the charger can do this independently. And when the battery is charged, the device also spontaneously stops the process.
Charging the Exide Excell EB704 battery using Vympel-55
Previously, I talked about my choice of charger for car batteries.
Below we will talk about charging my calcium CA/CA car battery Exide Excell EB704 (70Ah 540A) which I bought about 5 years ago. I can’t say for sure, because I couldn’t find the date of manufacture - now I’m even wondering if I have a “left” battery?
In any case, it so happened that after many years of using the Exide Excell EB704 (70Ah 540A) battery in my 2005 Toyota Camry, 2.4L, after the onset of the new year 2020, after a week of the car being idle in an unheated garage, I was unable to safely start the car. And there were no frosts in Moscow during the New Year holidays...
What’s most nasty is that my alarm system didn’t notify me about the voltage drop by calling my cell phone - I have such a notification function... Once, in the Auchan parking lot, I forgot to turn off the headlights and while I was walking around the store with my wife, the battery was safely discharged. So then the alarm called me and informed me about a voltage drop... But this time it didn’t work out!
So the battery is dead or completely dead
— at that time I didn’t know. The battery worked, as I already said, for perhaps 5 years, and during all this time I did absolutely nothing with it - did not measure the voltage, did not recharge, did not check the density of the electrolyte... Nothing at all! Before installation, I just cleaned the terminals and, after fixing the battery clamps, treated them with a protective lubricant against oxides. By the way, no matter how hard I tried, I still couldn’t find the release date on the battery... I bought it at one time in Zhelezyak - it was a sinful thing to think that maybe they sold me a fake...
At the moment when I tried to start the car:
— the voltage on the Exide Excell EB704 battery was 11 volts. - the starter did not turn - the hood lock was unlocked
After several attempts to start the car, the voltage dropped to 9 volts and the hood lock no longer worked. The temperature in the garage was about -5 degrees.
Since I didn’t have a charger before, and after the holidays there was no one around in the garages to try to “light up,” I had to buy a new battery.
a Varta battery from Auto 49
70Ah (Blue Dynamic 570 412 063), and at the same time I immediately bought a hydrometer in a plastic tube for 219 rubles. to check the density of the electrolyte. Manufacturer: Top Auto.
I brought the Exide Excell EB704 battery home for easy heating and testing with the purchased Vympel-55
. When the battery warmed up, I checked the density of the electrolyte.
The Exide Excell EB704 battery has an oblong cover under the top sticker, which can be easily picked up with a screwdriver and removed to provide access to the banks. Visually, the electrolyte completely covers the plates by 10-15mm:
Before I started measuring the density of the electrolyte in the battery, I made a stand for a hydrometer from a 2-liter plastic bottle. The photo shows how it was done. I poured in a little water and sprinkled in a spoonful of soda and stirred. The main thing is that the tip of the hydrometer pipette is not immersed in this solution with soda... 
When measuring electrolyte density, be sure to wear rubber gloves! Still, you have to deal with acid...
After the measurements, it turned out that
the density of the electrolyte in my battery is very underestimated - in all banks - from 1.12 to 1.14.
At first, I sinfully decided to buy electrolyte and dilute it with what was in the battery to the required density of 1.27 - 1.28
Reference:
The density of a fully charged battery in central Russia is 1.27-1.28 g/cm3, voltage - 12.7 V
But I came to my senses in time... I read smart people :), and I also looked on YouTube for explanations of the processes in the battery and, in particular, for what reason the density drops and Why can’t you increase the electrolyte density with a new solution before charging the battery?
The fact is that when the battery is severely discharged or after long-term storage, sulfation occurs - the deposition of sulfuric acid sulfates on the battery plates. At the same time, the density of the battery electrolyte drops significantly, and sulfates are deposited on the plates. When charging the battery, sulfates are destroyed and the density of the electrolyte is restored.
__________________________________________________________________________
Finally my Vympel-55 charger arrived with the latest firmware 2.27!
In the last article I posted two user instructions in the old and new modifications. They are a little different.
In the latest charging options, we changed the layout of the element base and slightly corrected those “jambs” that users very often complained about: - lack of thermal paste on power elements - fastening the latter to radiators using rivets, not screws - small fan
Some changes have been made to charging management. Now, for example, the start of fan operation (except for forced fan) can be set to 25 degrees.
After opening the device, I will take photos and post them in a separate article.
Immediately in the settings of Vympel-55 I set the fan to turn on at the lowest limit - 25 degrees. I must say that the fan is visually large, but during operation it seemed quite noisy to me. I'll probably change it for a quieter one.
The Orion NV-01 tested its battery with a load fork:
- without load it shows about 12V - probably warmed up at home during the day. — when the load is connected, it drops to 6V and slowly rises to 9V and the voltage holds.
I read on the website of the manufacturer Exide Excell that in case of a deep discharge, the battery must be charged with a low current of up to 2A and a voltage no higher than 14.4V.
I installed the following parameters on Vympel-55:
- 2A - 14.4V -
Charging algorithm 1
(the most common one, when the current drops when the charge is reached) Next, I connected the charging terminals to the battery and turned on charging.
The strangest thing is that after charging up to 13 volts for an hour and a half or two, the window showed “Charging complete” and the parameters no longer changed.
Then I came across a mention of this in one of the videos - that somewhere after an hour of work this inscription is displayed.
When the indicator “CHARGING IS FINISHED” appears on the indicator of the VIMPEL-55 charger (if the additional information line is activated) after some time, this is not a sign of a charged battery!!!
In this mode, charging worked for me for a little more than 2 hours, after which I increased the charging current to 6A (my battery is 70Ah) with the same charging voltage - 14.4 volts. This time, after several hours, Vympel-55 shows 14.4 volts and the same inscription “Charge is complete”, and the current gradually drops, i.e. the charge is coming. After 8 hours, the charge current had already dropped to 1.5 amperes and gradually decreased further.
When the current dropped to a reading of 0.6 amperes, I turned off the charging from the battery and, after being idle for a couple of hours, measured the density of the electrolyte.
So after 15 hours of charging I got the result:
- 40.2Ah supplied - electrolyte capacity in the banks increased to 1.24 - 1.25 - voltage without load - 13.4V - voltage under load - 11V
I decided to continue charging the battery according to the algorithm - in the so-called “desulfation mode”.
One of the indicators of this very desulfation is the low density of the electrolyte. Those. when sulfuric acid sulfates are deposited on the plates and the density of the electrolyte drops. It is for this reason that the low density of the electrolyte of a discharged battery cannot be brought to normal (usually 2.7) with a ready-made solution. If after such a procedure you start charging the battery, the density will exceed this indicator, which will have a detrimental effect on the battery.
In the process of charging the battery with a “swing”, sulfates on the plates are “destructed”, they, the plates, are cleaned, and the density of the battery electrolyte is restored.
If you put anything into the battery, it’s ONLY distilled water!
The settings on the Vympel-55 for the “swing” mode were as follows:
— selected “Profile 3” and edited it for the values below. - charge current - 7A (let me remind you that my battery has a capacity of 70Ah) - voltage 1 - 16.2 volts - voltage 2 - 13.8 volts
When connecting the battery to the charger, it showed me a battery voltage of 12.9 volts:
Set battery charging parameters After 12 hours, I lowered the upper voltage limit from 16.2 to 16.1 volts, since the charge took an extremely long time to reach this threshold. The charging process has begun! So far the voltage has risen to 13.3 volts...
The battery charging procedure is nearing completion...
The battery charge time is almost 56 hours!
And this is the number of ampere hours given - 63 A/h
Now the battery should stand for a while, after which I will re-measure the electrolyte density - let’s see if the density has been restored to 2.7 or not... I’ll write about this a little later...
By the way, here is the ratio of the charge current readings on the Vympel-55 indicator and on the Fluke317 current clamps:
At the end of the “swing” charge using algorithm No. 3, we have the following:
The voltage on the battery
immediately after charging is complete is 13.7 volts.
Let's see how much it will show after 8 hours. Charging time
on algorithm 3 - 64 hours 47 minutes
Number of amperes/hours supplied
- 66.6
Don’t look at the voltage readings too much - it was recorded by the camera as the readings changed in the range from 16.1 to 13.8 volts
Also, after a few hours I will measure the density of the battery electrolyte. After charging, the voltage on the battery showed 12.9 volts. When checking the density, I discovered that the electrolyte level had dropped, but the plates were still under the electrolyte, but the density in the jars turned out to be 1.29 - 1.3. I mean, it’s still a little big... so I’m thinking of diluting it by adding distilled water.
The result was like this:
Charge on ALGORITHM 1 - For example - 14.4V - Current - first 2A, then increased to 6A - gave a voltage of 12.9 - 13 volts without load and 11 V under load - electrolyte density increased from 1.12 to 1.24 - 1.25 Additional charge on ALGORITHM 3 - Voltage 1 - 16.1V - Voltage 3 - 13.8V - Current - 7A - the voltage on the battery did not increase and remained at the same level - the density of the electrolyte increased to 1.29 - 1.30
When the battery stood for several hours after the third algorithm, the measured density was generally 1.29 - 1.30 I was incredibly surprised!
I noticed that the electrolyte level in the banks had dropped a little, and in some it was a little more, in others a little less. However, within limits - the plates are completely covered with electrolyte - but before charging, visually the level was slightly higher.
Unfortunately, I don’t have any marks in the battery to check the level for minimum-maximum. After that, I played around a little with adding distilled water to the jars and brought the density to an average of 1.26 in each jar. First, I poured some water into the first jar and the density dropped significantly - to 1.23. After this “jamb,” I pumped out the existing electrolyte in the remaining jars into a container and from the first jar evenly distributed the electrolyte a little into each of the remaining ones. Then the poured electrolyte from the container was also evenly distributed distributed among all banks. As a result, the total density of the electrolyte was around 1.26
After that, I recharged the battery using the first algorithm 1 at a current of 3A and 14.4V until the current dropped to 0.5A - the battery was charged in this mode for half an hour... the density did not increase. I did this recharging so that the electrolyte could be mixed better.
Now I’m wondering whether it makes sense to add a little water to raise the level and use a corrective electrolyte to bring the density to 1.28 or not... While the battery is “resting”...
Now the battery without load shows 13 volts. Under load it immediately drops to 11 and then rises to 12.7 - no higher. The third day has remained at this level for now.
After checking the voltage under load with a load fork, the voltage from 11 volts slowly increases again.
Below you can see what readings are displayed on three different devices:
1 - with Vympel-55 turned off 2 - using FLUKE 317 current clamps 3 - using TRUE multimeter UNI-T UT71D
Video on measuring electrolyte density after the 3rd algorithm while charging:
Hydrometer - its measuring flask
The one on the left is the hydrometer, which is the first one I bought. He used it to measure the density before charging and everything was fine - he was holding the electrolyte collected in the flask. But then for some reason the electrolyte began to pour out of the flask... It looks like air is passing through somewhere. That's why I bought another one - in a glass flask - the electrolyte collected for measurements is holding normally for now.
Measuring battery electrolyte density:
It’s not visible in the photo, but the readings are around 1.29 - 1.30
Next, we’ll look at different battery charging algorithms, and I’d also really like to take a look at the insides of the Vympel-55 with the new firmware 2.27. It’s a pity that there’s no schematic diagram of this charger anywhere... maybe someone knows where it is? I couldn't find anything.
Combined option
This technique is the most gentle and effective, since it combines the capabilities of the first two methods. At the beginning of the process, the current remains constant, but the voltage changes. At the end of charging, everything happens the other way around - now the potential difference is set constant, and the current gradually decreases. If you use an automatic device, then you don’t even have to think about how many amperes to charge the battery at.
In addition, this technique is optimal from the point of view of conducting a quality process. It allows you to increase the service life of the battery itself. At the end of the procedure, the current is almost 0.
Accelerated process
This method is good in cases where it is necessary to restore the battery capacity for at least one engine start. For this purpose, some chargers have a corresponding Boost mode. In this case, charging is carried out under the influence of increased current for 20 minutes.
If the device does not have such a mode, but has a current control, then you can set the overcharge yourself. Only its value should not exceed 30% of the value during normal charging. How many amps should I give when charging a battery? For example, if it is usually 4 A, then the current in accelerated mode should not exceed 5.5 A. Otherwise, it will negatively affect the battery plates.
It is also worth noting that the accelerated charging mode should only be used in emergency situations when it is necessary to urgently start the engine. But after the trip, it is imperative to fully charge the battery in normal mode.
What current to charge a car battery with: 60, 70, 100 Ah
- charge with asymmetric current. Within 0.01 seconds, a voltage of 14.2 V is supplied to the battery terminals by the charger, over the next 0.01 seconds the polarity is reversed, with a voltage of 3.6 V;
- pulse current. A variation of the previous method, in which the period of voltage supply alternates with a period of no charging, during which time the battery “rests”;
- step change in current. At the battery terminals, the charge voltage varies according to a certain law from 12.6 V to 14.6 V.
The accumulation of charge in a battery is not a linear and constant process. Maintenance-free batteries are designed in such a way that the optimal voltage of 14.2 - 14.6 V, recommended by many practitioners, is higher than the previously used 13.2-13.8 V on older drive designs.
Gel batteries
Recently, gel batteries have begun to gain popularity. Their main advantage is the fact that despite the degree of discharge, the battery is capable of delivering increased current. This quality is simply irreplaceable when starting the engine in winter.
Another clear advantage is that the battery is able to supply the entire electrical network of the vehicle until the battery reserve drops to 25% of the full charge.
Gel batteries have the same standard capacity - 60 Ah. As you know, repeated charging of almost all lead batteries reduces this parameter, which is due to their design features. Gel batteries are more resistant to this procedure. Modern batteries can withstand up to 1,000 charges. But you should know how many amperes to charge the battery at. And this is exactly what will be discussed further.
Features of charging gel batteries
Since gel analogues of lead batteries are still at the stage of gaining popularity, not every service center can undertake charging them. In addition, here is another difference from lead batteries, which can be charged with a voltage within 14-16 V. You should be extremely careful with modern gel power sources, since they are characterized by a certain voltage threshold, which in no case should be set above 14 Volt.
What current should I use to charge a car battery for longer life?
You can select the battery of the required capacity based on the engine displacement, like this: 55 Ah is suitable for a volume of 1 - 1.6 liters, 60 Ah is suitable for a volume of 1.3 - 1.6 liters, and a capacity of 75 Ah is suitable for 1.6 - 3 .2 liters. The most common capacities are: 55 and 60 ampere-hours, and the rarest is 190 ampere-hours.
The value of 14.5 volts is used in the process of charging conventional lead batteries. Voltage indicators that are higher than this figure are used to replenish the energy of maintenance-free batteries. The recovery time for such batteries is much shorter.
Battery charge monitoring
By monitoring the battery charging process with a multimeter, you can only get a mediocre idea of what exactly is happening. Of course, it is necessary to know how many amperes to charge the battery, but to obtain more accurate information it is worth measuring the density of the electrolyte. And for this you cannot do without another device, which every driver should have in any case. We are talking about a hydrometer.
The electrolyte density must be measured in each jar, and the degree of charge is assessed based on the resulting average value. Moreover, this characteristic itself should be approximately the same in all containers. However, minor deviations may be present, which is normal.
The need for each method of charging the battery
Now you can imagine how long the entire charging procedure will take. Specifically, everything is determined by the condition of the battery and the type of procedure used. Finally, I can give you a practical recommendation. We now know how many amperes to charge the battery at. There are no problems at all with the automatic charger.
But it is worth noting another interesting point - when the charger is turned off, the battery can be left in this mode for storage. And while the battery is idle, the leakage current will contribute to a gradual discharge and, as a result, its internal resistance will decrease.
As needed, the charger will turn on and replenish electrical losses. As a result, the battery will always be fully charged and ready for further use.
How to charge a car battery at home
It turns out that the answer to the question of whether a new car battery needs to be charged will be negative. There is no need to charge a new battery. If the battery you plan to purchase is discharged, then it may simply be old, used, or have a manufacturing defect.
A common cause of deep battery discharge is simple inattention. Often it is enough to leave the car with the lights or headlights, interior lighting or radio on for 6-12 hours, after which the battery is completely discharged. For this reason, many car owners are interested in the question of whether it is possible to restore a completely discharged battery.
05 Aug 2020 toplawyer 23503
Share this post
- Related Posts
- Will working pensioners be paid pensions in 2020 in Russia?
- Find out about deprivation of rights by last name
- How to register as an employer in 2020
- How to get pension savings when you retire
