Where to start modernization
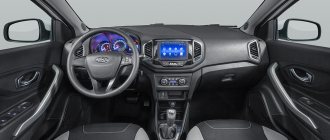
The basic speaker package is sparse and not particularly interesting. This is especially true for sound design. Only the luxury version of the car is equipped with a powerful sound system with a full set of modules.
The basic version does not include a radio and speakers in the rear doors of Vesta.
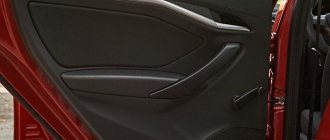
However, the manufacturer provided the opportunity to install the audio system and speakers yourself. There are standard holes on the dashboard for mounting the speakers. Under the casing there are wires that transmit the signal from the installation site of the speaker system to the speakers. The owner needs to select and purchase components, then install the equipment in the car.
Tips when installing an audio system
As we can see, the installation of acoustic components in the LADA Vesta interior is not capable of generating difficulties and dead ends. The main thing for the owner is to adhere to simple but useful rules, namely:
- We carry out the entire list of manipulations extremely carefully, without breaking the fasteners or scratching the panels.
- Since audio preparation is initially present, we just need to connect the speakers and head unit.
- We do not cut off the standard connectors, but stock up on the previously specified adapters.
- Before directly installing the dynamic heads, we soundproof the door panels.
- Installation of the speakers is carried out on previously prepared gaskets.
In the places where the speakers are mounted, spacers are placed under the speakers; this gives purity of sound. By the way, the standard radio of the Lada Vesta plays, in my opinion, at a decent level, all because there are spacers there. They must be installed so that: the speakers do not touch the casing, so that there is no rattling, vibration, or constant noise. Automakers provide different options for car audio preparation that make it easier to install music. Lada Vesta does not have speakers and acoustics everywhere. The standard multimedia acoustic system is fully included in the luxury Lada Vesta car; the standard speakers have good sound. The Lada Vesta comfort version includes an audio system + 4 speakers, and does not have tweeters in the mirror triangles. There are speakers in the doors, their size is 16 cm or 6 inches. The Lada Vesta classic (basic version) does not have a radio and speakers; in place of the radio there is a plug - “everything for the people!” The classics only have wires for connecting an audio system, coupled with standard holes for speakers (Acoustic system). To learn more about the topic, read the article to the end!
Equipment selection
Car tuning is limited by the driver’s imagination and financial capabilities. Manufacturers of sound mechanisms offer three product options:
- Broadband module. It is a simple design consisting of one column. Accordingly, it reproduces all frequencies at once. The cheapest option.
- Coaxial device. Consists of three speakers located in one unit. The best option in terms of price and quality ratio. The sound is more spacious and harmonious, but there is no stereo.
- Component system. The most expensive and advanced of those available. Each speaker is located separately in its own housing. The first reproduces low frequencies, the second – medium, the third – high. There is a stereo effect and the ability to adjust the sound.
The client's choice depends on several factors. Quality lovers spend more money on expensive subwoofer models. Anyone who is not considered a music lover is limited to a built-in device or the cheapest one on the market.
Installation recommendations
To obtain high-quality sound before installation, you should follow several recommendations:
- The choice of equipment is the most important step in tuning. Its operation and workmanship can be checked upon purchase.
- The use of spacers under the speakers will eliminate extraneous noise when the membrane vibrates.
- To obtain high quality, the output power of the speakers must be higher than that of the radio.
- Using a plastic puller will protect the trim elements from deformation during operation.
- The diameter of the speaker space in the front door is 6 inches, in the rear door it is 5.
- Audio equipment components must be from the same manufacturer. This will help avoid inconsistencies.
- Acoustics must have a volume reserve. Vibration and shaking of the car lead to a decrease in sound quality over time.
Dismantling
Before installing and connecting speakers in the Lada Vesta, you need to remove the door cards. This is not difficult to do. To work, you will need a simple tool - a ratchet, a TORX T20 bit (star), as well as a plastic spatula for removing elements of door cards. If you don't have a spatula, you can use a knife or flathead screwdriver.
Front doors
First you need to remove the triangular panel near the side rear view mirror. To do this, it is first pryed off with a knife, after which the fastener snaps off. All that remains is to disconnect the plug.
After this, you need to remove the lampshade. It is pryed off from the side, and then the plug is disconnected. When this is done, 3 screws are removed from below, which secure the card to the door.
Then the plastic plug is removed from the end, behind which the fastening screw is located. It needs to be unscrewed.
In the center of the door, first unscrew the screw that is located in the door handle.
Next, use a knife or screwdriver to pry off the control unit for the central locking, mirrors and power windows. It needs to be picked up from the side, but very carefully so as not to break the latches.
When the block is removed, you need to unscrew another bolt.
In the end, all that remains is to snap off the caps. To do this, use a plastic spatula (or a screwdriver wrapped in fabric) to bend the door card from below, and then snap it off around the perimeter.
The entire algorithm of actions is clearly demonstrated in the video.
Rear doors
If you decide to install speakers in the Lada Vesta not only in the front doors, then the rear door cards will also have to be removed.
In this case, you first need to remove the window lifter handle if they have a mechanical drive. To do this, you need to insert a plastic spatula from the reverse side and remove the latch, after which the handle itself will be removed.
This is clearly shown in the video.
Then carefully remove the door handle trim - this will give access to the 2 screws. They need to be unscrewed. There is only one screw left - at the bottom of the door.
Finally, you need to unclip the pistons and remove the door card.
Changing and installing a radio
Depending on the model configuration, a standard radio may or may not be installed. The beginning of the manipulations in this case is partially different:
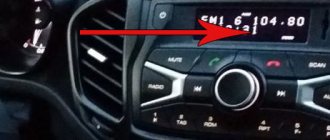
- In the Classic modification, the decorative plug is removed. The procedure is carried out with a plastic card, so the casing is protected from damage. The plastic latches are carefully removed. Inside there are four types of connectors with connected wires: ISO, FAKRA, USB, AUX. The panel is ready for installation of an audio recorder.
- More advanced Grant configurations have a standard soundbar. To install a new product, the old version is removed. To do this, remove the top frame; under the cover is the central part of the radio. The main console latches unhook from the bottom. Next, the air ducts are dismantled and the module is removed, it is attached to the dashboard with screws. On the reverse side, carefully remove the connectors with wires. They are the same as in previous versions of the car.
Installation of the device occurs in the reverse order. The connectors are connected to the appropriate sockets, the pinout of the wires is carried out correctly. The radio is carefully inserted into the remote control and screwed with fasteners. All supply elements are connected, the cover is inserted into place.
Removing the trim and installing the audio system
The installation of the speaker system is similar to the placement of the radio, but has features due to the design of the car body. Before installing the speaker in the door on Vesta, the dimensions are calculated in advance.
The trim is removed from the doorway (fasteners and screws are removed), the procedure is performed without the use of sharp tools. Spacers for the speakers are screwed into the open cavity; they are purchased ready-made on the market or cut out of plywood. The depth depends on the thickness of the acoustics; the structure does not protrude from under the casing. After preparation, the speakers are secured to spacers. Standard connectors with wires are connected to the corresponding sockets of the system. If they do not match, then a purchased adapter is used. Do not press or squeeze the wires, as this may lead to a break.
Tips for selecting and installing a speaker system
For better surround sound, it is recommended to use a two-component system. These speakers use both a high-frequency tweeter and a mid-bass speaker. With their help, you can competently arrange the sound stage. It is recommended to install such speakers in the front. A coaxial speaker system is installed at the rear, which is used to complement the front speakers. Installing tweeters will require additional wiring.
Tweeters are best mounted in the triangle of the rear view mirror. If such a scheme seems too expensive, you can get by with a cheaper coaxial speaker system. In all cases, no additional adjustments are required, with the exception of adjusting the equalizer.
It is recommended to completely soundproof the doors using any available method - this will significantly improve the quality of the sound stage.
Even a beginner can install sound systems on Lada Vesta cars. It is enough to follow just a few simple rules:
- dismantling work should be carried out as carefully and accurately as possible so as not to damage the plastic casing;
- the manufacturer has already taken care of the audio preparation, so there is no need to connect and install the connectors yourself;
- It is impossible to cut off standard pads if they do not fit the new radio; it is better to purchase a special adapter.
Flashing a multimedia system should only be done as a last resort. It is better to entrust this procedure to specialists or contact the service center of an authorized dealer.
Correct adjustment and configuration of equipment
For correct operation of the installed system, debugging is carried out using an oscilloscope. Sequencing:
- All sound impulses from the amplifier are turned off.
- The sensitivity controls are set to the minimum value.
- On the main device, music is turned on at a volume level of 90% of the maximum, the tone control is in the middle position.
- A signal is supplied to one input of the amplifier.
- The knob for the corresponding input is turned until the value limit appears on the oscilloscope screen.
- The signal to the first channel is turned off.
The remaining input channels of the equipment are configured in the same way. In the absence of an oscilloscope, adjustments are made by ear. The appearance of sound distortion replaces clipping on the device screen.
Installing speakers in the rear doors, the Lada Vesta will delight the owner with loud and clear sound when driving. In addition, self-installation will save on visiting the workshop.