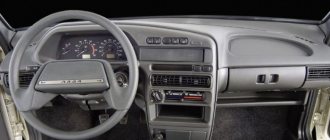
Types of fastenings
Different car radio manufacturers use different types of mounting the device to the car dashboard:
- using latches located on the side walls of the player;
- using elastic latches;
- using bolts or self-tapping screws.
In the first case, the radio is secured through a frame inserted into the niche. There are depressions on the side walls of the head unit housing, and opposite them on the frame there are tabs that are bent and folded with keys. This method of fastening has a disadvantage - the frame is susceptible to deformation. Because of this, fixing the radio in the niche may become less reliable or the head unit may get stuck. If handled carelessly, the latches and tabs may break off.
The second fastening method is more reliable, since latches made of elastic metal are used. They are most often located on the side and top walls of the car player body and engage with grooves on the frame. Other radios can also be inserted directly into a niche on the car's dashboard.
Manufacturers of branded head unit most often use screw mounting to brackets on the car. All fasteners are hidden under decorative overlays. All types of fastening do not allow attackers to quickly remove the radio from the car. Protection of the device from theft is also provided by other fastening elements hidden under decorative overlays, which must be found before removing the standard radio from the car.
To increase the reliability of fastening, a pin is used, screwed at one end into a special hole on the rear wall of the car radio, and at the other end into the inner wall of the car’s dashboard. Thanks to this, the player’s protection against theft is increased, since the device cannot be removed even after deforming the frame or bending the latches using improvised means.
Tools for work
Before removing the standard radio in the Ford Focus 2, prepare the necessary set of tools. This is an asterisk and hex screwdriver. Different modifications are secured with different fasteners. Also pick up a plastic card and an ordinary stationery knife.
The manufacturer has released a special tool for this purpose, with the help of which this task is solved in two, maximum three minutes, but its price is about $10, which is quite a lot today. This key in appearance resembles one half of scissors with special holes. Another difficulty with this key is that it is difficult to find. And you need not one, not two, but 4 of them. But we will try to do without it. If desired, you can disassemble two pairs of scissors.
You can make your own keys. A pre-prepared card will be useful for this. Cut it into slices 2 cm wide. You need four of these records. Cut a 45 degree angle at one end of each slab. Now the tool is ready, and you have saved $40 or more.
What you need to remove
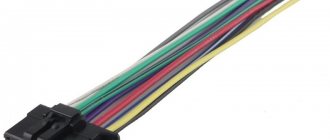
The tool needed to remove the player from the vehicle is included with this unit. The key for removing the radio is a steel strip 5 to 10 cm long with special slots. There are protrusions on one end that you can grab with your fingers. Using this tool, the tabs on the frame are bent and bent or the elastic clamps are pressed out.
If the branded car radio is bolted to the brackets, then you will need 2 screwdrivers. One will allow you to unscrew the fastener, and with the help of the second you can remove the decorative trim under which it is hidden. Removal of the radio, fixed with elastic latches, is carried out with special U-shaped removal keys, which are inserted into the holes on the front panel.
To unscrew the additional stud, you will need a wrench or a socket that fits the nut. If the removal tool included in the kit was lost, then improvised tools may be useful for dismantling the car radio. For example, to bend the tabs on the frame, you can use a screwdriver of a suitable width, a nail file, a car repair probe, a narrow and thin metal strip or a knife. To release the latches, several wire clamps of suitable diameter, a nail or a strong metal rod will be useful.
The process of removing the radio
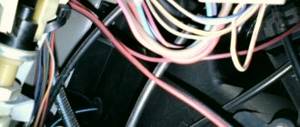
Before removing the radio in the car, you must disconnect the negative terminal from the battery. This must be done for your own safety! Otherwise, a short circuit may occur. Be sure to read the machine's operating instructions. It often happens that the procedure for removing the radio is described there. It is advisable to use the manual in printed form, which will greatly facilitate the process.
The next step is to remove the cladding elements. In many cars, they look like ordinary plastic trims designed to disguise screw sockets, which makes the car panel more attractive. To fasten the cladding, small pins or plastic latches are used. To remove the cladding, you need to carefully pry up one part, after which the fasteners should come loose. All this needs to be done quite carefully. If we are talking about a used car, you may need a hair dryer. The fact is that many car owners glue the lining, as the fasteners simply break. In this case, you need to heat the cladding using a hairdryer. After this, carefully remove the plastic and thoroughly clean the surface underneath it. It is not recommended to reuse old cladding; it is better to buy another element.
Next, take the device for removing the radio. Nowadays, there are both universal sets of such tools on sale, and those designed for a specific model. Unscrew the screws that secure the frame. After this, unscrew the screws of the adapter (if using a 1 din radio). Next, you need to insert the tool into the holes and press on it, applying some force. As a result of this, you will see how the radio comes out of the seat. In some cars you have to remove the glove compartment. This is necessary to gain access to the rear of the socket intended for the radio. This will allow you to push the device out from behind. After the case is removed, you need to disconnect all the wires that are connected to the radio. Remember that everything must be done very carefully, because if the wires fall into the hole, it will be quite difficult to pull them out.
If our tips on how to remove the radio did not help you, or you encountered certain difficulties in the process of dismantling the device, we recommend that you contact a specialist.
Any car driver cannot do without musical accompaniment on his way. This can be either a line of selected tracks on radio channels, or a personal selection of your favorite compositions on a CD or flash drive. But in any case, you need a special device - a radio tape recorder. And if it fails and it’s time to choose a new one, or at least repair the already familiar one, you need to properly dismantle the device. To remove the radio, you need a special key that unlocks a special latching mechanism. How to remove the radio if such a key is not available? Today you will find out the answer to this question.
Removal according to instructions with keys
Before removing the car player, you will need to remove the radio panel and the decorative frame under which the technological openings are hidden. If this cannot be done manually, then you need to disconnect this element with a thin screwdriver, prying one by one the teeth attached to the body of the head unit. Be careful not to use excessive force to avoid breaking the frame. If the car radio does not have a protection mechanism, you should disconnect the battery from the car to increase safety.
The next stage of removal is to insert the keys into the slot near the frame located in front of the device. This must be done carefully and gradually until the tool enters the opening between the side wall of the car radio and the frame tongue. At this point, a slight resistance will be felt.
To bend the tabs towards the frame, disengaging them from the grooves on the head unit, you should slowly lift the key, rocking it from side to side.
Removing a device secured with elastic latches is best done with an assistant: one inserts the keys into the holes and gently presses them, the other carefully removes the car radio, pulling it towards himself. As soon as the latches become visible, the tool is removed from the openings and the device is removed from the niche.
If the radio is not removed, then it could be screwed on with an additional pin or jammed due to damage to the frame. In this case, you will need to remove the car's dashboard so that you can approach the player from the back. Then the outer nut securing the stud is unscrewed, and the radio is removed from the niche. To release the head unit, bend the tabs that secure the frame to the dashboard niche. After this, all the deformed elements are unbent and the frame is removed from the player.
When removing the radio, it should be disconnected from the on-board network. This operation is best performed with an assistant: one holds the head unit, and the other disconnects the connectors or removes the insulating tape and unscrews the wires if the connection was made using a twist. In the latter case, the ends of the wires going to the on-board network must be insulated.
Corolla
In the new body of this Japanese car, replacing the radio is not very simple. For work, it is better to prepare a Phillips screwdriver and a 10mm socket head in advance.
First, remove the ashtray to gain access to the screw. Next, remove the ventilation deflectors. They are held on by latches made of high-quality plastic - they will not break. But don't delay too much.
Remove the center panel and frame. There are options here: either a radio with a frame or without. But the operating principle remains the same. Unsnap the latches. There are many of them; in this matter, accuracy is your main companion. Don't forget that the climate control connector also needs to be removed. There are cars that do not have a climate system. Car enthusiasts also note possible inconveniences with the wire that powers the ashtray backlight, but if you don’t pull it too hard, everything will work out easily.
Now in front of you is a radio without a frame; you can unscrew the bolts that hold the mounting brackets. This is why you need a 10mm head. It is very inconvenient to work with an open-end wrench in these conditions.
Well, now the matter remains small. Disconnect the connectors - there are quite a lot of them, but you'll figure it out. Now you can safely replace the standard one with a new, more modern multimedia system.
How to get out without keys
If a knife or steel strip is used for removal, you should protect your hands with gloves before removing the radio without keys, so as not to accidentally injure yourself. First, the front panel and outer frame of the head unit are removed to gain access to the technological openings.
The next stage of removing the radio without special keys is selecting a tool suitable for the technological opening. To do this, you need to carefully push it into the gap until it fits freely there.
The selected tool is inserted alternately into both technological openings, and the tabs on the frame are bent in the same way as when using factory keys. To remove a keyless radio attached with elastic clamps from the panel, you need to insert the tools into the holes, pressing them one by one. When the latches are released, the radio is pulled out of its seat at the same time as the homemade keys.
If the head unit has code protection, then you should not disconnect the car battery from the on-board network before removing the radio without keys, so as not to interfere with the functioning of the device. When removing the radio from the socket with or without keys, care must be taken not to damage the connectors and not to damage or break the wiring to avoid short circuits and fire.
How to Remove a Pioneer Radio without Keys
Content
It's true to remove the radio without special keys
Many car enthusiasts face the problem of removing the radio in their car. Some are unable to remove the standard factory installed unit, others inherit the music with the machine, while others routinely lose their special keys. The circumstances of dismantling are also sufficient. from repairing electrical wiring to purchasing the latest stereo system. Hence the demand for information on how and with what help you can gently pull the receiver without damaging the plastic of the front panel. And although the operation is primitively ordinary and relaxed with the help of improvised means, it has pitfalls, which
Types of radio installation
To choose how to remove the player, you need to understand how it is secured inside the panel. The following types of fastenings exist:
- on 2 side clamps;
- on 4 latches located on the side and top of the case;
- Screws or screws into brackets.
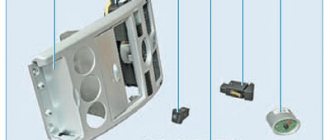
Example of installing a standard head unit
The note. The latter mounting method is typical of the standard devices with which the vehicle is equipped by the manufacturer.
Latch on mounting frame
The principle of snap-on (latched) mounting is that the radio housing is enclosed in an iron mounting frame and is not built directly into a panel recess. This intermediate part, which has special petals with projections or grooves (depending on the brand and model of the device), is securely fixed in the recess. The player body has rear latches that lock into place when the player is inserted into the slot.
Rear part of the latch on the body
To unlock the latches and remove the receiver, keys of various shapes are used, supplied by the manufacturer, complete with music for the car. They are lost over the years of use of the car, as they are used very rarely. Typically, the key is a metal strip or handle inserted into 2 pairs of holes located on the front panel of the device.
This is what most car radios look like
In most cases, fastening is carried out using bolts screwed to the brackets and hidden under the front plastic panel. There is no need for a small tool kit to disassemble this panel and loosen the mounting screws or bolts.
READ How to Remove Transfer Case on UAZ Bukhanka
key in the form of a handle to unlock 4 latches
For reference. All this wisdom with hidden locks and special keys invented by manufacturers for one purpose: stealing a car radio is very difficult when the thief crashes into the car.
Key Hole Locations
Removing the device according to the instructions
Removing the radio using keys is just annoying. You have to see this to understand how to deal with a loss. The order is as follows:
- Remove the front of the turntable and the decorative plastic panel, using a flat-blade screwdriver to secure it together if necessary.
- Insert the first key into the slot between the housing and the mounting frame at the end. You should feel a slight resistance as the tool bends the latch.
- Repeat with the second key.
- Grasp the radio from the protruding parts along the edges of the case and carefully remove it from its niche.
There are 2 keys to remove the radio
Advice. No great effort is required, the device is easy to remove. Finally, be careful not to pull the wires again and break the contact.
Special keys must be glued to the side holes
When the radio is equipped with 4 latches, access is through 2 pairs of round holes. You need to glue 2 U-shaped keys on them and pull out the housing as described above.
How to get a radio without a key
It turned out to take out the radio
out of the socket easier than usual. Main. find out how this can be done.
Remove the radio from your car quickly and easily.
This video shows you how to remove a radio
from a standard car VAZ Kalina 2 mount. From a standard one.
Use the music center just pulled out
How to delete a video player lesson
how to remove the radio without keys?
If the standard keys are lost, you'll need to do a DIY job focusing on the shape of the cracks. To see them, remove the removable cover and plastic frame. Here is a list of tools that different car owners can use to unlock their locks:
- thin iron strips 6-15 mm wide;
- stationery knives;
- plastic clamps for wiring;
- clove and flat wire. for round holes;
- thin screwdrivers and other similar items suitable for cracks.
These iron strips can be used instead of keys.
For reference. Almost all recorders have mounting cutouts that are visible from the outside, so you don't have to remove the front panel and plastic frame.
READ How to Remove Renault Duster Radio
First, the front of the radio is removed
To remove the car radio, use the same method:
- First, insert one narrow strip of metal (or a utility knife, narrow screwdriver) into the technological hole. Feel that any latch is unlocked.
- If the player is using 4 clips, insert four tools.
- Slowly pull the radio out of the niche immediately using the hand keys.
Glue the strips to the side grooves.
Advice. When using iron strips to open latches, be sure to wear cloth gloves to avoid cutting your hands around the sharp edges.
Music center removed with groups
Removing a car radio without a key video
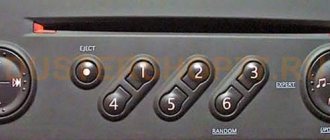
Disassembling the music center of a typical day
Often standard head units (they are also tape recorders) are removed as described above because they are attached to 2 or 4 clips. For example, the factory player on a Priora rests on 2 latches and, to unlock and tilt, you need to insert a steel strip "3" and "5". "6".
Advice. Before you start disassembling the factory radio, find out how to attach it to the factory radio so that in this case you do not accidentally push iron shards unless you find holes in the technology.
In Priority you have to insert bars between the keys
In order to remove a wound radio, you need to prepare a standard set of tools:
- narrow flat screwdriver or knife;
- Phillips screwdriver
- set of small heads (from 6 to 10 mm).
In this case, the factory player must be unscrewed
On cars of different brands, conventional players can be installed in different ways, but the principle is approximately the same: the device is attached to brackets that are covered with a plastic cover. As an example, it is proposed to consider the possibility of removing the radio on a Korean Hyundai Solaris car in the following order:
- Using a flathead screwdriver or knife, glue down the bottom corner of the plastic trim panel surrounding the stereo. Pull the edge and grab it with your hand.
- Gently pull it towards you and release the first latch, then move around and unlock the rest.
- Hold the panel with both hands, remove the panel and, if necessary, disconnect the connectors located below.
- Remove the 4 Phillips screws and remove the radio.
Factory radio Hyundai Solaris
Advice. When removing any player, do not rush to disconnect the battery from the on-board network, as the device will be gone in 10-15 minutes. it may be blocked and upon further activation will require you to enter a security code that you do not have.
READ How to Check ABS Sensor Peugeot 307
Removal of standard device included in Hyundai Solaris. Photo
Problems with decryption
The main problem with this procedure is the security code built into the memory of most recording devices. The fact is that disconnecting the music center from the external power source for 10-15 minutes will lead to the fact that the next time you turn on the radio you will need to enter a security code (usually a four-digit code) without which it will not work.
Advice. Removing the device to replace it with a new one will not hurt if you do not plan to use the old player on another computer. In any case, try not to disconnect the battery for a long time.
The device requests a code after connecting to the on-board network
If the code card is lost or missing, there are several ways to solve the problem:
- when it comes to a standard device, they will help you find the code for a fee from the dealer who sells your brand of cars;
- there are offices and individual specialists who specialize in these issues;
- The free way is to search for the code using various programs.
Serial number placement
Whichever method you choose, you must turn off the radio to see the serial number. It is applied along with the barcode to a tag attached to the side or top of the case. When you take out your device, write down these numbers and then try to calculate their pin code using various online calculators on the Internet. If you are unable to find a suitable code this way, remove the stereo and take it to a specialist in the field and be prepared to pay for their services.
Fundamental point. If you don't know your radio PIN, don't enter the number more than 3 times when searching for yourself! Otherwise, the device will be locked, and in this state, decrypting it will be much more expensive.
The issue of unplugging the car radio from the socket is not very complicated and takes a lot of time. But the consequences may be unexpected for an unprepared motorist. One last tip: before turning off and unplugging your player, you can find your lost PIN to save your time and hassle.
Decoding problems
Some car radios have a built-in protection mechanism that is triggered 10-15 minutes after being disconnected from the on-board network. This measure further protects the device from unauthorized use after theft. The next time you turn on the radio, you will be asked to enter a password to unlock it. If a card with a security code is attached to the player or it is written in the instructions, then it is entered by pressing the function buttons with numbers or by rotating and pressing the volume control, depending on the model.
If the documentation with the code is lost, you can decode the radio using specialized programs for a computer or mobile device. To do this, you will need the serial number of the player, which is written on the label with a barcode and technical data.
You can make a mistake when entering the PIN code of the radio no more than 3 times - after that all functions of the device will be blocked. It will be possible to remove the blocking only at specialized service centers, which should also be contacted if the serial number was lost due to damage to the label affixed to the device. Once you have determined your PIN, you must write it down and keep it in a safe place.
To avoid such problems, do not disconnect the car battery for a long time. If necessary, you can make a spare power source for the radio from any battery for a screwdriver that provides 12 V. You should connect its poles to the power terminals of the car radio. To do this, you should find the red, yellow and black wires under the dashboard, cut them off from the common harness, extend them and connect them to a backup source. All connections must be insulated. You should not turn on the radio unless necessary, so as not to waste power.