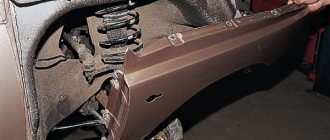
Front Panel
Today, the VAZ 2101 torpedo looks pretty boring. It is outdated both morally and practically. It is for these reasons that many car owners are considering options for various modifications and improvements to this element, which will significantly transform the interior and make it different from standard cars.
Dashboard
The “penny” dashboard contains a minimum set of instruments that allow the driver to monitor the status of the car’s main systems (engine oil pressure, coolant temperature, speed). In order to slightly improve the dashboard and make it more informative, you can modify it by installing additional devices, for example, from a VAZ 2106, or install a device from a foreign car. If in the first case there are no particular difficulties, then the second option will require installing the entire front panel.
The dashboard of the VAZ 2101 can be modified by installing additional devices from the VAZ 2106
Glove box
The main inconveniences of the VAZ 2101 glove box are poor lighting and rattling of the contents while driving. The glove compartment is illuminated by a light bulb, which illuminates practically nothing. The best option for replacing it is to install an LED strip, the power for which can be taken directly from the lamp.
To improve the illumination of the glove compartment, you can install an LED strip (for example, the glove compartment of a VAZ 2109)
Extraneous sounds can be eliminated by finishing the glove compartment with carpet or sound-insulating material.
To prevent anything from rattling in the glove compartment, it can be treated with sound insulation
Removing the rear seats of a Qashqai
The set consists of two separate pillows - a vertical backrest and a lower sofa. Each of them is filmed separately. Before removing the seat on the Qashqai, prepare a 16 mm socket wrench for work.
Removing the seat
The lower sofa is removed first. To do this, grab its front part, push it forward and lift it up. This will free the seat from two plastic latches at the base of the body, which are located at a distance of 25 cm from the edge. After this, push the 2 seat belt buckles under the pillow, which are located in the middle of the pillow. After this, the lower part can be removed from the interior.
Remove the rear part of the plastic trim on the sills and rear pillars. Underneath it are the backrest mounting plates, screwed to the body with two 16 nuts. The cushion itself consists of two parts. The right half should be removed first, since the left half fasteners are located underneath it. Installing the rear seat of a Nissan Qashqai is done in the reverse order.
Unscrew the bolts securing the back of the sofa
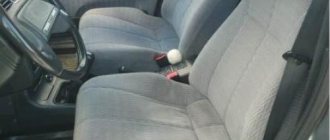
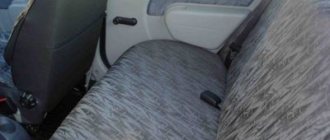
"Kopek" seats
Standard VAZ 2101 seats cause a lot of inconvenience to car owners, because they have no lateral support, no headrests, and the material itself is not attractive in any way. Therefore, there is no need to talk about any comfort. All these negative factors lead to drivers seeking to improve, modify, or simply replace standard seats.
What seats are suitable for VAZ 2101
For a penny you can get not only standard seats, but also products from the VAZ 2103–07 without major modifications.
On the VAZ 2101 you can install seats from the “Seven” or a foreign car
If you really want to improve the comfort of your car, you can install seats from foreign cars (Mercedes W210, SKODA, Fiat, etc.), but you need to measure the dimensions of the new seats in advance to understand whether they will fit the size of the cabin.
Video: example of installing seats from a foreign car on a “classic”
How to shorten the seat back
If for some reason it is necessary to shorten the back of the seats, then they will need to be removed from the car, disassembled and cut off part of the frame using a grinder. After this, you will need to adjust the foam rubber and cover to the new dimensions of the backrest, and then complete the assembly and install everything in its place.
Types of toilet seat designs
Difficulties with the toilet lid are in second place among the breakdowns of this sanitary device.
A few years ago, the toilet seat had a simple design and was limited in the number of models. These days, the plumbing market offers a wide range of products. In addition, the covers can be equipped with additional functions. For example:
- built-in bidet;
- seat heating;
- micro-lift.
Several factors can lead to product failure:
- long-term operation;
- manufacturing defects;
- careless use.
As a result of any of the above reasons, cracks may form on the toilet lid or the fastenings may fail. In both cases, you will need to replace the old toilet seat with a new one. The products themselves have two varieties:
- Articulated. The most common option. It is a structure made of a toilet seat, which is fixed to the base of the toilet using hinges. Hinges can be either plastic or metal. The first option is not subject to corrosion, but is inferior to metal hinges in strength and service life. Therefore, this design has to be changed more often. Chairs with metal hinges are installed on more expensive models, for example, with a micro-lift. Whereas the plastic option is inexpensive, so they are used to equip more affordable plumbing fixtures.
- Micro-lift. This is a more modern mounting option. It is a semi-automatic design that raises and lowers the toilet seat. The installation method for a micro-elevator is no different from the conventional version. But there are several engineering nuances that should be taken into account when replacing the product. Thus, the fastening mechanism consists of a spring, a rod, a cylinder and a piston. They are the ones that move the lid. Failure of any element leads to the replacement of the toilet seat. After all, without the appropriate skills, it will not be possible to repair a micro-elevator.
Reference! The first mention of the toilet is dated 1 AD. e. It was invented in Ancient China. The covers for the plumbing fixtures were made of varnished wood.
Seat belts
Owners of the first model Zhiguli may encounter the problem of lack of rear seat belts. Their presence may be required to secure a child seat or during a technical inspection. The fact is that some “kopecks” from the factory had mounting holes, but were not equipped with the belts themselves. To modify the VAZ 2101, you will need belts marked RB4–04.
On the VAZ 2101 it is necessary to install belts marked RB4–04
The installation of these elements does not raise any questions. The mounting points are located on the rear side pillars and under the rear seat, which will have to be removed for modification.
The seat belts are secured at the designated points.
Video: installation of rear seat belts using the example of a VAZ 2106
Removal and installation of front seats
And so, let’s look at the question - how to remove the front seats on a VAZ 2114.
To perform this operation we will need the following set of tools:
- flat screwdriver;
- ratchet;
- knob;
- 8 mm head (or Torx 10 - in late models);
- 13 mm socket or a simple 13mm wrench.
The front seats are dismantled according to the following scheme:
- Disconnect the heated seat wiring harnesses (if equipped).
- Using a 13mm wrench, unscrew the four nuts securing the front seat tube.
- If necessary, remove the torsion bars by pulling forcefully at their edges.
- Raise the seat (you need to do this with a jerk) to its highest position (as far as possible), after which access to its fastening will open.
- Unscrew the bolts securing the seat slides in the front (on both sides).
- Pull the locking lever to move the seat forward.
- Unscrew the bolts securing the seat slide at the rear (on both sides).
- Remove the vacated seat.
Installing the seat in the car is done in exactly the same way, but in the reverse order (it should be noted that this diagram is relevant for both front seats - the driver's and the passenger's).
When purchasing new front seats, the best option would be to give preference to the so-called anatomical ones, which allow you to feel comfortable behind the wheel even on long trips.
Interior lighting
From the factory, the VAZ 2101 was not equipped with lighting as such in the cabin. The side pillars contain lamps that signal the opening of the doors. They can be useful for rear passengers, and then only after installing LEDs instead of light bulbs. They are of no use to the driver or front passenger. However, the situation can be corrected by installing a ceiling lining from a VAZ 2106 and introducing a “Priorovsky” ceiling lamp into it.
To illuminate the interior of a VAZ 2101, you can install a lampshade from Priora
The installation of the lamp can also be done on a homemade metal plate, securing it under the screws of the rear view mirror.
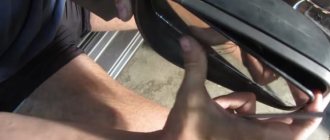
Removing the front seats of the Qashqai
Unscrew the bolts
First of all, remove the negative terminal from the battery, since during the removal of the seats it will be necessary to disconnect the electrical terminals. To perform this work, you need a multi-faceted TORX T50 key (asterisk) and thin pliers. The procedure for the right and left seats is the same.
Pull the locking handle and move the chair all the way forward. Using a T50 wrench, remove the 2 bolts securing the guide slide to the body. After this, move the seat back, unscrew the front mounting bolts and lift the seat. Under it you will see 4 connecting blocks that connect to the power supply:
- side airbag;
- control of the seated driver or passenger;
- seat belt contact;
- electric heating.
These pads must be disconnected, the wiring harness must be freed, and only then can the chair be removed from the interior. To disengage the pads, press their side locks.
Disconnecting the connectors
After this, you need to disconnect the wiring harness from the lower support part by cutting the plastic clamps.
Installation of the chair is carried out in the reverse order. In this case, do not forget to tie the wiring harness from below. To do this, prepare new plastic clamps in advance. It is recommended to apply an anaerobic fixing paste to the surface of the bolt threads, which will ensure reliable fixation of the connections.