Tank cap problem
As you know, when the engine warms up, the coolant also heats up - it expands. Accordingly, this creates increased pressure, which is greater than atmospheric pressure, this is natural. It should be noted that slightly increased pressure in the CO is neither bad nor good; by and large, the engine doesn’t care! The main thing is that it is enough for the system to function. It must also be airtight.
If you want, this can be compared to a home heating boiler. The boiler is an engine, the pipes are pipes, there is an expansion tank in both places.
The more the antifreeze or antifreeze heats up, the more pressure arises in the system. It should be noted that many old units operate at temperatures of 90 - 95 degrees. But modern engines have great performance, so it is not uncommon to work at 100 - 110 degrees Celsius, for example, my AVEO is a high-temperature motor, its normal performance is about 115 degrees. As you understand, these are average values, but at peaks they can reach even higher values of 120 - 125. Coolant at such temperatures can increase by 20, sometimes even by 25% - that’s excess pressure.
In order to prevent pipes, radiators, pipes and the expansion tank itself from bursting, a special valve was invented, which is located in the lid.
Normal pressure in various systems on warm engines should be in the range from 1.1 to 1.5 (bar) atmospheres. It's already dangerous.
Just if the pressure rises much higher, the cooling system can be damaged, in simple terms, it will simply rupture all your hoses or, even worse, the radiators.
This is where the expansion tank cap comes into play; it “bleeds off” excess pressure, bringing it to a normal level of, say, 1.1 atmospheres. This way, all your pipes and hoses remain undamaged.
Low blood pressure is also dangerous!
Just imagine - you drove on business in the winter, and then you parked the car (parked overnight), the antifreeze will begin to cool and decrease in size, that is, “sink down.” And the pressure will also begin to drop (after all, the excess pressure was released by the valve and closed), thus, the decrease in pressure will begin to create a slight vacuum. Hoses and pipes will shrink inward - which is also not good.
Again, the expansion tank cap starts to work, it also has a low pressure valve, that is, if a vacuum begins to create, then the system opens and replenishes with air. The hoses expand to normal levels.
Thus, the expansion tank cap works both in one direction (high pressure) and in the other (low pressure). This is a very smart and very necessary element of the system, despite its simplicity.
Very often it primarily protects radiators from damage (after all, they are expensive on foreign cars).
Device, principle of operation of the tank lid
As I already indicated above, the task of the lid is to maintain pressure to a certain limit. It becomes clear that it should tightly adhere to the tank and not allow the pressure to bleed, up to a certain limit - 1.1 - 1.5 atmospheres.
The cap itself holds practically nothing; it is only needed to press the high-low pressure valve, which plunges into the neck of the expansion tank.
As a rule, there are one or two sealing gaskets on the valve body, which act as a kind of seals. In many foreign cars there is only one valve, it is also inlet and outlet, that is, it can bleed and build up pressure.
It is worth noting that on many domestic VAZs, the lid is designed differently, there are physically two valves, one, as you guessed, only works to relieve pressure, the other to pump it up (normalize) to normal.
These valves are named:
- Protective – against high rates
- Vacuum – from low values
But as long as the pressure in the system is normal and both are closed, they do not work, this is the norm! However, the cover often breaks, which is difficult for a simple motorist to determine (and it is very difficult for a beginner), although this entails quite expensive breakdowns. Now a few words about the signs of such malfunction.
How does the coolant reservoir cap work?
The engine cooling system is completely sealed. However, due to the fact that the coolant is made on the basis of methyl alcohol, it can increase in volume during the heating process.
This is interesting: Is an airbag dangerous?
Therefore, excess liquid, as well as compressed air, enters the reserve tank when heated - the expansion tank. If the air in the system is strongly compressed due to an increase in the volume of liquid, then the release valve in the lid is activated: it opens slightly and excess air comes out.
Further, when the car sits for a long time, the opposite reaction occurs: the engine and the liquid cool down, due to which the volume of antifreeze is sharply reduced. Accordingly, air pockets appear in the system. Thanks to the inlet valve, these plugs are quickly removed from the system.
Valves in the lid maintain the required pressure in the system
Signs of a faulty expansion tank cap
Often the high pressure valve fails; it simply begins to release antifreeze at normal levels, or does not release it at all.
- When the normal pressure is released (with a warm engine), antifreeze or antifreeze splashes out and, accordingly, it decreases. Steam can often come out from under the hood because the liquid gets onto the hot exhaust manifold. Moreover, the engine temperature is not in the red zone, that is, it is working - which means 90% of the lid.
- If the vacuum valve fails, completely different symptoms will appear. This is how air pockets often arise in the system - this leads to the following: the engine overheats, and cold air comes out of the stove.
To be honest, there can be a lot of reasons, for example, another sign is when pipes burst or clamps break. YES, the tank itself can burst - this means that the high pressure valve does not release the “excess” and it begins to exceed 1.5 atmospheres, which, by the way, can damage the radiators themselves, let me remind you of their two main ones and the stoves (in the cabin).
So if your connecting clamps or other connections start to “snot”, and hoses often get knocked out, change the cover.
Refinement of a new part - what to do if it does not function?
When it turns out that the lid stubbornly refuses to relieve excess pressure and/or is not able to restore air losses in the SOD, it can be modified. For some reason, the most complaints come from owners of VAZ, model 2109, including those who buy new plugs. It is clear that the reason for the incorrect operation of the cover valves lies in the too much rigidity of their springs.
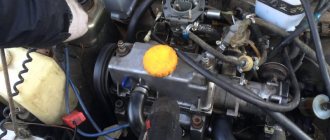
To modify the cover, for example, for a VAZ 2109, it must first be disassembled. This must be done carefully, using pliers and a thin flat-blade screwdriver. We must try to remember where everything stood so that the springs do not fly away to God knows where. After the lid for the VAZ 2109 tank has been disassembled, it’s time for the wire cutters. They need to shorten the springs: the large one, for the safety valve, usually by 1 turn, and the small one by 2.
Shortening the plug spring
For the second, the length of the removed segment is not critical - as long as it generally supports the vacuum valve when it is closed and does not resist the external air pressure of 0.03–0.1 kgf/cm 2 . With a large spring it is more difficult - as if not to overdo it. You need to look at its rigidity and the pressure at which the safety valve opened when checking the tank cap of the VAZ 2109. After shortening the springs, we assemble the cap in the reverse order. Before use, it is advisable to check again how it works.
How can I check the work myself?
To be honest, this is a little problematic; the valve-lid needs to create either increased or decreased pressure.
However, first you need to inspect it visually; if you notice cracks, abrasions, rupture of sealing gaskets, or other mechanical damage, then this is most likely the cover. Also, the internal elements of the valve can become unusable over time; some manufacturers recommend changing these plugs every two to three years, then there will be no problems.
Now a few simple ways to determine the malfunction:
- Start the engine, warm it up, then carefully begin to unscrew the cap; if a “bang” occurs, it means it is holding its “atmospheres”, most likely working.
- We look at the thick hoses; if they are severely deformed, as if squeezed, then the vacuum valve does not work - the cover needs to be replaced.
- There is another way, but it is not always possible to use it. We unscrew the cap from the tank, strongly squeeze one of the thick hoses, then, without releasing the hose, screw the cap on - if they return to their original shape, then our plug is working. If not, change it. The only downside is that this is quite difficult to do on many modern foreign cars.
Of course, at many stations there are special pressure pumps, to which the caps from the tank are screwed and pumped - 1.5 atmospheres, after this critical indicator is crossed, the valve should open, if this does not happen, it means it is faulty.
In conclusion, I would like to say that on many foreign cars the cap breaks when unscrewed, the valve itself remains inside the tank and does not come out. This suggests that the vacuum that has been created inside does not allow it to come out! A replacement is needed, not because it is broken, but because the valve is “dead.”
This is how the article turned out, for those who are lazy, watch the video version.
I’ll end here, I think it was interesting, read our AUTOBLOG.
Similar news
- Is it possible to pour water into the engine cooling system? In summer or w...
- Antifreeze or Antifreeze, which is better? Use - pour in for the sake of...
- Protective mesh for the radiator grille. To bet or not?
Add a comment Cancel reply
How to check valve functionality
Self-checking the expansion tank cap is made difficult by the fact that without a special device it is impossible to find out whether there is pressure in the system or not. Therefore, service centers use devices equipped with a pump and pressure gauge, which give an accurate assessment of the performance of the cap and each valve individually.
To diagnose the tank cap, a special device is used, which includes a pump and a pressure gauge
However, there is a simple way to check the reservoir cap:
- On a cold engine, unscrew the cap from the reservoir neck.
- Inspect the product from all sides: there are no cracks, dents, chips, or tears.
- If there is no mechanical damage, screw the lid back on.
- Next, start the engine and warm it up to operating temperature.
- With the engine running, carefully unscrew the cap.
- At a certain moment, gases should escape from under it - this indicates that the valve mechanism is in good condition.
- Assess the condition of the connected hoses. If they are severely deformed, wrinkled or swollen, then the pressure reduction valve definitely does not work.
When carrying out the test, it is important to slowly open the cap, since coolant can escape from the reservoir under high pressure.
By following these simple steps, you can determine whether the valves on the reservoir cap are working or not.
Symptoms of malfunction
Failure of the high pressure valve is usually accompanied by the fact that coolant begins to be released from the system even at normal pressure. Or, when the antifreeze heats up strongly, the pressure does not release. The driver can notice this problem by clouds of steam coming from under the hood. While driving, the engine begins to heat up, and the temperature of the coolant also rises. Antifreeze emissions enter the intake manifold, causing it to quickly evaporate liquid.
If the problem lies in the vacuum valve, then completely different signs of malfunction will be observed. Air jams occur in the cooling system pipes because the valve does not equalize the pressure. Because of this, failures in engine operation may occur, since low coolant pressure does not allow the cylinders to move correctly. Moreover, the first sign of this malfunction is a hot motor and cold air from the stove at the same time.
This is interesting: How to change the timing belt on a Hyundai Accent yourself
Another symptom of a faulty expansion tank cap is ruptured hoses or torn pipe clamps. In addition, due to destabilization of internal pressure, all connections of the hoses and pipes of the system may fail. Therefore, at the first signs of expansion (pressing in) of the hoses, you should immediately change the cap of the expansion tank on the car.
Deformation of the pipes is a clear sign of a faulty expansion tank cap.
DIY expansion tank cap repair
Repair work on the tank cap is so simple that even a child can do it. This is due to the fact that the design of the cover itself is simplified to the minimum. So, to repair the cover and the valves in it, you need to do the following:
- Unscrew the cap from the tank neck.
- Use a flat-head screwdriver to pry the rubber seal inside the lid and remove it.
- Next, remove the spring.
- There is a small valve device under it - you need to pry it up with a screwdriver and pull it out. There is a second valve nearby - it is pulled out following the example of the first.
- After this, clean out all the dirt that has accumulated in the lid. It is best to use regular soap solution and cotton swabs.
- Next, if the valves, spring and rubber seal are in good condition, sequentially install them in place.
- Screw the cap onto the neck of the tank and check the tightness of the system after warming up the engine.
After cleaning and installing the elements, the cover should perform its functions in full
