During operation of the power plant, detonation may occur. It negatively affects the motor, causing parasitic destructive loads.
To timely detect suboptimal combustion of the air-fuel mixture, a knock sensor is used. The signal it emits goes to the control unit, which adjusts the operation of the engine so that there is no detonation.
Description of the knock sensor
Detonation is a serious deviation from the norm in the operation of the power unit, which is expressed in the explosive nature of the ignition of the working mixture in the combustion chamber. This is an undesirable phenomenon that has a shock effect on pistons, cylinders, cylinder head elements and other components of the power plant. For timely detection of this phenomenon, a special meter is used. It is called the knock sensor.
Purpose and types of engine knock sensors
To get rid of detonation in the engine, a sensor (SD) is required. Its only purpose is to identify this problem in the engine cylinders and send a corresponding impulse to the electronic control unit. It automatically changes the advance angle, reducing it, and later ignition allows you to get rid of detonation. In addition to its direct functionality, the knock sensor affects two main engine characteristics:
- on motor power;
- for economical fuel consumption.
The sensor allows you to automatically set the ignition angle when starting the engine, thanks to this you can quickly start it in any weather.
The principle of operation of the knock sensor is to respond to the shock wave that occurs in the combustion chamber during detonation. As a result, increased vibration is formed and, due to the piezoelectric element, mechanical energy is converted into an electrical discharge, which is a signal to the ECU.
There are two types of sensors:
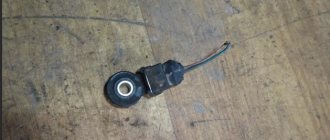
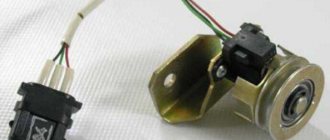
- Broadband is the most common type. They are installed on the engine block with a regular bolt, visually representing a large washer with an exposed wire;
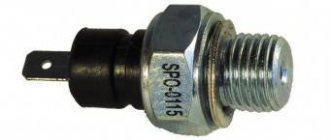
- Resonance sensors are reminiscent of engine oil pressure sensors, which are also attached to the block with a threaded connection. They are less common, but are also used on such a popular brand as Toyota.
Operating principle of DD
The operating principle of most knock sensors is based on the use of the piezoelectric effect. The working element of the meter has the ability to form a potential difference when exposed to external forces. The DD device of different designs is shown in the image below.
The knock sensor is designed to be sensitive to external influences. Thanks to this, it detects the slightest change in the operation of the motor. Detonation is always accompanied by vibration, which the DD picks up.
Checking the knock sensor
Since breakdowns occur for various reasons, you will have to check several elements of the system. Inspect the condition of the sensor wires, check the harness sockets and sensor plugs. Evaluate the reliability of their connections. If everything is in order here, check the contacts of the socket. Found damaged components? Replace them. It is also recommended to examine the condition of the tourniquet. Turn off the ignition, disconnect the harness from the sensor and check it with an ohmmeter. This way you will know if the chain is intact.
Sometimes the problem lies in the condition of the shielding braid. In this case, we proceed as follows.
- We look to see if the harness sockets and plugs are securely connected;
- We study each of their components;
- We check whether the shielding braid is intact.
If the cause of the malfunction is a short to ground, you must proceed using another method:
- We disconnect the entire block from the harness, along with the knock sensor;
- We check the integrity of the chain, look for heavily worn places;
- Turn off the ignition and, using an ohmmeter, examine the place where the engine mass is connected to the harness circuit.
We find and dismantle the sensor
Purpose of the knock sensor
The main purpose of the DD is the timely detection of detonation and, as a result, maximizing the service life of the engine. Engine life is the first thing the meter affects.
There is vibration when the engine is running. It is constantly converted into a signal of a certain amplitude and frequency. As soon as detonation occurs, the vibration of the power unit becomes much stronger. The piezoelectric element detects this and the corresponding signal begins to arrive in the electronic engine control unit. According to pre-programmed algorithms, the ECU eliminates detonation, which is what the DD reports.
During detonation, the power of the power unit drops, and an unpleasant vibration runs through the body. This reduces ride comfort. Timely detection of incipient detonation by the sensor not only increases the resource of the internal combustion engine, but also makes driving a car more enjoyable.
Checking the knock sensor
The main symptoms indicating that this device is faulty:
- power drop;
- deterioration in acceleration characteristics and a sharp increase in the “appetite” of the engine;
- smoky exhaust.
At the same time, the engine malfunction indicator on the panel lights up. Moreover, it can either burn constantly or light up briefly when the load increases.
It is not always possible to have a scanner at hand that can read and decipher the fault code. Getting to the service station is also not always possible. The question arises: how to check the knock sensor yourself? The tools you need are a digital multimeter.
First of all, it is necessary to find out what resistance a working sensor should have on a specific car or engine model, since this value is different for all manufacturers. If it is different from normal, a replacement is needed.
You can also check the voltage at the sensor's electrical contacts by disconnecting the sensor's electrical power connector and removing it from the engine. After this, the multimeter is switched to the voltage measurement mode in millivolts, its positive probe is connected to the signal contact, and the negative probe is connected to the sensor ground (the hole through which the engine mounting bolt passes).
Checking the knock sensor involves holding the sensor with the attached probes in the palm of your hand, which you then need to lightly tap on some surface. When impacted, the multimeter should detect the appearance of voltage (usually it is about 30-40 mV). The principle is simple: the stronger the impact, the greater the potential difference will arise between the electrodes. Since the voltage is low, not every device is capable of measuring it, so you must first make sure that the measuring device at hand is designed for such measurements. A complete absence of potential difference indicates that the knock sensor is faulty.
DD location
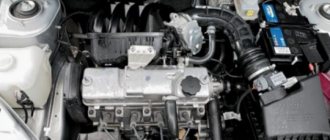
To see where the knock sensor is located, you need to look at the cylinder block. The DD is located at the place where its sensitivity to detonation is highest. On most engines, the meter is installed between the second and third cylinders.
The knock sensor is located on a level surface. It is pressed tightly against the surface of the power unit.
The knock sensor is located in such a way as not to come into contact with antifreeze and other technical fluids. Some meters have a thread on the body, with which they are screwed into the mounting hole. Most DDs are secured with a separate bolt running through their center. In this case, it is extremely important to maintain the tightening torque for proper operation of the sensor.
DD device
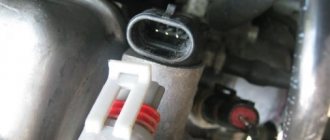
The engine knock sensor consists of a housing, in the middle of which there is a hole for attachment to the engine block, and also has an electrical connector for connection to the car wiring. Sensors of different car brands can differ significantly from each other. For example, the Toyota knock sensor has radical changes compared to the Nissan knock sensor; it is more reminiscent of an oil pressure sensor.
The sensor is based on a piezoelectric element, upon mechanical action on which an electrical impulse is generated and recorded by a computer.
Determining a sensor malfunction based on vehicle behavior
First of all, changes in the behavior of the car indicate a malfunction of the DD. The owner may notice one or more symptoms:
- increased fuel consumption;
- the power unit fault indicator lights up;
- reduction in engine power;
- exhaust gases have become smokier;
- the car has lost its dynamics and reacts poorly to the gas pedal;
- when driving there is a constant detonation sound;
- The motor operates with frequent overheating.
Signs of a malfunctioning knock sensor
A problem with the sensor is indicated by an indicator on the dashboard. It can light up only sporadically when the load increases, or it can light up constantly. The absence of an impulse from the sensor does not prevent engine operation and further operation of the vehicle, however, this negatively affects its dynamics. Other indirect signs may indicate that not everything is in order with the knock alarm:
- engine overheating in a short time, despite the low external temperature;
- loss of power and throttle response;
- occurrence of glow ignition;
- deterioration in acceleration performance;
- increase in gasoline consumption;
- Excessive carbon deposits on the spark plugs.
Determining a fault using a multimeter
You can check the functionality of the knock sensor with a multimeter or any other tester that has a voltmeter. To do this, you should follow the instructions below.
- Remove the sensor from the car.
- Connect the probes of the device to the terminals.
- Apply small blows to the working part of the sensor with a metal object.
- Check the instrument readings. If voltage does not appear at the sensor terminals, it is unfit for further use.
Part of the car has a single-contact resonant sensor. In this case, one of the contacts should be connected to its body.
Checking the sensor operation
There are two ways to check the functionality of the sensor. First you need to find where it is, in some cases you will need to remove the protection. For example, on 16-valve engines it is often placed under the exhaust manifold. To check you need:
- Start the engine and hold it steadily at 2000 rpm. The installed sensor is subjected to gentle impacts, simulating fuel detonation; if it is in normal condition, the ECU will change the ignition angle, and the speed will noticeably decrease. After the tapping stops, the speed will return to its previous value.
- Remove the sensor by unscrewing it from the engine block. Set the multimeter to measure resistance in the range of 2 kOhm. Connect the positive electrode to the contact, and the negative electrode to the metal ring in contact with the body. After this, we begin to tap the sensor with a metal object, and the resistance should increase abruptly and immediately return to its original value. If the resistance does not decrease, the sensor is faulty.
If testing shows that the sensor is in normal condition, but problems are observed during engine operation, then you need to check the supply wires and contacts, which may simply oxidize.
Required Tools
Replacing the knock sensor requires the tools in the table below.
Table - Tools and materials required to replace the knock sensor
| Name | Note |
| Socket wrench or socket | The size depends on the DD used and its fastening. Usually these are keys from “13” to “21”. On some cars, access to the sensor is difficult, so some components and parts will need to be dismantled. In this case, it is better to prepare a set of keys in advance. |
| Vorotok | When working in cramped conditions, it is advisable to have a ratchet. On some cars it is necessary to use an extension to the wrench. |
| Torque wrench | The correct operation of the motor depends on compliance with the tightening torque. |
Where is the knock sensor located?
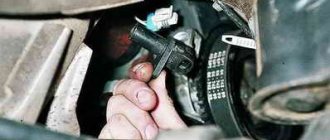
The sensor is located on the engine block , but the location is different on different cars, for some it is in the front of the engine in the upper part, and for some at the back of the engine. One thing is for sure, it is difficult to confuse it with other sensors, because a round, not high, penny is screwed on and attached directly to the block. It is also worth noting that if you have a carburetor car, then you should not look for it, because it simply does not exist, since it is installed only on injection engines . By the way, when replacing it, you must observe the tightening force (it is about 19 Nm), since tightening with excessive force can lead to its failure.
Repairing the knock sensor is impossible, since it is not a dismountable part, so if checking the engine knock sensor shows that it has failed, it is replaced with a new one.
Replacing the knock sensor
In most cases, repairing the knock sensor is impossible, so it needs to be replaced. The price of DD rarely exceeds 300-350 rubles, so there is no point in delaying the installation of a new meter.
- Unlock the terminal block lock.
- Disconnect the connector that is responsible for communication with the electronic engine control unit.
- Unscrew the bolt that secures the DD.
- Install a new sensor, strictly observing the tightening torque.
- Connect the terminal block.
Broken knock sensor signal wire
1. Check the presence and reliability of the connection of the harness socket to the sensor plug.
2. If the connection is normal, then disconnect the socket of the wiring harness from the sensor, remove its rubber cover and inspect the condition of the socket contacts and the wires connected to it. If necessary, straighten the connector contacts or replace them.
3. To check the malfunction of the harness circuit, disconnect the sensor and the unit from the wiring harness and, with the ignition off, check the integrity of circuit “11” of the harness with an ohmmeter: from contact “2” of the sensor socket to contact “11” of the block socket. If necessary, restore the indicated circuit.
4. After eliminating the malfunction, turn on the ignition and check that there is no fault code “041”.
Broken shield braid of the knock sensor wire
1. Check the presence and reliability of the connection of the harness socket to the sensor plug.
2. If the connection is normal, then disconnect the socket of the wiring harness from the sensor, remove its rubber cover and inspect the condition of the socket contacts and the wires connected to it. If necessary, straighten the connector contacts or replace them.
3. To check the malfunction of the harness circuit, disconnect the sensor and the unit from the wiring harness and, with the ignition off, use an ohmmeter to check the integrity of the shielding braid of wire “11” of the harness: from contact “1” of the sensor socket to contact “30” of the unit socket. If necessary, restore the indicated circuit.
4. After eliminating the malfunction, turn on the ignition and check that there is no fault code “041”.
Short to ground in knock sensor wires
1. To check for faulty circuits, disconnect the sensor and unit from the wiring harness.
2. With the ignition off, use an ohmmeter to check the connection of circuits “11” and “30a” of the harness with engine ground: respectively, from contacts “1” and “2” of the sensor socket to the metal parts of the engine.
3. If necessary, repair the indicated circuit.
4. After eliminating the malfunction, turn on the ignition and check that there is no fault code “041”.
Short circuit in the knock sensor wires
1. Disconnect the protective cover of the knock sensor socket.
2. Turn on the ignition and use a voltmeter to check the voltage between the sensor socket contacts “1”, “2” and the metal ground of the engine.
3. If the voltage is around “12 V,” then disconnect the sensor and control unit from the wiring harness.
4. Disconnect the battery from the on-board power supply and check with an ohmmeter the probability of shorting circuits “11” and “30a” of the harness with power supply to the control system: respectively, from contacts “1” and “2” of the sensor socket to contacts “18”, “27” and “37” block sockets.
5. After eliminating the malfunction, turn on the ignition and check that there is no fault code “041”.
Knock sensor malfunction
1. With the engine idling, tap the sensor with a hard non-metallic object and check with an AC voltmeter for the presence of a signal from the knock sensor: if the signal amplitude is < 0.1 V, then the sensor is faulty.
2. Replace the faulty knock sensor with a working one.
3. After replacing the sensor, turn on the ignition, start the engine, set the idle speed to 3300..3500 rpm and check that there is no fault code “041”.
Methods for checking the serviceability of the knock sensor circuit
1. Turn on the ignition and start the engine. Set the engine idle speed to 3300..3500 rpm for more than 20 seconds. If fault code “041” is detected: the wiring harness, control unit or knock sensor is faulty.
2. With the engine idling, tap the sensor with a hard non-metallic object and check with an AC voltmeter for the presence of a signal from the knock sensor: if the signal amplitude is < 0.1 V, then the sensor is faulty.
3. If the knock sensor is working, check the integrity of circuits: “11” and “30a”, as well as the reliability of the connection of the shielding braid of the sensor wires with the metal ground of the engine.
4. If the wiring harness is in good condition, then check the absence of code “041” at high idle speed >3000 rpm with the control unit.
CODE 042—SECOND KNOCK SENSOR (DD) CIRCUIT MALFUNCTION
· Cause 1: Knock sensor signal wire is broken.
· Cause 2: breakage of the shielding braid of the knock sensor wire.
· Cause 3: short to ground in the knock sensor wires.
Reason 4: short circuit to the electrical system of the knock sensor wires
· Cause 5: Knock sensor malfunction.
· Cause 6: Engine control unit malfunction.
What is a knock sensor and why is it needed?
This part is found in cars that use gasoline as fuel. It is intended for injection types of engines. The sensor is located on the engine cylinder block. This is an important part of the control system, the main purpose of which is to control the level of detonation.
In answering the question of what the knock sensor is responsible for , it should be noted that thanks to it the following vehicle capabilities are realized:
- Fuel economy.
- The ability of the engine to develop maximum power.
The sensor monitors the vehicle's starting system and regulates its proper operation.
What are the main components of a knock sensor?
The main details of this mechanism are:
- Vibrating plate.
- Piezo type electrical element.
- Signal wire.
- Braid.
Location of the knock sensor
The sensor is mounted on an aluminum or cast iron cylinder block in the area between the second and third cylinders. This is the hottest place in the block, and the shortest distance to two cylinders at once. The choice of the location where the knock sensor is located is not accidental; it is in the hottest combustion chamber that detonation will begin to develop, while in the remaining cylinders the conditions have only approached the permissible limit. The sensor mounting location always has a smooth, flat surface to eliminate possible acoustic resistance or distortion of sound waves. The body of the device is always secured with a pin connection, guaranteeing a full, tight fit to the installation site.
