- Operating principle
- Checking the oxygen sensor VAZ 2114
- Connecting an oxygen sensor to a VAZ 2114 if it fails
- How to check the lambda probe on a VAZ 2114 as quickly as possible
- Voltage on the VAZ 2114 oxygen sensor, as well as other technical indicators
- Useful video
Some car enthusiasts who are wondering how to check the oxygen sensor of a VAZ 2114 think that doing it themselves is extremely difficult, but this is not so. It is enough to follow the instructions (which can be found below in the text). This will be quite enough to solve the problem.
The VAZ 2114 has a lot of complex electrical devices, each of which requires maintenance or periodic maintenance. The VAZ electronic control unit allows you to obtain data on the current state of any vehicle systems.
An oxygen sensor (also called a lambda probe) is one of the key elements of a car. If it fails, the performance of the machine will be impaired. In order to prevent this, you should study the principle of operation of the device, as well as the technology for checking an oxygen sensor that has failed.
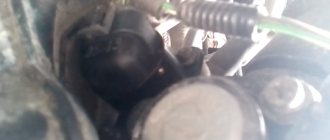
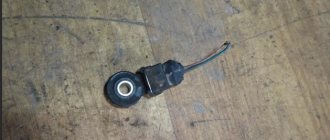
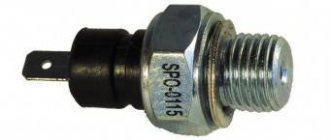
Oxygen sensor VAZ 2114
Operating principle
The sensor's sensing element can be found in the exhaust gas stream. The electrolyte, which is located in one of the exhaust gas streams, is heated to a high temperature (350°C). To speed up warming up to operating temperature, the lambda probe has a special heating element. The sensor is installed in such a way that the tip on one of its parts is in contact only with gases, and on the other with clean air.
When oxygen accumulates in the collector, a process of changing the potential difference occurs. This information is transmitted to the ECU. The system then changes the amount of fuel that is sent to the cylinders.
Checking the oxygen sensor VAZ 2114
The sensor is necessary so that the car's ECU can receive information about the amount of pure oxygen that remains in the exhaust gases.
Additional Information. The sensor consists of a ceramic electrolyte that can withstand even high temperatures. The electrolyte is made of zirconium dioxide, and its surface is treated with yttrium oxide. A platinum sputter coats the oxide surface. Platinum is an extremely necessary material for a sensor, because it has the highest possible thermal conductivity.
Oxygen sensor circuit
To check the sensor, do the following:
- Warm up the engine.
- You can use a tester to check the sensor. One probe of the tester must be connected to the negative terminal of the motor, and the other to contact “B” of the sensor. If the voltage is 12V, then the device is in fully working order. Otherwise, this means that one of the contact circuits of the oxygen sensor has broken.
- After this, you need to check all contacts of the most sensitive elements. We are talking about elements “C” and “A”. In order to do this, you need to place the positive probe on contact “A”. If the device is working properly, the tester will show 0.45V. If the indicator is different, the device needs urgent replacement.
Causes of failure and their symptoms
Although during normal operation the service life of the sensor is determined by a mileage of 60,000-80,000 kilometers (according to the “manual”), it can be damaged ahead of time if:
- Periodically and constantly use leaded or low-quality fuel (the lead contained in gasoline is dangerous);
- When installing a lambda probe, use a sealant that is not heat-resistant or contains silicone;
- For some reason (incorrectly adjusted ignition timing, interruptions in it, “rich” air-fuel mixture) the sensor overheats;
- “Flooding” the engine through repeated and unsuccessful attempts to start it (the danger of igniting fuel in the exhaust system with subsequent detonation);
- Oil and coolant will get into the exhaust system (poor condition of the valve stem seals (see Replacing valve stem seals) and “breakdown” of the cylinder head gasket);
- The exhaust system is depressurized;
- There will be an open, short to ground, or even poor contact in the sensor output circuit.
Well, since in the event of a lambda probe failure, the electronic control unit contains average readings, according to which the air-fuel mixture will be formed (different from the ideal ratio). We will be able to “read” information about the failure of the oxygen sensor based on the following signs of engine operation:
- Fuel consumption is significantly increased;
- The car's dynamics have deteriorated;
- At low speeds (idling), the engine is unstable;
- Increased heating of the sensor itself, which is accompanied by crackling of the exhaust pipe after stopping the engine.
And, of course:
- The “CHECK” warning light on the instrument panel lights up.
Attention! In most cases, the failure of the oxygen sensor is not detected by the on-board electronics, except in cases where there is a break in the heating circuit. Therefore, if the mileage of your car is more than 100,000 kilometers, then replacing the lambda is a resolved issue, since its price is much lower than the costs that will appear with the increased appetite of the car.
Connecting an oxygen sensor to a VAZ 2114 if it fails
To replace a broken sensor, do the following:
- go to a car store with a broken device. This is necessary so that you can compare the markings on the devices. Otherwise, the car enthusiast may purchase the wrong device that he needs. To prevent this from happening, you should carefully check the markings located on the device body;
- You must turn off the engine and let it cool. If you do not do this, you will not be able to replace the sensor;
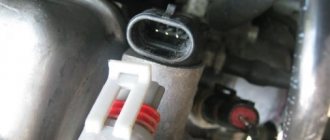
- after this you need to disconnect all wires from the sensor;
- now you need to unscrew the oxygen sensor with a regular wrench;
- When this task is completed, the motorist needs to install a new sensor. This is extremely simple to do, but you need to be careful, otherwise you can easily break the thread. In order to prevent such an unpleasant breakdown, it is necessary to screw in the sensor as slowly as possible;
- After this, you should start connecting the sensor contacts according to the pinout diagram.
Installed oxygen sensor
All operations to install a new sensor may take approximately 60-90 minutes. This will be quite enough to do everything as carefully and accurately as possible.
In order to better understand the features of this device, it is necessary to study the design of the lambda probe.
Symptoms of a problem
Now regarding the signs of malfunction. There may be several of them. Therefore, carefully monitor the behavior of your VAZ 2114. If you detect one of the signs, immediately take appropriate measures.
Location of the recreation center
- When gas is low, the power unit begins to operate unstably, may stall, and floating speeds appear;
- The dynamic parameters of the machine have deteriorated significantly;
- Under normal conditions, fuel consumption levels increase excessively;
- A cracking sound is observed in the catalyst zone after the engine is turned off;
- You can hear the characteristic smell of spoiled eggs. Such stench is caused by the ingress of a large volume of gasoline into the catalyst, which is not burned.
If you need to replace the DC, check whether such a probe is installed on your car. On earlier versions of the VAZ 2114, single-wire sensors were installed, and then four-wire sensors appeared. Their price ranges from 1200-3000 rubles, depending on the type of recreation center.
If, when removing the device, you find that there is carbon deposits on the device, but the measuring device shows a slight deviation from the norm, it is not necessary to change the DC. You just need to get rid of the carbon deposits.
To do this, heat the sensor very much and then cool it quickly. This will allow the carbon deposits to crack and fall off. All that remains is to lightly wipe the device with a brush.
How to check the lambda probe on a VAZ 2114 as quickly as possible
In order not to delay this process, you should understand the design of the device.
- One of the main parts of the sensor is the protective tips (shielded), which can be found on both sides of the electrolyte. It is on them that the holes for exhaust gases are located. These holes can also be used for air intake. It is the tips that are the main functional part of the device. From them, the device can determine the potential difference.
- A collector is located inside the tips. It is also called an element having high current conductivity.
- Between the tips there is a special device that reads the electrical signal.
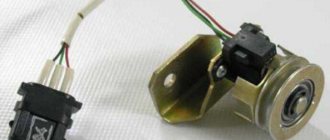
- You should also understand the purpose of the wires. White wires are needed to power the device. One of the black wires is used to transmit data to the ECU, and the other is needed for grounding.
Voltage on the VAZ 2114 oxygen sensor, as well as other technical indicators
Each indicator has its own standard values. If they change, then this is a clear signal of the presence of any malfunctions.
In order to determine a sensor malfunction, you should pay attention to the following signs:
- Increased fuel consumption.
- The appearance of any distinct crackling sounds. They usually occur in the area where the oxygen sensor is located. Most often, crackling sounds occur when the engine is turned off.
- There are problems with the engine at low speeds.
The lambda probe used in standard injection systems cannot detect changes in the mixture composition that differ significantly from 14.7:1.
Checking the lambda probe
Advice. You should also check the oxygen sensor if errors 134 or 131 occur. Their presence can be judged from the information from the car’s dashboard. These errors indicate that the sensor is sending an incorrect signal. This means the problem is with the sensor wiring. Another reason may be due to insufficient grounding of the device on the car body. In some cases, error 132 occurs. It means that the fuel mixture supplied to the car is too lean.
In order to solve any problem related to the device, you should study the pinout diagram. Only after this can you begin checking the device. Where is the oxygen sensor located?
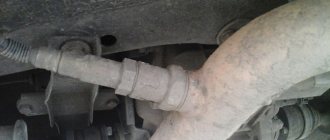
- In models with a 1.5 liter engine, it is located at the very top of the exhaust pipe. The sensor can be located next to the resonator.
- If we are talking about a car with a 1.6-liter engine, then the sensor can be found in the engine compartment. It is usually located on the exhaust manifold of the power unit. It should be taken into account that new models have several oxygen sensors at once. They are located close to each other, so finding them is extremely easy.
Functionality check
Before replacing the device, you should check its current condition.
You can check the DC using a measuring device:
- The normal lower signal level is from 0.1 to 0.2V;
- Upper - from 0.8 to 0.9V.
The manufacturer guarantees high performance of the device. As practice shows, if the lambda probe was manufactured strictly in accordance with GOST, the first signs of its malfunction may appear no earlier than after 80 thousand kilometers. On average, the “life” of a recreation center is 160 thousand kilometers.
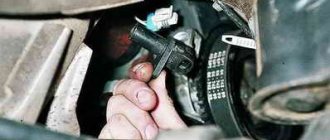
DK is in its place
But the instruction manual attached to the VAZ 2114 states that the DC should be changed after every 80 thousand kilometers. This is due to a decrease in sensitivity, which deteriorates the quality of the air-fuel mixture supplied to the combustion chamber.
How does DC affect engine performance?
In fact, the lambda probe has a very serious impact on the efficient and correct operation of the power unit. DC allows you to maintain optimal characteristics of the fuel and air mixture. If the DC is working properly, then:
- The engine operates correctly, is stable, and there are no vibrations;
- When you sharply press the accelerator pedal, the engine power quickly adjusts, changing the quality of the mixture depending on the engine speed. Due to this, jerking does not occur, the engine does not tremble;
- The maximum amount of burned exhaust is released into the surrounding atmosphere due to the correct operation of the catalyst, which burns the remaining harmful substances in the exhaust pipe. This causes less harm to nature.
Article on the topic: Choosing covers for the VAZ 2114
How to ensure optimal operation of the DC
So that you do not have to change your DC in the very near future, follow simple recommendations. They will allow you to maintain the sensor in optimal conditions and guarantee efficient operation.
- Use gasoline of the quality and brand recommended by the manufacturer for your car. In this case, for the VAZ 2114.
- If you plan to use fuel additives, make sure that their use is approved and that the quality matches the instructions on the packaging.
- Never use sealants to secure the sensor.
- If the engine is difficult to start, do not repeat a large number of starting attempts in a short period of time.
- When checking the condition of the cylinders, do not turn off the spark plugs.
- Avoid overheating the exhaust system, since the DC has a temperature limit of 950 degrees Celsius.
- Do not treat lambda zone tips with aggressive chemicals.
- Make sure that the connection between the pipe and the DC is always sealed.