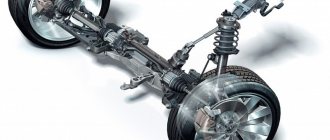
Steering rack - what is it?
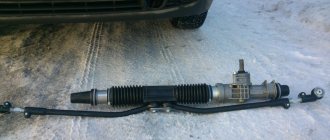
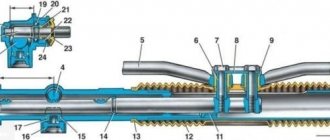
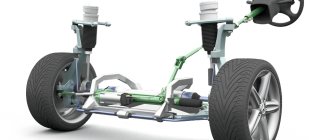
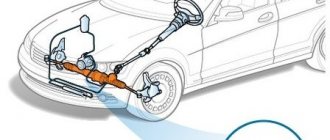
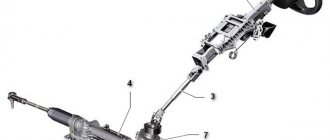
The design of the rack and pinion mechanism is quite simple. The steering rack is a part of the mechanism that controls the desired movement of the car and the movement of the wheels. Its operation is based on the movement of the drive gear connected to the steering wheel. As for the principle of operation of the mechanism, it is also simple. When the steering wheel rotates, the rack moves in a given direction - to the right or left, which activates the steering rods - and the wheels turn.
Steering rack functions
The main function of the steering rack is to convert the rotation of the steering wheel into coordinated wheel movements.
In addition, the steering mechanism performs the following functions:
- Transmits force to the steering drive.
- Increases the force applied to the steering wheel.
- When the load is removed, the steering wheel returns to the neutral position.
Steering racks are electrical, hydraulic and mechanical. In fact, the first two types differ from mechanical ones only in the presence of an amplifier (electric or hydraulic), which makes it easier for the motorist to control the car.
Damage to the steering rack
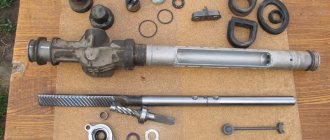
- Malfunction of the inner part of the steering rack. Breakage of the gear itself or the gear mechanism.
- Deformation of the rack body. This leads to complete immobilization of the car.
- Violation of the integrity of the tips, steering rods (curvature, crack, etc.) due to mechanical stress (corrosion, damage, impact, etc.).
- Depressurization of the steering rack. Once the seal is broken, particles of sand and dust penetrate inside, after which the steering rack completely fails.
- Critical wear of internal mechanisms. In this case, driving a car becomes impossible.
Removing the steering rack
To successfully remove the steering rack, follow the step-by-step instructions.
- Raise the car on stands from the front and remove the wheels.
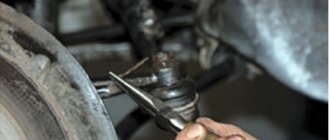
- We press out the steering tips, which are located in the steering knuckle axles, using a special puller.
- We remove the rack heat shield.
- If a hydraulic booster is installed, unscrew the hoses in which the oil is supplied and processed. Place a container in advance to carefully drain the liquid.
- We unscrew the bolts that secure the steering rack from the subframe or engine shield, which is determined by the make of the car.
- Slightly loosen the pinch bolt that holds the universal joint and the steering shaft together.
- To release the spline connector, pull the rack in the direction of the steering shaft. The rail does not always move easily, so we use a hammer and knock it out of place with a small blow.
- We pull out the rack through the wheel arch (left or right - determined by the layout of the space under the hood).
Each car has its own engine compartment. If the subframe is in the way, unscrew the rear bolts with the engine mount. Next, move the subframe lower and pull out the steering rack. We do not completely remove the subframe - this is a rather labor-intensive process.
In what cases is the steering rack replaced?
Repair of the rack is possible when the inside of the mechanism is not damaged. If during the inspection you find serious wear on the inside of the steering rack and its elements, the presence of dirt inside the rack, damage to the anthers, then there is only one way out - replacing the rack. This is the only way to solve the problem with this node. Many workshops offer their services for restoration and repair of steering racks, but all restoration work, as a rule, does not resolve the issue for long.
What does a steering rack repair kit for a Ford Focus consist of?
Basically, the steering rack repair kit consists of the following spare parts:
- Steering rack repair kit (oil seals) No. AG0008 (price 3000 rub.)
- Nut used to tighten the rail, instead of the standard plastic one No. 6772170 (price 150 rub.)
- Sliding bushing SKF PCM 252815 E
It may also come in handy, but is not included in the repair kit. set: Pressing fork No. 6317116 (It is just pressed by the adjusting nut and removes play in the engagement of the rack with the gear) and Spring No. 3707496 (Placed between the pressing fork and the adjusting nut)
And so, we have stocked up on consumables, now we move on to the process of repairing the steering rack on a Ford Focus
All repair work on the steering rack on a Ford Focus car is carried out only after removing this part. Therefore, this is where I will begin our step-by-step instructions.
Replacing the steering rack with your own hands, step by step
First of all, prepare the tools and materials that will be required when replacing the steering rack, and also complete all the preparatory work.
tools, consumables, accessories
- New steering rack.
- Tip remover.
- Wooden supports.
- Rags.
- Liquid key.
- Thin screwdriver.
- Hammer.
- Ratchet heads.
- Set of wrenches and socket wrenches.
preparatory work
- Before starting work, place the machine on level ground and lock the parking brake. Place bricks under the rear wheels. After securing the car, move to the front.
- Place the steering wheel in neutral position.
- Loosen the wheel nuts one by one.
After all the preparatory work has been done, jack up one side of the car, remove the wheel and lower the car, installing supports. Do the same on the other side. This will free up access to the steering ends, which will make it easier to remove the steering rack.
Before unscrewing the tie rod ends, clean the mounting bolts from dirt using a wire brush, then spray with WD solution (the so-called liquid wrench).
While the liquid is corroding the rust, free access to the rail. Removal will be hindered by the alarm siren (if equipped) and the gas adsorber. Carefully unscrew the terminals and set them aside.
dismantle the tips
If you will also be replacing the steering rack tips, when removing the old ones, knock them out with a hammer or use a special puller.
Using pliers, remove the key from the fastening nut and unscrew it. Insert a fork-shaped fastener under the rubber seal, and place the upper part of the pin onto the tip bolt. Tighten the puller nut until it stops and use a hammer to knock the tip out of the rack mount.
removing the rack
- Loosen the crosspiece fastenings. This connection is located in the passenger compartment under the brake pedal. We remove the rubber mat and raise the trim so that nothing gets in the way. It is worth noting that the internal fastening is made in the form of a clamp with small slots. To release, you only need to unscrew one nut.
- Next, go back under the hood and unscrew the steering rack clamp mounting nuts.
- Now the rail is free and all that remains is to remove it. Take the body with both hands and, loosening it, pull it towards you. If you can’t remove it, it means the spline joint is stuck. Arm yourself with a hammer and tap it lightly.
- When all the fasteners are disconnected, pull out the rack through the hole in the arched space of the wheel. Turn it to the left or right so that the spline shaft fits into the recess.
The steering rack must be removed very carefully to avoid damage to the fuel hose or electrical wiring. It is advisable to carry out all work with an assistant.
steering rack installation
- We clean all the seats with a brush and sandpaper. We treat the landing pins with graphite lubricant or grease.
- Before installing a new rail, open the plugs and fill the holes with lithol.
- We place the rack under the hood. This is done in the reverse order of removal. It is necessary to carefully rotate it around the axis to avoid damage to the mechanisms and wiring.
- Place the rail on the studs, put on the clamps and tighten the nuts.
- At the last stage, tighten the stud nuts.
- Once the rack is installed, put on the ends, tighten them and install the wheels.
Installing the steering rack
It is better to install the steering rack on the car with an assistant - one starts the rack from the engine compartment, the other directs the universal joint into the shaft splines from the passenger compartment. The universal joint can be placed in only one position - there is a special casting in the spline joint, which must be aligned with the groove on the mating part. Do not immediately tighten the pinch bolt - the universal joint will take the correct position on the splines after the rack and subframe are finally screwed on.
Install and tighten the steering rack and subframe mounting bolts, then finally tighten the steering shaft universal joint pinch bolt.
Insert the steering pins into the axles and tighten the nuts. Connect the power steering tubes and hoses (or wire connectors for a system with power steering). Pour power steering fluid into the reservoir until about.
Install the wheels and, without removing the car from the stands, begin bleeding the system (for cars with power steering).
How to bleed the power steering system
Turn the steering wheel several times from lock to lock with a slight delay in the extreme positions.
Remove the car from the stands, add fluid to the power steering reservoir if the level has dropped.
Turn the steering wheel from lock to lock several times, also with a delay in the extreme positions.
Make sure that the power steering pump does not make noise, add fluid to the reservoir if the level has dropped and inspect the connections, hoses and power steering tubes for leaks.
Tip: Don't rush to install the heat shield; it will make it more difficult to inspect the rack during the test ride.
After bleeding, check again the tightness of all threaded connections and make a test drive. Steering rack repair can be considered successful if:
The steering wheel has become lighter and sharper.
The knocks and noises stopped.
The fluid level in the power steering reservoir does not drop.
The car handles well and holds the road confidently.
If everything is in order, reinstall the heat shield.
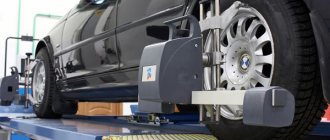
After repairing the steering rack, be sure to check the wheel alignment at a car service center or yourself.
