Adjusting headlights yourself
Incorrect adjustment of headlights causes inconvenience not only to the driver of the car, but also to other road users. In this case, the headlights shine either “in front of the nose” of the car, or illuminate the upper floors of surrounding buildings and trees. So what is the essence of adjusting headlights and can you do it yourself?
To better understand the process of adjusting headlights with your own hands, we have added detailed video instructions, which you can read at the end of this article.
We have divided this material into two parts: theoretical and practical, which includes a headlight adjustment diagram and instructions for its use.
On the glass of a car headlight lens there is a pattern of a certain shape, which is created by a corrugated notch that scatters and directs the light flux so that, on the one hand, the conditions of visibility and illumination of the road are improved, and on the other hand, with proper adjustment of the headlights, the likelihood of dazzling oncoming drivers is reduced.
- The pattern on the headlight glass “cuts” the light beam along the top edge so that it is directed slightly below the eye level of the driver of the oncoming car. At the same time, the diffuser increases the beam width, thereby providing the required lighting corridor.
- The optimal level of illumination of the right side of the road is achieved by “raising” the right part of the light beam (look at the headlight adjustment diagram a little lower).
Rules for adjusting car headlights with your own hands
When adjusting the headlights, the direction axis of the light beam changes. Adjustable by rotating the parabolic reflector with the lamp at its focal point. The reflector moves vertically and horizontally, thereby changing the direction of the light flux.
There are two screws on the back surface of the headlights that secure the position of the reflector. We have already written about additional low and high beam headlights; if you haven’t read it, you’d better read it, there are many nuances there.
Each car has its own headlight adjustment scheme. It can be found either in the instruction manual or downloaded separately on the Internet for a specific make and model of car.
The headlight adjustment diagram looks like this:
How to adjust headlights:
- Place the car on a flat surface. The screen on which the light will be scattered must be smooth, without bends, protrusions and strictly vertical. The screen is usually used on a garage door or a flat wall. The machine must be placed close to the wall.
- You need to draw a vertical line on the wall - zero. It should be in the middle between the headlights. On the left and right sides you need to draw vertical lines “L” and “P”. Line “L” should coincide with the center of the left headlight, line “R” should coincide with the center of the right headlight.
- Now you need to draw a horizontal line. It should be in the same plane as the center of the headlights. The line is usually designated by the number "1". And under line “1” you need to draw line “2” at a distance of 50 millimeters from it.
- Now you need to drive back and place the car at a distance of 7.5 meters from the wall.
- Now turn on the low beam headlights and adjust them.
- We cover one headlight, for example, with a cloth. We look at the screen and see the boundaries of the light of one headlight. The boundary of the light flux should run along line “2”, and the inclined segments should begin at points “E” (see the figure above).
- If the boundaries go beyond line “2” and the inclined lines begin far from point “E”, then using the screws you need to adjust the headlights horizontally and vertically.
Works such as settings and adjustments are easily understood through training video lessons.
Method No. 1
You will need a flat surface and a wall or a large vertical shield acting as a screen. The headlight adjustment diagram is shown on the screen. Drive the car close to the wall and mark on it the central part of the vehicle and the middle of the headlight axis.
It is necessary to mark the distance from the base of the platform to the lamp, and then from this mark to the central part of the vehicle. Next, step back from the line 5 cm and apply another one. Drive the vehicle 7.5 m away from the screen. On the last one, connect the centers of both headlights with a horizontal strip.
Read here Tuning a vase with your own hands: 150 photos and videos instructions for beginners on how to decorate various models of Zhiguli
Draw vertical lines through the centers of the lighting fixtures. Draw another vertical line through the center of the car.
After drawing the diagram, turn on the low beam and adjust the headlights so that their angle of inclination coincides with the horizontal line.
For adjustment, use the appropriate screws in your vehicle. The area in which the light goes up must be compared with the risks intersecting in the diagram.
Turn the adjustment screws until the desired result is achieved. It is best for the light to be located slightly below the central part of the headlights on the markings.
Changing the engine oil with your own hands - step-by-step instructions on how to correctly, quickly and easily change the oil in the engine and transmission (125 photos and videos)Do-it-yourself speed controller - how to make a simple adjustment device or smooth descent (120 photos)
Do-it-yourself engine repair - major restoration and maintenance of an internal combustion engine
In some cars, the low beam is combined with the high beam. In this case, only the long-range adjustment is performed. In this case, the neighbor adjusts on its own, since they have the same mechanism. With separate light, you need to make alternate adjustments. In this case, you need to mark the corresponding lamps.
Causes of light adjustment problems
Many drivers are concerned about the problem of why one headlight is brighter than the other when looking at the car from the side. This indicates that the adjustment of the headlights is impaired and the appearance of light in the area of the cut-off strip.
Factors that influence optic tuning include:
- hitting a large pothole at high speed;
- corrector malfunction;
- consequences of a minor accident;
- installation of lamps of dubious quality.
We recommend: Design and principle of operation of the gearbox synchronizer
Car owners wonder why their headlights don't shine well after replacing the bulbs. The reason may be either new light elements or carelessness during installation. Low-quality lamps are manufactured without complying with the rules and requirements, and therefore often have a misaligned spiral. The reflector cannot catch the beam, shape it and direct it onto the road. In this case, only buying new light bulbs will help. Another factor could be accidental movement of the mechanism during lamp replacement. In both cases, the optics will not be able to correctly illuminate the road.
Reasons for the need to adjust headlights
Headlights must be adjusted in the following cases:
- after replacing lamps;
- after replacing a faulty headlight (or both headlights);
- when the quality of illumination deteriorates;
- if the headlights illuminate oncoming cars;
- after installing fog lights. Usually only PTF is regulated;
- after adjusting the suspension;
- before performing scheduled maintenance;
- before a long trip.
Setup Guidelines
The procedure for adjusting light fluxes must be performed in the dark. Accordingly, it is advisable to prepare the setting template on the wall before dark. To adjust the headlights yourself, follow these simple instructions:
- Open the hood and turn on the low beam. If you want to save battery life, start the engine and leave it idling.
- Cover one “eye” of the car with a shield. On the second, rotate the vertical adjustment screw until the upper edge of the light beam aligns with the horizontal line.
- Adjust the optics in the horizontal plane so that the projection point falls into the crosshairs of the lines, where the light flux begins to deviate upward and to the right at an angle of 15–20°. Repeat the operation on the second headlight.
- For separate optics, adjustment is made for each of the four lamps. Only the main beam is set on the top line, and the low beam devices are set on the bottom line.
Important point! If the car is equipped with remote control of the headlight angle from the passenger compartment, you need to set the controls to the zero position before making adjustments.
In some modern cars, manufacturers install automatic control elements for lighting devices. The system reacts to the rotation of the steering wheel and wheels, and directs the optics in the appropriate direction, the car seems to “look” around the corner. Car service specialists will help you correctly adjust headlights with automatic drives; it is not recommended to adjust them in garage conditions.
Method No. 2
Another simple way to adjust the headlights yourself. Also involves performing markup. The central points of the lighting fixtures should also be marked on the wall, connecting them with a horizontal line.
Next, step back 12 cm and make an additional line horizontally. Return to the original line, step back 22 cm and draw another horizontal line.
Set the adjusting screw to position 0. The car needs to be driven 12 m. Turn on the lights. The main spot along the upper border should end on the 2nd line. The 3rd risk is the upper limit of the PTF. In case of deviation, adjust the headlights using the adjusting screw.
Ways to adjust car headlights
There are several options for adjusting optical devices:
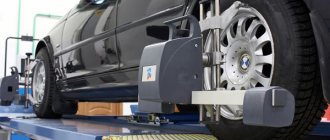
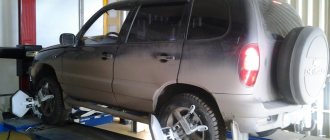
- Using the stand. This method is used in car service centers.
- Adjustment with a device that allows you to achieve optimal results.
- If the device is not available, the adjustment can be done manually.
Setting up optics at a service station
Not every driver knows how to adjust the optical device correctly. In this case, the best solution would be to go to a service station, where they will adjust the headlights using special devices, and the accuracy will be higher than with manual adjustment. If the procedure was performed for the first time, then it is also worth contacting a service station to check the accuracy of the work performed. As a result, you will know how correctly you are doing everything.
In service station conditions, headlights are adjusted using special equipment
Self-adjustment
To adjust the optics with your own hands, they resort to the standard scheme. At the same time, some car and lamp manufacturers offer their own adjustment methods. As a rule, a diagram of the adjustment process should be attached to the technical documentation for the machine. A universal method that is suitable for most cars involves the following sequence of actions:
- markings are made on a flat vertical surface (wall), which will be used as a stand;
- The car is placed in front of the wall on a flat horizontal platform at a distance of 7–10 m.
horizontal headlight adjustment?
For all those interested, setting up the light in a Jeep KJ (European), personal experience (100% for everyone).
1. There are two regulators, the first is on an electric corrector (controlled from the cabin), the second (a long screw, closer to the wings of the car) -100% for Europeans, for Americans (without a corrector), only the screws are closer to the wings - horizontal for reduction into a spot.
2. The one closest to the wings adjusts horizontally, those on electric regulators adjust vertically.
3. Adjustment “on the fence”:
A. we drive close to the fence
b. draw an axial vertical line along the center of the car
V. draw axial vertical lines in the center of the headlights (approximately 56 cm from the center line of the car (I have this on a 2006 European)
d. Draw a horizontal line along the axis of the center line of the headlights (approximately 90 cm, not for everyone, depends on the tires and how high/low the car is)
d. move away 5 meters (debatable)
e. we adjust the horizontal so that the point from which the jackdaw leaves is like in the attached diagram with a screw that is closer to the wings
and. use the screw on the electric corrector to return the headlight beams to the horizon
h. it is important that the face is not broken
That is, at the first opportunity at the service station, we set the headlights accurately.
Possible obstacles (I encountered them myself):
The horizontal screws do not work or do not work correctly:
— we remove the headlight, turn the screw, make sure that the deflector does not respond or reacts weakly, we conclude that the headlight is broken, we need a new one (just kidding), — we decide to fix it.
— the issue of adjusting broken headlights is not complicated:
A. disassemble the headlight only in the last case (I started with this, it’s good that I didn’t break everything)
b. an easy case, we remove the rubber seal of the lamp, twist the regulator, make sure that it is scrolling, look in the ass from where it should come out and see that some person has driven the adjusting screw inside the headlight (it can be solved by carefully removing the back part of the plastic regulator, turning it clockwise for the right or counterclockwise for the left headlight using the adjuster screw, screwing it on and installing it as expected along the chamfers of the guide assembly.
V. a severe case, the bushing of the guide ass rotates, it can be solved by replacing the ass with lubrication of the assembly, or, like me, by disassembling the headlight and fixing the screw that is turning (usually a seal pops out - insert, additionally fix with a small piece of vacuum tube from the trombler from the “classic”, fix the cuff with a wire and other collective farm stuff) , it is important to ensure that there is no turning when turning the adjusting screw.
PS
Diagram “for understanding”, the dimensions of our car.
ZYZY
Who needs NEW headlights for an American DEPO in packaging under a film at their own cost (6 thousand pair), I will send it to the regions plus the cost of delivery by the company by knocking in a personal message or at number eight nine hundred six zero fifty-three ninety-five fifty-five. I took the LED bilens for installation, changed my mind, left the car in stock, I think it’s relevant for Liberty owners, I picked up the last ones in Moscow at this price tag.
Modified October 13, 2020 by simpson
Rules for adjusting car headlights
Changing the direction of the axis of the light beam when adjusting the headlights is ensured by rotating the parabolic reflector, the focus of which is the light bulb, by moving it relative to the vertical and horizontal planes.
The correct position of the reflector is established by two vertical and horizontal adjustment screws, which are located on the rear surface of the headlight unit.
To correctly adjust the headlights, it is necessary to combine the light spot formed by the optics with the reference adjustment diagram, which is usually provided by the car manufacturer (in our case, the headlight adjustment diagram for Tavria and Slavuta cars).
Car headlight adjustment diagram
The headlights are adjusted in the following order:
- An unloaded car is placed on a flat horizontal platform at a distance of 5 meters from the screen. Any wall or low fence (up to one meter) is quite suitable as a screen.
- A vertical line “0” is applied to the screen, lying in the plane of symmetry of the machine (look at the adjustment diagram). To the left and right of it, two more symmetrical lines “L” and “R” are drawn, which should coincide with the centers of the left and right headlights.
- At a height corresponding to the distance of the centers of the headlights from the ground, a horizontal line “1” is applied, and a line “2” is applied 50 mm below it.
- When the preparation is complete, turn on the low beam headlights and begin adjusting.
- Closing each headlight in turn, check the location of the light border relative to the adjustment diagram printed on the screen. It should run along line “2”, with the inclined segments starting at points “E”.
- If this does not happen, then you should adjust the headlights using the horizontal and vertical adjustment screws.
The process of adjusting the headlights is shown more clearly in the video below. However, even if after adjustment you still do not have enough illumination of the road, perhaps polishing the headlights will help correct the situation.
The simplest check of headlight adjustment
Let's see how the headlights of our car shine. At dusk or at night, drive up ten meters perpendicular to the wall of a building or a fence and you will see, on this improvised screen, a beam of light from the headlights of your car. Let's assume that the headlights of your car are not worn out, the reflectors are clean, the light bulbs are CORRECT and of good quality. On the screen you will see two “seagulls”, cut-off boundaries similar to the image of a seagull, located on the same level. The right side of them rises upward at an angle of approximately 10 degrees.
If the surface on which your car is parked is horizontal and it is possible to drive away from the screen in reverse for 70 - 100 meters, then when driving back you should see how the “gulls” go down as you move away from the screen. At a distance of 70 - 100 meters, the “gulls” will completely descend from the screen to the ground. If so, you are doing pretty well with the light.
If you see that the “seagulls” are not “flying” synchronously, but each one where it wants, you need to start making adjustments. The first thing you need to do is to ensure that the wings of the “gulls” are parallel. Moreover, the left wing is parallel to the ground. This can be achieved by correctly installing the light bulbs. The light bulb in the headlight has only one correct position, determined by the design of the headlight and the base of the light bulb. If desired, the light bulb can be placed incorrectly. The reason for this is that almost all cars have cramped conditions, and as a result, scratched hands and an incorrectly installed light bulb.
There are cars on which to replace the lamp you need to remove the headlight, battery, wheel, fender liner, hatch in the fender liner, and so on. Sometimes replacing a lamp is such a geography story that you are all wet with sweat and dirty as if you had changed the pendant. Of course, a thoughtless attitude could also be the cause. I stuck it in, and as it turned out, it shines well. Where it shines is none of my business.
So, either our light bulbs are installed correctly, or we installed them correctly. Let's go further.
Headlight glass pattern
The headlights are made with a specially designed pattern so that the light that comes from the headlight bulb is scattered and illuminates the roadway. At the same time, with the correct settings of the headlights, the luminous flux passing through the corrugated notches of the pattern does not blind drivers of oncoming vehicles:
- the pattern refracts the light beam along the top edge so that it is below the eye level of the driver of a standard oncoming car;
- The best illumination of the right side of the road is done by raising the right side of the light beam.
When customization is required
Adjustment of lights is required at least once a year, as well as after replacing lamps. The light is lost gradually, so the human eye is not able to notice deviations.
When operating a vehicle in difficult conditions, the reflector is subjected to constant vibrations and loads. Because of this, it gradually takes an incorrect position, in which the light flux is lost in the distance or goes down.
The malfunction can be identified by the following symptoms:
- the headlights shine differently if you stand in front of the car;
- when driving with low beams, drivers of oncoming traffic blink their high beams;
- roadside visibility has deteriorated;
- jackdaws are not distinguishable and have a strong discrepancy in height or in the horizontal plane.
Adjusting the light will ensure the best illumination of the road and will have a positive effect on driving safety.
Adjusting the headlights of VAZ "OKA" 1111 1988-2008
- Repair manuals
- VAZ "OKA" 1111 1988-2008
- Adjusting the headlights
The direction of the light beams of the headlights should be such that the road in front of the car is well illuminated, and oncoming drivers are not blinded when the low beam is turned on.
It is best to adjust the direction of the light beams of headlights in specialized workshops using optical stands. If this is not possible, it is permissible to make adjustments using the screen. You will need: tape measure, opaque material.
| Rice. 7.3. Headlight adjustment diagram |
| 1. Place the car on a flat, horizontal platform. |
| 2. Place the car perpendicular to a smooth wall (for example, a garage) at a distance of 5 m. Place a load weighing 75 kg on the driver’s seat. Mark the screen on the wall as shown in the figure (fig.). |
| USEFUL TIPS Before marking the screen, make sure that the air pressure in the tires is normal, and then rock the car to self-install the suspension springs. |
| 3. Draw vertical lines on the screen: center line O and lines A and B passing through points E corresponding to the centers of the headlights. The latter must be symmetrical with respect to the center line of the car and line O. At a height h corresponding to the distance of the centers of the headlights from the floor, draw a line M and below it, 65 mm, a line N of the centers of the light spots. |
| NOTE Measure the distance from the center of the headlights to the floor on your vehicle. This will be the distance h on the screen. |
| 5. Open the hood and turn the adjustment knobs on both headlights to the extreme left position. | 6. Adjust screws 1 (in the horizontal plane) and 2 (in the vertical plane) for manual adjustment of the light beam to the position of the light spot for each headlight on the screen, if the location of the light spots on the screen does not correspond to the figure (see Fig. 7.3). |
| NOTE Adjust the direction of the light spot for each headlight separately. Cover the second headlight with opaque material during adjustment. |
The headlight light is considered adjusted if the upper border of the left parts of the light spots coincides with line N, and the vertical lines A and B pass through the intersection points C1 and C2 of the horizontal and inclined sections of the light spots.
↓ Comments ↓
VAZ-1111-11113 OKA
Section 1. VEHICLE STRUCTURE
General information about cars Vehicle registration data
Section 2. ENGINE
Possible engine malfunctions, their causes and solutions Useful tips Replacing the coolant Replacing the engine oil and oil filter Cleaning the crankcase ventilation system Setting the piston of the first cylinder to the TDC position of the compression stroke Adjusting the tension of the camshaft drive belt Replacing the tension roller Replacing the camshaft drive belt Removing, installation and troubleshooting of the flywheel Replacement of engine seal parts Cylinder head Adjustment of clearances in the valve drive Removal and installation of the engine Engine repair Lubrication system Cooling system Exhaust system Power supply system
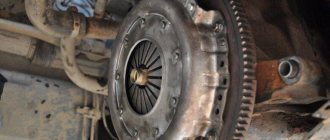
Section 3. TRANSMISSION
Clutch Gearbox Front wheel drives
Section 4. CHASSIS
Front suspension Rear suspension
Section 5. STEERING
Inspection and check of the steering system on the vehicle Steering column Steering mechanism Steering linkage
Section 6.BRAKE SYSTEM
Checking and adjusting the brake system Replacing the brake fluid Bleeding the brake system hydraulic drive Master cylinder Brake vacuum booster Pressure regulator Replacing brake hydraulic hoses and pipelines Front wheel brakes Rear wheel brakes Parking brake
Section 7. ELECTRICAL EQUIPMENT
Fuses and relays Generator Starter Ignition system Lighting, light and sound alarms Windshield wipers and washers Engine cooling fan Instrument cluster Switches and switches
Section 8.BODY
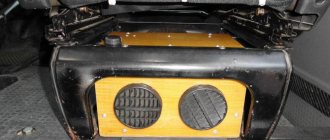
Possible body malfunctions, their causes and solutions Replacement of buffers Hood Side door Rear door Rear view mirrors Seats Heater Body care
Applications
Appendix 1. Tightening torques for threaded connections Appendix 2. Fuels and lubricants and operating fluids Appendix 3. Basic data for adjustments and control Appendix 4. Filling volumes, l Appendix 5. Oil seals Appendix 6. Layout of rolling bearings Appendix 7. Car electrical diagram : 1 — side turn signal repeater; 2 — front direction indicator; 3 - headlight; 4 — electric motor of the cooling system fan; 5 — sound signal; 6 - sensor for turning on the electric motor
Preparing to make adjustments
To achieve the correct position of the headlights, the adjustment procedure must be performed under certain conditions. Carry out the following preparatory work:
- Find a flat area without a slope adjacent to a vertical wall. One of the suitable options is a concreted entrance to the garage; the role of the setting template will be played by the gate.
- Remove unnecessary items from the trunk and interior of the car, leaving only the factory tool kit, first aid kit and spare tire. The goal is to ensure the curb weight of the vehicle specified in the operating instructions.
- Check the pressure in all tires and adjust them to normal if necessary.
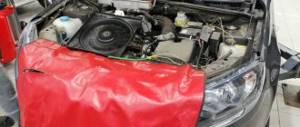
- Clean the optical glass from dust and other contaminants that block the path of light flow. Do not use solvents, only ethyl alcohol-based glass cleaners.
- It is advisable to fill the fuel tank full, fill the washer tanks to the top and, if necessary, add antifreeze to the expansion tank.
A headlight adjustment diagram is drawn on the garage door or wall adjacent to the site. You will need a tape measure, a long straight bar and a marker. The color depends on the chosen background - for a white wall it is better to take a black felt-tip pen, for a dark gate - chalk. The diagram is drawn as follows:
- Drive the machine close to the wall. Using body parts or the car brand emblem as a guide, mark a point on the surface that coincides with the central (longitudinal) axis of the vehicle.
- Measure 7 m from the gate and drive the car to the specified distance. Draw a vertical line through the marked point.
- Take 4 measurements on the car: from both headlight bulbs to the ground and to the center of the car. On models equipped with separate high and low beam optics, the listed measurements are made for all four bulbs separately.
- Subtract 50 mm from the number indicating the distance to the ground. Set this size aside on the wall and draw a horizontal line.
- From the vertical axis, plot the distances to the centers of the lamps along the drawn line. Place marks in the form of segments. The scheme is ready.
Note. For separate optics, you need to draw 2 horizontal lines, and the second one must clearly correspond to the measurement from the high beam bulbs to the ground. Segments corresponding to the location of the outer lamps are laid out on it.
Before adjusting the position of the optics, it is also recommended to treat the adjustment screws with a penetrating aerosol lubricant such as WD-40, since the connection threads could become soured due to extremely rare rotation. As a rule, the adjusting screws are located on the rear plane of the headlight housing, facing into the engine compartment. The shape of the head is for a Phillips screwdriver, hexagon or special key.
We recommend: Why the VAZ-2112 stove does not heat 8 and 16 valves and how to repair it
Setting up PTF
Adjusting the fog lights with your own hands is done in the same way. But, you need to increase the load on the vehicle by 70 kg.
DIY bumper: how to make a unique polymer bumper for a car at home (125 photos)Do-it-yourself car painting - preparation for coating and the main stages of high-quality car painting (100 photos)
Polishing a car with your own hands - a step-by-step master class on how and how to polish a car’s paintwork (70 photos)
Use any available means for this - from bags of cement to passengers. Fill the tank full to ensure the desired load level.
Draw a horizontal line indicating the size between the surface and the PTF. Make another line higher, doubling the previous distance. Mark the center of the vehicle.
You should get 2 lamp center points and 2 boundary lines. Place the car on a flat surface 10 m from the wall. Professionals say that 5 m is enough. But it’s better to start with 10 m.
Adjust the headlights until their light is within the marked boundaries. The light beam should focus at the points where the centers of the lamps are marked.
When and why do you need to adjust your car headlights?
Every car owner should know that in the dark you can drive a vehicle only in good lighting, which can be provided by correct adjustment of the headlights. If the optics are configured incorrectly and the angle of inclination does not meet the established requirements, then drivers of oncoming cars will be blinded by the stream of scattered light. This situation increases the likelihood of an accident when cars pass in the opposite direction. In addition, low headlight efficiency reduces the visibility range, which also leads to accidents.
The vehicle is operated on paved roads, which in most cases have uneven surfaces. As a result, the angle of the headlights changes and there is a need for adjustment from time to time. In addition, this procedure is used in the following situations:
- if a new headlight was installed, the lamp or reflective element was replaced;
- when installing fog lights;
- in the event of an accident in which the front of the car was damaged;
- when repairing or replacing suspension elements;
- when replacing rims or tires.
One of the situations when it is necessary to resort to headlight adjustment is their replacement.
Do-it-yourself light adjustment on Japanese cars
Adjusting the headlights on Japanese cars involves changing the shape of the chiaroscuro boundary. In this case, you have to completely change the entire lighting structure. But if the car is equipped with H4 bulbs, the process is simplified, since the low beam of the headlights is adjusted using a special element, which is an integral part of the optical element. It has the shape of a cap, and you can turn it together with the lamp. You only need to turn it 5-7 degrees counterclockwise.
If you can’t do this, the “antennae” of the lamp should be slightly sharpened. You shouldn’t overdo it during this process, otherwise it will fall inside and won’t hold on. It is best to file it with sandpaper. You can also adjust the bi-xenon lenses yourself.
WATCH THE VIDEO
Of course, it is unlikely that ideal light will be obtained after such manipulation, but it will be possible to pass a technical inspection with it. Thus, you can adjust the light in your car at home. The price of adjusting headlights in a car service is from 2000 rubles.
Adjusting the headlights
How to adjust headlights without a stand? And we have a marked screen. Very simple. The low beam headlights are adjusted. Turn on the low beam and set the light corrector to the zero position. We determine where the beams of our headlights need to be directed. First we adjust it left and right, then up and down. Typically, the right-left adjustment screws are located outside, and the up-down screws are closer to the center of the engine compartment, and the adjustment process itself with working headlights, correctly installed, good quality lamps takes 10 minutes. As usual, more time is required for preparation. So that the light of the second headlight does not interfere, you can hang it with a piece of fabric while adjusting the first one.