How many silent blocks are there in the rear suspension?
The suspension in a car is needed to ensure a movable connection between the wheels and the body. At the same time, it must absorb as much as possible the unevenness of the road and the vibrations of the car that occur when driving on a bad road. The suspension is part of the chassis of the car. Not only the driver’s feeling of driving on the road depends on the condition of the suspension, but also safety, i.e. vehicle stability when driving at high speed. The suspension can be front or rear, and include many different elements depending on the model of a particular car. One of the most important connecting links in a car’s suspension is the silent block. This is what we will talk about in today’s article.
Chassis elements
A car suspension is a complex system of many elements. Generally speaking, they can be divided into three groups:
· Guides;
· Elastic;
· Extinguishing.
The former ensure that the suspension is attached to the body and forces are transferred to the car body. The guide elements are also responsible for the movement of the wheels relative to the vehicle body when it moves. A variety of levers are used as guides: longitudinal, transverse, and so on.
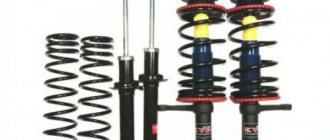
An elastic suspension element absorbs loads from road unevenness, accumulates the resulting energy, and transmits vibrations to the body. In modern cars they are presented in the form of springs, leaf springs, and torsion bars. The last part, called the shock absorber, is designed to reduce the amplitude of vibrations of the car body. The operation of shock absorbers is based on the resistance that occurs when fluid flows between the two cavities of the shock absorber cylinder.
What is a silent block?
Upon closer examination of this element, it becomes clear that the silent block is a rubber-metal hinge that has one or more metal bushings surrounded by rubber. It is necessary to connect the suspension parts together, while the rubber silent block is necessary to dampen vibrations between the units that it fastens. Silent blocks are used both in the front suspension, in particular for attaching arms to the body, anti-roll bar, and in the rear suspension. Often used for fastening gearboxes and other machine components and mechanisms.
How to check silent blocks
As a rule, good quality original spare parts can last more than 100 thousand kilometers. However, taking into account the peculiarities of our climate and roads, control inspections should be carried out somewhat more often, once every 50 thousand kilometers. In addition, you can also understand that the silent block has worn out by your own feelings, control deteriorates, and knocking appears in the chassis when driving.
However, the best way to determine the failure of silent blocks is visually. To do this, you need to drive into a pit, or lift the car on a lift. There should be no cracks or tears in the rubber part of this chassis element, and the bushing should be level and not skewed. Failure of silent blocks primarily affects wheel alignment/camber, because when they break, the levers take the wrong position.
How many silent blocks are there in the rear suspension?
When planning chassis repairs, each car owner calculates what spare parts he will need. At the same time, replacing silent blocks is a procedure that cannot be avoided, so they must be purchased in advance. Here the car enthusiast is faced with the question of how many silent blocks are in the rear suspension of a Lancer 9, Mazda 6, VAZ 2109, Opel Vectra S, Ford Focus or any other car he owns? Let's take the above options as an example
Automobile
| Number of silent blocks in the rear suspension | |
| Mitsubishi Lancer 9 | 14 |
| Geely CK | 12 |
| Mazda 6 | 14 |
| Opel Vectra C | 14 |
| VAZ 2109 | 4 |
| Ford Focus 2 | 14 |
bibioil.com
Dismantling and installation process
Installation begins after purchasing the parts. You will need a tool - wrenches for removing the beam and suspension arms, a hammer or sledgehammer.
Step by step guide:
- The car is driven into a pit or overpass. You can lift the wheel with a jack, but it is so inconvenient to work with the suspension - you have to work lying down. The jack foot should not be in the same plane as the beam bracket.
- Dismantle the suspension beam. Be sure to remove the handbrake cable when doing this.
- The brackets have special brackets that hold the brake system hoses. The staples are removed.
- The old silent block of the beam is dismantled. Garage conditions require the use of a hammer or sledgehammer. You should work carefully so as not to damage the seat, otherwise there will be problems with installing the new part.
- The seat is cleaned of dirt and graphite lubricant is placed there.
- Install a new part. Replacement of the silent block of the rear beam is done so that there are no gaps or holes. Pressing is done with careful blows of a hammer.
- Reassemble the beam in the reverse order.
This is interesting: Selecting and using silicone lubricant for a car: 8 best brands for 2020
The replacement is complete and you can drive the car immediately. During assembly, you should check the installation of each part and only then proceed with assembling the next one. The silent block of the front beam is changed according to the same scheme.
Dismantling the old gum is done with 3 - 4 strong blows with a sledgehammer. You should hit strictly in the center of the part, without deviating to the side from the vertical axis. The edge of the clip is bent using a chisel to facilitate dismantling.
Experienced craftsmen use a piece of tube to press out the silent block of the rear beam. It is important that its diameter is slightly smaller than the same parameter of the seat. The tube is placed against the part and hit with a hammer. In a few blows the part will be removed without unnecessary operations.
Having removed the silent block of the rear beam, check the seat. There should be no chips or cracks on it. If there are any, the part should be replaced. Otherwise, the new silent block will not fit as it should.
rear multi-link suspension bulkhead — Community “VAG Club” on DRIVE2
Unfortunately, the Drive format does not allow posting a full report, limiting the number of photographs (there are more than 50 in the original source). So, as they say, I'll be brief:
Most often, the rear steering rods require replacement; the rest comes to a halt when it is not possible to move the adjusting bolts (there are 4 of them) at the wheel alignment stand.
And if there is still a chance to move the lower ones or even cut them off with a grinder, then the upper ones are very difficult to reach. It is possible to remove/install a new one, but if the bolt is soured, then you cannot do without removing the beam. And if you do remove it, then it would be advisable to change everything en masse. Simply reasoning logically, almost all silent blocks are almost the same diameter, and therefore have the same resource. *While everything is tightly screwed to the body, it makes sense to “touch” all the nuts and bolts, which will then need to be unscrewed *disconnect the handbrake cable from the calipers. To remove the ball from engagement with the lever, and to remove the shirt from the stop, the “whiskers” on the shirt must be compressed * pull the cable out of the guides attached to the levers * unscrew the calipers themselves and hang them on the locker using wire hooks, for example * In order not to depressurize the brake system, you need to disconnect the pipes from the beam. In some models, it is enough to remove the clamp, after which both the tube and hose are pulled out to the side through the slot
on some models you will have to make this slot yourself
*place a stop under the rear lever, create a stop.
*unscrew the bolt securing the lever to the steering knuckle, lower the lever, remove the spring
*unscrew the lower shock absorber mounting bolt *on some models, on the left side, remove the rubber band securing the muffler, on others, like the Turan, remove the rear muffler can *disconnect the connectors from the ABS sensors *install the stand under the beam
*unscrew the bolts securing the trailing arms *unscrew the 4 bolts securing the beam to the body
*beam can be removed and disassembled
*unscrew the outer bolts of the upper arms
*unscrew the internal ones. If they turn sour, use the “grinder”
by car, you can't do that
*remove the lower bolts securing the steering rods to the steering knuckle *unscrew the rear stabilizer link from the lever. If that doesn’t work, cut it down too *unscrew the bolts securing the trailing arms to the steering knuckles
*turn the beam over and unscrew the lower rear arms. If there is resistance, cut it.
and these bolts could be sawed off by car, if necessary
*unscrew the stabilizer mounting bolts *unscrew the last levers, those same thruster rods. Suspension disassembled
it is useful to lay out in the order that and how it was collected
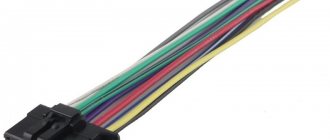
And this is what a set of new spare parts looks like, awaiting installation
there's an extra pair in the upper left corner, don't pay attention
*thrust rods are installed first. Do not confuse the left with the right if they are not symmetrical * now the silent blocks in the rear lower arms are repressed. This can be done either with a special mandrel, pre-ordered from a turner, or by selecting a head of a suitable diameter
Before pressing in new silent blocks, it is necessary to clean the seat
*the silent block itself must be correctly oriented relative to the lever. It has two protruding stripes
-they need to be aligned with the protrusions of the lever
You also need to take into account that the silent block holder is narrower than the lever itself * install the levers into the beam, insert new bolts and new eccentric washers, but do not tighten * screw the stabilizer into place * turn the beam over, now you can restore the upper curved arms
Please note that the silent blocks are almost identical in appearance, differing only in the inner diameter.
-repress in the same way, only the head will need a different diameter *screw the arms to the beam, also using new bolts and washers *now the trailing arms. Before unscrewing the central bolt, for example, I measure the distance between the arm and the body
I make a mark with a marker
* also, before removing the old silent block, it is convenient to make a mark along which to orient the new silent block
*The silent blocks remain in the steering knuckles themselves. With a small number of mandrels and a long screw, everything can be done on site
If they don't come out, an industrial hair dryer will help, because... plastic clips
There are no difficulties with the reverse process.
*when all silent blocks have been replaced, you can begin reassembly. A few points:
- when screwing the trailing arm to the steering knuckle, do not tighten them immediately, as you must first insert the stabilizer link bolt. And in general, you can’t tighten any of the fasteners to a certain point, just bait and tighten them. To make it more convenient to insert the beam into place, you can cut off the caps of a couple of old bolts and use them as guides - the springs must be installed in a strictly defined position. This can be helped by a protrusion on a rubber sole, which must be inserted into the response hole of the lever - After the beam is installed and screwed, the springs are in place, a jack or hydraulic stand is placed under the lever and raised until the weight of the body moves from the paw lever lift. And in this position, tighten all the bolts and nuts. -don’t forget to insert the brake pipe into the clamps and put the connectors on the ABS sensors -after that you can screw on the wheels and go straight to the wheel alignment stand. ===================================================== If anyone wants to repeat this procedure on their own, write in a personal message, I’ll give you a link to the original source :-)
www.drive2.ru
Replacement of silent blocks of front levers
To begin with, the car is placed on a jack, or a lift is used, which is preferable in this situation. Not only the wheel itself is removed, but also the silent block with the lever. It is enough to unscrew one nut and then a special bolt. All that remains is to pull the lever.
To remove the rear silent blocks you need to have a special tool. With its help, you can press out the part without much hassle. If you don’t have one, then a sledgehammer or a vice will do. But then you can damage other parts. Now the new hinge is inserted into the freed lever, which will also require professional equipment. If you do this with a hammer, then the risk of all kinds of damage increases many times over.
The lever must be put back with the nuts screwed onto the bolts. All that remains is to screw the wheels on and then remove them from the jack or lift. It is very important to carry out control tightening of silent blocks under a serious weight load.
Rear suspension silent blocks Focus 2 — tsa-auto.ru —
First, some information. The Ford Focus 2 has a multi-link rear suspension. This gives advantages to the car's handling, but at the same time increases the cost of repairing the suspension in the event of a breakdown. It contains four levers on each side. One longitudinal, and three transverse (two at the bottom and one at the top).
The rear lower wishbone is also called a “sprung” arm; a spring rests against it. Anterior lower “bone” and upper “sickle”. They are called that because of their visual resemblance to these objects.
The content of the article:
Ford Focus 2 rear suspension diagram
| 1 — Cross member 2 — Anti-roll bar 3 — Anti-roll bar link equipped with ball joints 4 — Hub support 5 — Wheel hub 6 — Upper arm 7 — Front lower arm 8 — Rear lower arm 9 — Dynamic deflection limiter 10 — Shock absorber 11 — Spring 12 - Rear lower arm adjusting cam nut |
There are two types of spring levers - straight and curved. Curved ones are used on the so-called improved suspension. They come with a stabilizer bar with L-shaped struts and two hinges. With straight arms there will be a different stabilizer and straight struts. Straight arms and struts are cheaper.
The wear of the rear suspension silent blocks can be judged by the beginning of uneven wear of the rear tires. You can check the silents visually and shake the “bone” with your hand. Often the silent parts in this lever simply begin to dangle due to the rubber breaking. It also becomes impossible to adjust the toe-in of the rear wheels, because the silent bushings stick to the camber bolts.
On my car, I missed the moment of timely replacement. For this reason, the rear tires were eaten away along the inner edge and a hernia appeared on the tread on one wheel. The wheel began to bounce when driving.
The rubber could still be used. And now just buy a new one. Therefore, I advise you to monitor wear and make timely repairs in the rear suspension.
Condition of suspension silents
The mileage at the time of repair was 174 thousand km. I examined the entire suspension and decided to change not all the silent parts, but only in the spring arm and in the “bones”. The rest didn't look too bad and were still holding the load. Below are a few photos of the left side, the same thing happened on the right.
Left side, front trailing arm bushing "butterfly"
Front lower wishbone left side "bone" | Upper wishbone on the left side "sickle" |
Spare parts for repairs. Rear suspension silent blocks Focus 2
Everything I needed in the photo is what I needed, more details to come.
For the “bones” you need four identical silent blocks, two for each lever. Ordered Lemforder 31938 01.
I decided to use Masuma silents for the spring-loaded levers. Internal RU471, external RU470. The company is Japanese, but made at a factory in China. Externally the quality is good.
Internal silent spring lever | External silent spring lever |
Silents differ in diameter and length of the outer ring. There is a red dot on one side. This side of the silent should be inserted into the lever; it is slightly smaller in diameter. In general, I noticed a difference of almost 1 mm in diameter only on one pair of silents, I don’t remember internal or external. You need to measure it with a caliper, but there was a red dot on both. If you press incorrectly, the silent seals will not stick.
I took a few bolts as a spare, but all of them came loose except the camber ones. The nuts are welded to the subframe. If you don't have to cut them, then just the bolts are enough. Bolts for “bones” M12x65 mm Ford 1 471 995 or SWAG 50 92 9451. Need 4 pieces. The bolts for the “sickles” are the same, but I didn’t touch them.
External bolt of the spring arm Ford 1 471 980 or Ford 6 699 982. M12x75 mm, two of these are needed. The Ford bolt 1 471 980 has a widening for the inner diameter of the silent only near the bolt head. My relatives have this place longer, I left them.
Spring arm outer bolt, 1 471 980 | External bolt of spring arm, M12x75 mm |
Bolts for bones, 1,471,995 | Bolts for “bones” M12x65 mm |
You also need two alignment bolts, I ordered a bolt-washer-nut set ZZVF ZV1456980HG. The original is too expensive. The strength on the head is not knocked out. The rest is normal, not crooked. The alignment was adjusted without problems.
Removing the rear suspension arms
I started on the left side. Lift this side and remove the wheel. We place a reliable support under the beam. For example, a screw jack. It is better to immediately unscrew the stabilizer from the struts and loosen it in the bushings. Then you can bend it down so it doesn’t get in the way. The nuts on the bushings are also welded; you need to turn the bolts. Now we remove the front lower wishbone, that is, the “bone”
Unscrew the rear shock absorber. I decided that it was easier to unscrew the two 10mm bolts on top than to tear the soured bolt at the bottom. It's time to change the bumpers.
Now we support the support lever with a jack and unscrew the bolt of the external silent block. We take out the bolt, smoothly lower the jack and the spring is released. The breakup bolts had to be cut off with a grinder, the bushings were stuck. After this, the lever was released.
The rubber in the silent bands fell apart
Repressing the silent blocks of the Focus 2 rear suspension
Pressing out and pressing silent blocks is an important, responsible and very difficult matter. For this, I turned to a specialist who has a hydraulic press, a bunch of mandrels and experience working with all this.
I watched from the sidelines. What I noted was important. It is necessary to measure the diameters of the silents and seats before pressing out and before pressing in new ones. That is, push in a certain direction. On spring-loaded levers, you need to use spacers so as not to bend the ears of the lever.
On the bones, the silent was placed in the center of the lever, taking into account its thickness. This is approximately 9mm from the outer edge of the lever. The slots in the rubber should be perpendicular to the axis of the lever.
The red dot of paint on the bushings in the spring arm faces forward and this side of the bushing is slightly smaller in diameter.
The levers on the left side are ready and can be assembled. In the photo on the right, the silent blocks of the Focus 2 rear suspension are pressed out. Essentially scrap metal.
Installing levers on a car
I placed the camber bolt head back. On the reverse side it is difficult to install the adsorber. To unscrew it, you need to unscrew two torx screws from the top of the beam. I gave up on this matter, it’s very difficult to get close. There were no problems with toe adjustment. We install the camber bolt, wind the spring, tighten it with a jack, and install the outer bolt of the lever. We screw on the shock absorber and at the end there is a “bone”. We put the wheel in place.
The left side is ready. Now we do the same on the right side. A couple of photos.
Tightening the silent blocks of the Focus 2 rear suspension
The silent block bolts must be tightened under load. On the forums they write about tightening through a 113 mm spacer. This is a lot of weight. I very rarely load the trunk this way. Therefore, I decided to tighten it with less weight. I figured it out and loaded it with paving slabs. I was hanging out on the overpass.
With an empty trunk, the distance between the lever and the subframe is 160 mm. I tightened it to 135-140 mm. In this case, I do not encourage anyone to do the same, this is my personal decision.
I've been driving for a year, everything is fine. When there was a large load, which happened a couple of times, I heard the rubber bands creaking.
Previously, I assumed that the deviation of the rear wheels from the vertical axis was a consequence of wear on the silent blocks. It turned out that this was not the case. After the repair, the angle of inclination remained the same. Also, in comparison with my father's C-Max, everything is the same.
Thank you for reading to the end. Happy renovation! Mileage 4700 km.
ps A year later, I loosened the bolts and tightened them properly through a 113 mm spacer. I marked the camber parts with a core, the corners didn’t seem to be gone. I didn’t notice much of a difference, the squeaks remained under load, maybe it’s the stabilizer bushings, I’ll try spraying it with silicone.
By the way, the rear springs compressed differently; more weight had to be applied to the right side. I haven’t figured this out yet, it looks like the left spring has sagged.
how many silent blocks are there in the rear suspension of Ford Focus 2
on one side: trailing arm silent, 2 spring-loaded arm silents, 2 silents on each of the two small wishbones, straight and arched “sickle”. a total of 7 pieces on each side, if I'm not mistaken. and let’s not forget 2 stabilizer bushings and stabilizer struts, and they come in 2 types: on our assembly they are straight, in the form of a rod with rubber bands, on the European one they are L-shaped, with a ball joint. Accordingly, the stabilizers themselves and the large wishbones (spring-loaded) are also different.
All silent blocks of the rear suspension of Ford Focus 2 https://okeyavto.ru/ford-focus-ii-zadnyaya-podveska/silent blocks-rear-suspension
More clearly: 1) Spring-loaded levers 2 pcs. (4 silent blocks) 2) Straight lower transverse arm 2 pcs (4 silent blocks) 3) Upper transverse link 2 pcs (4 silent blocks) 4) Rear trailing arm silent blocks 2 pcs. Total: 14 silent blocks
touch.otvet.mail.ru