Step-by-step instruction
The gearbox weighs relatively little - 27 kg, but it is still not easy to remove it with your own hands, so invite an assistant.
All work is carried out after installing the machine on the ramp or above the pit. Additionally, the car still needs to be jacked up and placed on supports so that the wheels are in the air. First of all, remove the mudguard, the motor crater protection and disconnect the battery. Further:
- drain the gearbox oil;
- remove nuts from wheels and drives;
- remove the clutch cables and also the speedometer;
- disconnect all the ball joints by tightening the bolts holding them to the knuckles;
- dismantle the longitudinal tie;
- pull out all the drives included in the gearbox (you will need the help of a friend), remove the central nuts and remove them completely;
- unplug and remove the starter.
After this, all that remains is to disconnect the gearshift linkage and the gearbox itself from the engine (it is held in place by four nuts).
But before this action, the power unit must be secured. It is either hung out, leaning on the spar (or rather, on its glasses) or propped up from below with a jack.
The gearbox still needs to be disconnected from the body supports, and only then can it be removed. This is done in this way: the box is rocked a little and moved away from the engine by 10 cm - this is enough for the primary shaft to leave the disc and clutch basket. In order not to damage the latter, you must act very carefully.
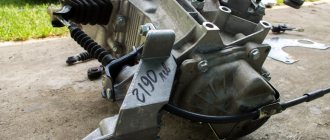
Lada 21099 Stock › Logbook › Gearbox bulkhead, part 1 — Removal and disassembly
I'll start from the beginning) The first gear began to fly out, the second stuck in with a crunch. All symptoms point to the synchronizer. I decided to do it myself, because repairing the gearbox costs a lot of money. I drove into my dad's garage and away we go. First I read the entire Internet and all possible VAZ Murzilkas. It scared me that I had to unscrew a lot of things. But that's all I got by with. First of all, I removed the protection, which I had to fiddle with because the front bolt was stuck tightly. I decided to weld a nut, but it’s all bullshit. Guys, take a strong rod, weld it and unscrew it calmly, fiddling with the nut is very inconvenient. Next, unscrew the saber from the crab (there are three bolts in front) on the left side (the driver's side, where the short CV joint is), then unscrew both ball joints. Unscrew the speedometer cable - the plastic cap. Disconnect the minus from the starter and the chip. unscrew the three fastening nuts and remove the starter, putting the nuts back on the studs. Loosen the gearshift rod clamp and pull it back by force, maybe gently using a hammer. Next, I disconnected the fastening to the body near the rod, and then on the left side, where the saber was unscrewed, there was also a support. For convenience, I completely removed it, first unscrewed it from the body, then from the box itself. Don't forget to disconnect the reverse sensor. And after that I unscrewed the drain plug and drained the oil for 15-20 minutes. Due to the fact that the box sank after removing the supports, the oil drained faster and better, probably)) While the oil was draining, I jacked up the engine through a piece of wood and loosened the bolts securing the box; there is a nut on the engine side that I didn’t see at first. And I saw it when I took out the CV joint. To remove the CV joint, just crawl under the car, carefully pull the hub with your foot (remember about the unscrewed ball joint) and use a crowbar to carefully pull the CV joint out of the box, it should come out without much effort, the same on the other side. Next, I unscrewed all the engine mounting bolts and removed the gearbox. And it was very easy to remove. He climbed into the hood and simply pulled it with his hands and put it on the floor. That's all) Alone without anyone's help)
It will be useful: Replacing the timing belt Lada Granta 1.6 16 valves: video instructions
And now the most exciting moment for me is dismantling the gearbox. I’ll only tell you about the most problematic areas and I want to say right away that no pneumatic tools were used! In general, everything is according to the book - we unscrew the fifth gear cover, the clamps, and all the excess that is not needed, carefully put everything on a clean cloth, after wiping the removed parts. And then the fun part began - the shaft nuts. They are reinforced, that is, on top of the nut, in the place where there is a hollow in the shaft, the edge of the nut is driven into it. You definitely need to unlock it. Take a medium screwdriver and carefully knock off and bend the edges of the nut. I watched the video on how to fix the shafts - put a wedge in the gears, engage the gear (move the rod out of the box forward or backward) and remove the nut. BUT NOTHING! It’s impossible to do this alone! In general, I puffed for two hours. I went to read the Bible again. It says to engage two gears and unscrew. I couldn’t figure out how to turn on two gears. It turned out that everything was simple - manually, that is, with our hands we press on the gears of the fifth gear, so that they click together and go down, along with the fork. and then use the rod to engage 3rd or 4th gear, that is, forward or backward. And that's it, the shafts don't spin. But it was very difficult to unscrew. I placed and propped the box against the garage doorway, sat down there and rested my feet against it. I took a wrench, a 32 meter head and a meter pipe. And finally the nuts came off. After this we see bolts with a Phillips head, and it seems that they need to be unscrewed with an impact screwdriver or a pneumatic compressor in general. I have neither one nor the other. Therefore, I took an ordinary screwdriver and began to tap each bolt in a circle with a hammer, several times. I made 4-5 circles and already began to try to unscrew them, with very great effort I was able to unscrew them, but only with tapping. Hit with a hammer without fear, as you should. The screwdriver, of course, must fit exactly in size. All bolts are unscrewed and the plate is removed. We remove the sleeve with the washer from the secondary shaft, from which the gears have already been removed (by the way, remove them together so that the synchronizer springs do not fly apart). Again, I saw in the video how easily the crankcase can be unscrewed and removed, and supposedly the bearings remain in it. But not in my case. Unscrewed all the nuts and bolts securing the crankcase. I unscrewed another lock and the reverse speed light switch itself. In short, so as not to suffer with the shafts, remove the bearing retaining rings and everything comes out fine. And then you remove it normally from the shaft. I only removed the output shaft, just pull it harder, loosening it, and it will come out. Whatever condition it was in the box, put it in that way. This is how, with a set of ordinary tools, I removed and disassembled the VAZ 21099 gearbox alone. I disassembled it myself, for the first time, so I hope some tips will help beginners deal with the difficulties that have arisen for me
Installation
The gearbox is installed in place after all problems and malfunctions associated with it have been fully eliminated.
Before the reassembly process you should:
- make sure that all elements affected by the dismantling process are in good condition;
- check the alignment of the clutch;
- Renew the lubricant on the splines of the release and input shaft bearing flanges.
When installing a gearbox on a car, the following scheme is used:
- the power unit is lowered on a jack or stretcher with a slope of 15 degrees;
- the box itself is lifted and inserted until it stops (do not try to tighten the engine and gearbox with bolts until it sits tightly in its designated place);
- tighten all four elements securing the gearbox to the engine;
- install “pillows” (supports) under it;
- attach the clutch cable and adjust its tension (its pedal is normally located a centimeter above the brake);
- return the previously removed starter together with the rear speed sensor to its place;
- install the flywheel protective housing;
- screw the speedometer cable and ground wire;
- connect the shift gear mechanism - its lever is aligned according to the marks made during dismantling;
- assemble the drive, install ball joints, couplers;
- put the car on the wheels and tighten the bolts on them;
- tighten the drive nuts;
- add fresh oil.
Stages of removing the gearbox on a VAZ-2109
It is worth considering that the VAZ-2109 box weighs 27 kg and it is better to prepare a winch in advance to fix the part. Removal of the box should be carried out in a well-lit room, since some elements are quite small, and the dirt that adheres to the box during operation makes them almost invisible. Let's start dismantling the gearbox.
First of all, you need to disconnect the negative terminal on the battery.
Next, you need to drain the used oil into a clean container.
After this, we proceed to the next steps:
- Removing the mudguard and crankcase protection, if equipped.
- Removing drive and wheel nuts. It is better to remove all 4 wheels, but if you are not sure about the reliable position of the car, then 2 wheels can be left. It is also necessary to raise the engine and securely fix it using stands made of wood, stone or metal.
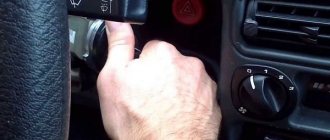
- You need to remove the clutch and speedometer cable.
- At the next stage, it is better to remove the starter. It is preferable to completely dismantle the starter, since removing only the wires will make installing the part more difficult. The starter can be secured to adjacent wires, so the part will not be lost and will be securely fixed.
- Removing the ground wire.
- The bolts that secure the ball joints to the knuckle are unscrewed.
- The longitudinal brace on the left side of the vehicle must be removed.
In order to pull the drives out of the gearbox, you will need the help of a second person. The assistant needs to tighten the internal grenade using a pry bar, and the first person at this time must sharply pull the wheel. This method saves time on removing drives. Since after removing the drives, the differential may rotate in the box, it is better to insert an old grenade or chopstick in place of the dismantled part.
- You need to unscrew the central nuts of the drives and remove them.
- The next step will require removing the connector for the reverse sensor.
- The flywheel protection is unscrewed from the gearbox.
- Having remembered the location of the shift lever, you need to remove it.
After holding the manual transmission, you need to manually remove the cushions, supports and fastenings.
At the next stage, you need to carefully move the box away from the engine together with an assistant. This is done so that the input shaft is disconnected and its petals are not deformed. After the box is disconnected from everything, it must be removed from under the hood. This completes the dismantling of the part.
On average, dismantling the box takes 20 minutes. Even if a person is doing this for the first time, the whole process will take no more than half an hour. It is important to have the necessary keys and an assistant at hand who can provide physical assistance. When a part is completely replaced, you don’t have to worry about maintaining the working condition of the gearbox and don’t worry about accidentally dropping the device after removal.
Removing the VAZ 2109 gearbox
First of all, you need to remove the mudguard and engine crankcase protection (if installed).
drain the oil from the box, remove the drive nuts and wheels. If removal takes place in a pit, it is necessary to jack up and hang the front part of the car on trestles or other reliable stands. Be sure to disconnect the battery terminals. The next order is:
– remove the clutch cable
disconnect the speedometer cable;
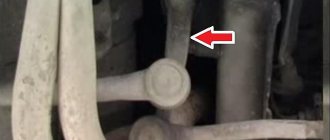
– with the car raised, unscrew the ball joints (it is recommended to unscrew the two bolts securing the ball joint to the “knuckle”);
– tear off and remove the left longitudinal brace;
– with the help of an assistant, pull the drive out of the box – one pulls the inner grenade with a pry bar
(to prevent disassembly of the drive in another place), the second one sharply pulls the wheel, pulling the drive out of the box (after removing one drive, in order to avoid turning and scattering of the differential, it is necessary to insert a special stopper or an old grenade into the box);
– unscrew the central nuts of the drives and remove them;
disconnect the ground wire
and reverse speed sensor connector
from the box, flywheel protective cover from below
and disconnect the gearshift link (having previously marked the position);
– then unscrew one by one the four mounting points of the gearbox to the engine;
– it is imperative to fix the engine by supporting it through a hydraulic jack from below, or by hanging it, resting it on the spar cups;
– holding the box, unscrew and remove all the supports (“pillows”) securing the gearbox to the body;
– together with an assistant, slightly swaying, try to move the box away from the engine; it needs about 10 cm for the input shaft to come out of the clutch disc and basket;
– when removing, be careful not to damage the clutch basket petals with the input shaft.
Transmission repair options without removal
It is not always necessary to completely replace the gearbox, so sometimes it is advisable to carry out repairs without removing the gearbox. Replacing a disk or basket can be done with the box not removed, but it must be taken into account that in this case the time for repair work can increase by 1.5 - 2 times. In order to replace parts, you need to unscrew the two upper bolts and instead screw in long studs that will act as an axis. Using the gearbox studs, you can move it away from the engine and perform all the necessary manipulations.
What needs to be done after dismantling the box?
Most often, the gearbox on a VAZ-2109 is removed for maintenance and replacement of worn parts, so it is important to keep it in working condition during dismantling. First of all, you need to think about maintaining the desired position of the parts by inserting a chopper instead of grenades. After the necessary work has been carried out, you need to take care of the performance of the remaining parts. It is necessary to carefully check their performance, otherwise the gearbox may need to be removed again.
Preparatory work
Before removing the box on the VAZ-2109, it is necessary to prepare the car for dismantling. For this:
- Completely disconnect the battery and remove it.
- A jack is installed under the left side.
- Loosen the bolts that secure the wheels.
- Unlock the nut securing the outer CV joint and loosen it.
- Lift the left side and completely remove the wheel from the car.
- Place a container of at least 5 liters under the gearbox housing.
- Drain the gearbox oil. Assess its condition and, if necessary, refill it with fresh water.
With this, the preparatory work is completed, you can begin to dismantle the elements that will interfere with the removal of the gearbox.
Disassembling the left drive
Before removing the box on the VAZ-2109, it is imperative to disassemble the left part of the suspension. The fact is that the left drive will interfere when the box is moved. Therefore, you need to free up space for maneuvers:
- Using the “17” wrench, unscrew the two bolts that secure the ball joint race to the hub steering knuckle.
- Using pliers, you need to pull the cotter pin out of the hole in the steering tip, and then unscrew the nut with a key “19”.
- Having installed the puller on the tip, you need to remove the finger from the fist hole.
- Move the brake hose to the side.
- After this, you need to completely unscrew the nut on the outer CV joint.
- Pull the entire stand toward you until the drive falls to the ground.
You don’t have to do the sixth point; you just need to remove the internal grenade from the gearbox. But the right grenade is removed only after the box is moved to the side. It is not difficult to remove the VAZ-2109 box with your own hands, just follow the sequence of all actions.
Final disassembly
Then you need to perform the following manipulations:
- Remove the starter, first disconnecting two wires from it.
- Using a 13mm wrench, unscrew the negative wire attached to the gearbox.
- Loosen the clutch cable and remove it.
- Unscrew the speedometer drive cable.
- Place a support under the gearbox; you can use a regular jack.
- Disconnect the lever from the rocker.
- Completely remove the cushions that secure the transmission to the car body.
- If you need to remove the VAZ-2109 engine with gearbox, you will need to hang it.
That's all, now the gearbox is held in place by just three bolts and one nut on the engine housing.
How to remove the box on a VAZ 2108
Drain the oil from the gearbox (see Changing the gearbox oil). Remove the engine splash guard (see Engine splash guard). Disconnect the drive rod from the gearbox (see Removing the gear shift drive). Disconnect the clutch cable from the gearbox (see Removing the clutch cable). Disconnect the negative cable from the battery and remove the starter (see Removing the starter). Disconnect the wire connector from the reverse light switch (see Replacing the reverse light switch). Disconnect the “mass” wire from the power unit. Disconnect the speedometer drive cable. If the car is equipped with a VAZ-2111 engine, it is necessary to remove the speed sensor (see Removing the speed sensor) and use a 13mm key to unscrew the bolt securing the ignition module bracket to the clutch housing (see Removing the ignition module of the VAZ-2111 engine). We hang the front part of the car and disconnect the ball joints from the steering knuckles (see Removing the ball joint). We remove the internal joint of one of the front wheel drives from the gearbox (see Removing the front wheel drives).
How to completely remove the box?
After completing all the previous steps, you will need to unscrew the three bolts and one nut using “19” keys that secure the gearbox to the engine boat. Do not be afraid, the box will not fall after unscrewing these threaded connections. It will have to be undocked using mounting blades.
Carefully, trying not to damage the crankcase elements, move the gearbox away from the engine. It is best to carry out all work on an overpass or inspection hole, but if you do not have such facilities, then it is enough to hang the front part of the car. Be sure to install a piece of pipe in the hole instead of one of the inner CV joints. Otherwise, the differential mechanism may be destroyed, and the box will have to be completely disassembled and repaired. Once the transmission input shaft has come off the splines, you can lower the gearbox to the ground. This gives you full access to the clutch mechanism, which is mounted on the crankshaft flywheel.
tuning gearbox and gear knob
The domestic origin of the VAZ-2109 is not at all a death sentence when it comes to the driving performance of the car. Yes, the Nine is not a foreign car, but it can also show excellent results if you tune the VAZ-2109 gearbox.
What can be done to improve the dynamics of the car? It's simple: you need to change the number of gears. It is also necessary to adjust the gearbox shafts and the ratio of the gear ratios of the main gearbox pair. The choice of shaft rows will depend on the requirements for the car, as well as on the driving style - economical or sporty.
By replacing the main gear with a 3.7 gear ratio (by increasing it to 3.9, 4.1 or more), you can significantly improve the vehicle's dynamic performance. As a result of this transformation, the engine will reach maximum speed faster. The driver will be able to switch speed modes less often with a sporty driving style.
Work to improve the gearbox can be done with your own hands. To do this you will need the following tools:
- Key for 10, 13, 17.
- Hammer.
- Two screwdrivers.
- Head 32.
- Vorotok
Basic tools for work
The dismantled gearbox must be cleaned of dirt and washed. It is very important that when cleaning, water does not get into the gearbox housing.
Description of the gearbox tuning process
Now let's get to work:
- Using a 17mm wrench, unscrew the bolt that secures the clutch cable bracket.
The bracket holds the transmission clutch cable
- We unscrew the six nuts with a 13mm wrench. They hold the rear crankcase cover. The bracket can then be removed.
- Unscrew the stud securing the gearbox to the crankcase to make disassembly easier.
- We take it out, as well as the seal that is put on the studs.
- It is necessary to squeeze the gear selection rod all the way. Engage third gear.
- Use a 10mm wrench to unscrew the fifth gear fork bolt.
Fifth gear fork bolt of VAZ-2109 gearbox
- We install a metal drift on the fork and hit it down with a hammer, while simultaneously engaging fifth gear.
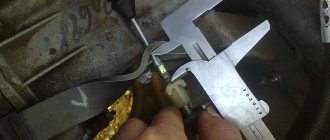
- Using a chisel, straighten the tilted fragments of the primary and secondary shaft nuts.
- Unscrew the nuts with a 32mm head.
- Using two screwdrivers, pry up the fifth gear gear and remove its assembly.
VAZ-2109 fifth gear assembly
- Remove the spacer ring from the needle bearing, and then the bearing itself.
- Similarly, using two screwdrivers, remove the fifth gear drive gear.
- Unscrew the three rod clamps with a 13mm head.
- Remove the springs and retainer balls from their sockets.
- Using a Phillips impact screwdriver, unscrew the four screws that secure the thrust plate and remove it.
This is what the fifth gear thrust plate looks like
- Use two screwdrivers to pry off the thrust washer of the fifth gear driven gear bushing.
- We insert the puller grips into the gap formed between the thrust washer and the rear bearing and press the bushing and washer together.
- Use a screwdriver to pry up the retaining ring on the rear bearing of the input shaft and remove it.
- We do the same in relation to the secondary shaft bearing.
- Unscrew the locking plug with a 13 key and remove the spring.
- Insert a screwdriver into the socket of the latch. We apply a magnet to it and pull out the ball.
- We unscrew thirteen nuts with a 13mm wrench, as well as one bolt that secures the gearbox and clutch housings.
- We insert a screwdriver into the groove at the junction of the crankcase planes and, carefully lifting the gearbox housing, remove it and the gasket.
- We unscrew the bolt securing the fork, which includes 1–2 gears, using a 10 mm spanner.
- Lifting the rod, remove the fork from its seat.
- Similarly, unscrew the 3rd-4th gear fork bolt using a 10mm wrench and use a screwdriver to remove the rod from the gear selection mechanism.
- Having raised the rod, we remove the fork from the groove of the synchronizer sliding clutch.
VAZ synchronizer sliding clutch
- By turning the fifth gear rod, we remove it from the gear selection mechanism.
- We take out the axis of the intermediate gear, which is responsible for the reverse gear and itself.
- At the same time, the primary and secondary shafts are removed from the bearings (they are located in the clutch housing).
- Next, you need to disassemble the secondary shaft, first resting the drive gear of the main pair on a wooden plane.
- We insert the chisel into the gap between the end of the drive gear and the inner race of the front bearing. By hitting it with a hammer, you need to compress the inner ring of the bearing.
- You also need to compress the rear bearing, having previously picked it up with a pair of screwdrivers.
- We remove the 4th gear driven gear, the gear needle bearing, the thrust washer, and its spacer ring.
- Using mounting blades, pry off the 3rd gear driven gear.
- Next, you need to compress the needle bearing bushing.
Needle Bearing Bushing
- After this, remove the 3rd-4th gear synchronizer hub assembled with the clutch, then dismantle the secondary shaft thrust half rings with the ball, the needle bearing, the synchronizer blocking rings, the 3rd gear driven gear, the retaining ring, the second gear gear together with the needle bearing.
- Using pliers, unclip the locking ring on the synchronizer hub and remove it.
- Next, the sliding clutch of the 1st-2nd gear synchronizer is removed together with the hub, as well as the blocking ring.
- Then remove the 1st gear locking ring, the 1st gear driven gear, the needle bearing and the second circlip.
- We take out the differential.
- Clamping the driven gear in a vice with a 17-point head, unscrew the 8 bolts.
- Using a hammer, knock out the differential box.
- We install the tuned shaft assemblies and the main pair in reverse order.
This is what a version of tuned gearbox shafts looks like
Tuning the gear knob
Breathing a new spirit into the design of the gear knob is very simple. Today in stores you can see a huge assortment of the most sophisticated accessories in design. But it’s quite reasonable to create something yourself, for example, illumination of the VAZ-2109 gearbox handle. To do this, you should invest in a new pen, the model of which is suitable for these purposes.
When choosing a handle, pay attention to the presence of grooves and holes for wires. Usually the part of the handle on which the gears are marked is not visible because the numbers are chrome-plated. But this shortcoming can be completely corrected.
You can purchase ferric chloride at any chemical store.
Pour the ferric chloride solution into a glass container and place the lid in it. After 10 minutes, remove and rub with a brush. Repeat the operation until all the chrome coating has disappeared. To speed up the reaction, you can add a little hot water to the solution. Next, install the light bulb and wires into the handle body. And now, the new unusual gear knob is ready.
Photo gallery: options for homemade gear knobs
Rate this article: Share with friends!
tuning-lada-2109.ru
Installation of the box
The installation procedure is performed in reverse order. Be sure to clean the gearbox housing of any dirt. You need to do the following:
- Raise the transmission until the input shaft is approximately centered on the flywheel. At the same time, you need to install the right grenade into the hole.
- Install the input shaft in the flywheel hole. If necessary, you can twist it so that it fits onto the splines.
- Pull the gearbox housing as close to the engine as possible. Do this as evenly as possible so that the gearbox does not go awry.
- Install three bolts and a nut for securing the gearbox.
- Install the left inner CV joint into the hole.
- Replace the cushions, the rocker, the starter, and connect all the wires.
- Reinstall the clutch and speedometer cables.
After this, you can assemble the left side of the suspension by installing the ball joint in place and securing it with two bolts. Place the steering knuckle on the steering knuckle and tighten the nut. Secure it with a cotter pin. The hub nut must be tightened only after the vehicle is installed on the wheels. Here's how to remove the gearbox on a VAZ-2109, the procedure is not complicated, but skill is required - the process can take a couple of days if there is no experience.
Removing and installing the gearbox on VAZ 2108, VAZ 2109, VAZ 21099 cars
Place the VAZ 2108, VAZ 2109, VAZ 21099 car on a lift or inspection ditch. Raise the hood and lock the hood in this position. Before removing the gearbox from a VAZ 2108, VAZ 2109, VAZ 21099 car, disconnect the wire from the “-” terminal of the battery, and also drain the oil from the gearbox.
USEFUL ADVICE It is more convenient to remove the gearbox from a VAZ 2108, VAZ 2109, VAZ 21099 car together with an assistant.
1. Unscrew the mounting bolts and remove the crankcase protection.
2. Unscrew the bolt and disconnect the ground wire from the clutch housing.
3. Loosen the nuts on the end of the clutch release cable.
4. Remove the cable end from the clutch release lever.
5. Disconnect the block with the wire from the starter traction relay terminal.
6. Unscrew the fastening nut and disconnect the wire from the contact bolt of the starter traction relay.
7. Unscrew the three nuts (the third on the other side of the starter) securing the starter and remove the starter.
8. Loosen the clamp and disconnect the gear shift rod from the joint tip.
9. Unscrew the fastening nut and disconnect the cable from the speedometer drive.
10. Disconnect the block with the wire from the reverse light switch.
11. Loosen the nut securing the brace to the suspension arm.
12. Unscrew the nut securing the brace to the bracket or the three bolts securing the bracket to the car body and move the left and right braces apart.
13. Remove the cotter pin from the tie rod ball joint nut to the swing arm.
14. Unscrew the nut securing the steering rod ball joint.
15. Using a puller, press the steering rod ball joint pin out of the strut swing arm.
16. Remove the two bolts and disconnect the ball joint of the suspension arm from the steering knuckle.
17. Using a pry bar, press the shank of one of the inner CV joints of the front wheel drive out of the gearbox and move it to the side.
18. Insert a technological plug instead (for example, an old internal CV joint). After this, disconnect the second CV joint.
The process of removing the gearbox on a VAZ 2109
For any vehicle to function properly, it is necessary to regularly monitor its technical condition. Sometimes you need to remove the gearbox, for example, when overhauling the gearbox itself, replacing the oil seals in it, or if it interferes with getting to any parts when repairing the car. The article describes how to remove the box on a VAZ 2109, and also attaches a video in which you can see all stages of the process.
Step-by-step instruction
Drivers who do not want to tinker with their car use the services of a service station. The procedure for removing the gearbox can be done by yourself. True, you will need an assistant to carry it out.
What will you need?
To carry out work with the gearbox, the car must be driven into an inspection hole, raised using a lift, or installed on an overpass. Before you begin the process of removing the gearbox from a VAZ 2109, you need to drain the oil from it.
To remove the gearbox you will need:
- a set of keys;
- mount;
- for draining oil, a container with a volume of about 5 liters.
It is recommended to perform the procedure with an assistant.
Stages
The procedure for removing the gearbox on a VAZ 2109 includes the following steps:
- Before carrying out work, the car must be de-energized - disconnect the negative terminal on the battery.
- Next, the protection from the engine crankcase is removed. To do this, unscrew the screws with which it is attached to the body.
- The ground wire must be removed from the stud by unscrewing the bolt holding it.
- Next, release the clutch cable by loosening the nuts on the tip of the clutch cable. And then remove it from the clutch lever.
Disconnecting the clutch cable
- The next step is to disconnect the block supplying the power wires from the starter.
- Next, unscrew the nut and remove the power cable going to the battery from the stud.
- To disconnect the starter from the clutch basket, unscrew three mounting nuts.
Removing the starter
By carefully pulling the starter towards you, you need to remove it from under the hood. - To perform further work, you need to move under the car. The gear shift drive rod is disconnected from the joint tip by loosening the clamp.
- Then the reverse sensor is disconnected.
Disconnect the reverse light connector - After unscrewing the fastening nut, disconnect the cable from the speedometer drive.
- The next stage is working with stretch marks. There is no need to remove them, just loosen the nuts securing them to the suspension arms.
- Then, the bolts securing the bracket to the car body or the nut that secures the braces to the bracket are unscrewed; the braces need to be moved apart so that they do not interfere.
- Next, the cotter pin of the nut is removed, with the help of which the ball is attached to the swing arm and the fastening nut of the ball is unscrewed.
- Now, using a puller, press the ball joint pin out of the strut swing arm.
- Then the steering tips are disconnected from the steering cams.
- At the next stage, using a small pry bar as a lever, you need to rest one of its ends against the drive hinge and push the grenade out of the box.
- After removing the drive, you need to install a technical plug in its place; you can use an old grenade. Now you can start removing the second one. If you do not install the plug and start removing the second drive, the differential gears located inside the box may shift, which will then be difficult to install due to the fact that the grenade shanks will not be able to get into place.
- Next, the mounting bolts are unscrewed and the shield is removed.
Removing the shield
After this, you should loosen the screws and nut that secure the clutch housing and cylinder block together. - The next step is to fix the engine in a suspended state. This must be done, since when removing the VAZ 2109 gearbox, the mounting bolts of the power unit supports are unscrewed. To do this, a reliable wooden beam is installed on the front fenders, on which the engine will hang. First, material should be laid on the fenders to protect the paintwork, and wooden support bars should be placed under the beam in the area of the front pillar supports.
- Next, the engine is suspended using a strong rope or wire.
Suspending the engine Now you need to unscrew the nuts holding the rear support of the unit.
Unscrew the left support fastener - After unscrewing the nut, remove the left engine mount bolt.
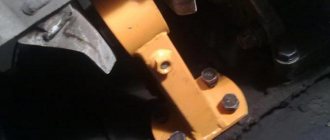
- Then unscrew the nuts securing the motor to the gearbox and remove the support.
- Next, you need to finally unscrew all the fasteners on the other side of the gearbox. Then you should remove the box from the car by pulling it towards you. In this case, you need to act carefully so as not to break the clutch basket.
The procedure for removing the gearbox on a VAZ 2109 with your own hands is completed. Then you can continue repair work.
Removal and installation of VAZ 2108 gearbox
Removing and installing the gearbox, replacing the VAZ 2108 clutch.
Recommendation: remove the gearbox with an assistant.
Execution order
Remove the battery, drain the gearbox oil and remove the starter
Disconnect the block with wires from the speed sensor by squeezing the spring clips.
Remove bolt 1 securing the ignition module bracket to the gearbox and two bolts of the upper gearbox mounting to the engine. Bolt 2 (front of the car) is short, bolt 3 is long.
At the bottom of the car, disconnect the block with wires from the reverse light switch.
Remove the two bolts securing the torque rod bracket to the gearbox.
Loosen the bolt of the gear shift rod clamp and disconnect the rod from the gear selector rod hinge by sliding it back.
Remove the wheel drives. Tie the plug inserted in place of one of the drives with a rope or wire so that it does not fall out when removing the box. The right drive does not need to be completely removed. It is enough to disconnect it from the gearbox and, moving it to the side, hang it from the body.
To make it easier to remove the box, unscrew the two mounting bolts and disconnect the left ball joint from the steering knuckle
Unscrew the nut of the lower right mounting of gearbox 1 to the engine (engine side). Please note that on models with a fuel injection system, a support bracket 2 for the intake pipe is installed under this nut, which must be removed from the stud.
If necessary, loosen the top nut securing this bracket.
Unscrew the three fastening bolts and remove the lower cover 1 of the clutch housing 2.
Remove the bolt from the lower left mounting of the gearbox to the engine. Suspend the engine using a hoist or board.
From the bottom of the car, unscrew the nut securing the left power unit support.
Unscrew the two nuts securing the rear power unit mount to the body.
Unscrew the two bolts securing the rear support of the power unit to the gearbox, holding the nuts from turning with a second wrench, and remove the support.
By inserting a screwdriver between the clutch housing and the cylinder block, slide the gearbox off the guide bushings. Be sure to hold it while doing this.
Move the VAZ 2108 gearbox as far back as possible, passing the rear cover of the box over the front suspension extension (the input shaft should come out of the clutch). If the input shaft cannot be disengaged from the clutch, push the engine to the side. Lower the front end of the box and remove it from under the car. Install the gearbox in the reverse order of removal. After installation, fill in oil, adjust the clutch release drive and gear shift lever.
Result : work on removing and installing the VAZ 2108 gearbox has been completed
Installation of VAZ 2110 gearbox in VAZ 2108
Task: installing a gearbox on a VAZ 2108 from a VAZ 2110. Since the VAZ 2108 gearbox and the gearbox have dozens of different oil supply systems,