Alarm equipment
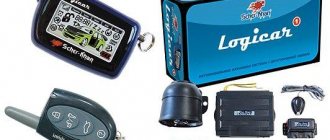
The alarm system for the Scher Khan Magicar car with engine start function includes the following elements:
- instructions for installation and use of machine alarms;
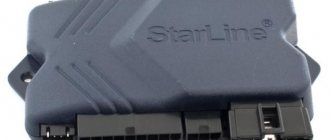
- main system control module;
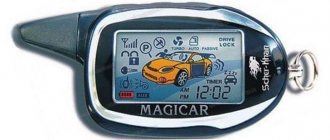
- a remote control with a screen that has the option of dual communication and settings of some “signaling” functions;
- auxiliary remote control without display;
- sensitivity controller with wire;
- controller for calling the car owner from inside the car;
- antenna adapter;
- temperature controller, in accordance with the values of which the power unit is started according to the specified temperature regime;
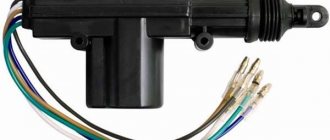
- car engine blocking relay with a connected block;
- siren;
- limit switches for mounting on the hood, trunk and doors;
- three six-pin plugs with cable and safety devices;
- eleven-pin connector for connection to the control module;
- six-wire cable for connecting the antenna adapter;
- two-wire cable for connecting additional channels;
- four-wire cable for connecting to the CAN bus, its use is relevant if there is a CAN output in the car;
- stickers for fixing the call controller and antenna adapter.
Alarm system Scher-Khan Magicar 9
"Signalka" for the Sherkhan Magikar 9 car has a feedback function, thanks to which the consumer has the opportunity to monitor the vehicle.
Equipment
Description of parts included in the package:
- service user manual;
- microprocessor car alarm control unit;
- a communicator with a display that provides a feedback option;
- spare remote control without screen and notification function;
- shock and sensitivity sensor with cable and connector for connection;
- controller for calling the car owner from the passenger compartment;
- transceiver module;
- temperature sensor, based on the readings of which the engine will turn on;
- car powertrain locking relay with connector and wire;
- siren;
- limit switch for installation on the hood or tailgate;
- three six-pin connectors with wires and safety elements;
- 11-pin block for connection to the control unit;
- six-wire cable for connecting the transceiver module;
- 2-wire electrical circuit for connecting additional channels;
- four-wire cable designed to connect to a digital interface;
- double-sided tape for attaching the car owner's call sensor and transceiver module.
The alarm package includes one limit switch for the hood or trunk; the remaining devices for door locks must be purchased separately before installation.
Scope of delivery Sherkhan Magikar 9
Specifications
Properties this model has:
- using an additional password to disable security;
- notifying the user with three types of alarm signals - from the siren, from the optical devices of the car, as well as from the key fob;
- the ability to protect against illegal linking of other communicators;
- data transfer between devices is carried out via a frequency channel at 433 MHz;
- the security mode can be controlled automatically in accordance with signals received from the controllers;
- to protect elements of the anti-theft system, safety devices, diode components, transistors, varistors, resistors are used;
- The security system is powered from an electrical network with a voltage of 9–18 volts;
- the amount of current consumed by the control module in protection mode is from 30 to 40 mA;
- microprocessor unit weight - 280 g;
- all functions can be performed at air temperatures from –40 to +85 degrees;
- The main communicator uses AAA power supplies, the additional one uses CR2025;
- the average service life of the batteries in the main console is approximately four months, in the additional one - up to three years;
- The signal is transmitted over a distance of up to 2 km.
A special feature of the Sherkhan Magikar 9 alarm system is the presence of a special Magic Code Pro2 encoding to protect transmitted impulses. The developers have introduced a new encoding algorithm, thanks to which the speed of data encryption and decryption has increased.
Main functions
Options that the anti-theft system has:
- Security mode when the power unit is running.
- The “Turbo” function allows you to maintain the operation of the car engine and reduces the rapid wear of turbocharged engines. It can be configured to operate for a certain period of time: from 1 to 4 minutes.
- Hands-free option. Using it, the consumer can configure automatic activation and disabling of the security mode.
- Panic function. It allows you to trigger an alarm with audio and visual accompaniment on command.
- "Pit stop". This function makes it possible to activate the security mode on a car with the engine running if the key is not in the ignition switch.
- The “Slave” function allows you to use the alarm using the key fob from the standard central locking.
- Hidden protection. When this option is enabled, when the alarm mode is triggered, information about this will only be sent to the owner’s communicator. The siren does not turn on.
- Remote start of a car engine based on time or temperature. The user can also start the power unit by sending a command from the communicator.
- The alarm system has a personal password intended for emergency disabling of the security mode.
- Option to delay turning off the lighting in the car interior.
- Monitoring engine start based on readings from the generator, tachometer or battery.
- Two-step protection mode disabling.
- Option to automatically open and close door locks when the ignition is turned off and on.
An overview of some of the functions of the anti-theft system is given in the video filmed by the AvtoGSM channel.
Advantages and disadvantages
Advantages of the security system:
- Feedback. Implementation of this option is possible only if the communicator is located within the operating radius of the system. The key fob display displays information about the security status, activated protective zones, air temperature, and time.
- Reliable protection of the protected object from hacking. The model implements proprietary technologies that prevent the possibility of interception of transmitted codes.
- Great functionality. Many useful options allow the user to customize the operation of the anti-theft system according to their needs.
- The service documentation includes a detailed installation guide for the system; it will allow you to correctly install and configure the device in accordance with the requirements.
Disadvantages specific to this model:
- According to reviews from car owners, the “Slave” option is useless. If the turbo timer is working, the engine remains running, the buttons on the door handles will not function. Accordingly, it will not be possible to lock the locks. The consumer will have to use the remote control to close it.
- Large communicator size for control. This drawback is usually noted by consumers who are accustomed to using tag keys.
- To enable the turbo timer function or auto-start the engine, you will need to first activate the parking brake.
Specifications
What are the characteristics of Sherhan machine alarms:
- to protect against pulse interception, the manufacturer’s own Magic Code Pro 2 system is used;
- to confirm that the protective mode is disabled, an additional code is used;
- the range of the main key fob with the central module is up to two kilometers, but only if the area is open;
- it is possible to protect the system from unauthorized configuration of spare remote controls;
- The direction of the anti-theft system is two-way.
User L1DER showed how to hack the Sherkhan alarm system.
Main functions
Signaling options:
- Possibility of turning on the protective mode when the engine is running.
- “Turbo” option, designed to maintain the operation of the power unit in the range from one to four minutes.
- The “Hands Free” option is designed to automatically activate and deactivate the protective mode.
- Availability of “Panic” and “JackStop” functions. Used in case of danger or when necessary to draw attention to the vehicle through sound and light signals.
- The Pit Stop function provides additional comfort during short stops. The car owner can arm the car with the power unit running without a key in the lock.
- “Slave” mode. Its presence allows you to use the standard machine control panel to configure certain options.
- Hidden security function. When activated, if the “alarm” is triggered, the pulse will be transmitted to the main control panel. The siren will not be activated.
- Possibility of remote start of the machine motor with indication of the time of its operation. The time interval can be adjusted down to seconds.
- Option for remote engine start using a timer; this option can be activated on vehicles with automatic and manual transmission.
- There is an option to start the engine by command from the remote control, temperature, or as a result of the battery charge dropping to a limit below 11.5 Volts.
- Availability of a personal code to gain access to the car interior if the key is lost.
- There is a delay function for turning off the lights in the car interior; up to three modes can be configured.
Page 32
MANUAL
SCHER-KHAN MAGICAR 9
code is only possible if programmable function 1-6 (see pages 72, 79) is at the factory setting. For this:
1) Open the car door with the key. The system will go into alarm mode 2) Turn on the ignition. There is no need to start the engine 3) Press the button on the call sensor body for 2 seconds. The hazard warning lights will flash once. The alarm will stop 4) Within 5 sec. Briefly press the call sensor button. Two short siren signals* will sound. The alarm will flash twice 5) The system will disarm and a signal will be sent to the key fob communicator to disarm the system.
DISARMING THE SYSTEM WITHOUT A KEY FOB USING PIN 1
If you want to use a personal code to disarm the system in the absence of a key fob, write codes for new key fobs, or use the two-step disarming mode, then you need to write a personal code PIN 1 into the system, consisting of four or two digits (determined by programmable function 1-6 , see pages 72, 79). The value of each code digit can vary from 1 to 4. Thus, the code can have a value from 1111 to 4444 or from 11 to 44. The code is entered using the multifunction button on the call sensor body.
Recording personal code PIN 1:
1) Disarm the system 2) Open the door and leave it open 3) Turn on the ignition. There is no need to start the engine 4) To enter the personal code recording mode, simultaneously press and hold for 2 seconds. buttons (III+ IV) of the key fob. The system will confirm entry into programming mode with one siren signal and one alarm flash. If you heard three siren signals* and three emergency flashes, this means
that the system has not entered programming mode. The system will not enter programming mode if it is in security mode, the ignition is turned off or the doors are closed 5) To enter the first digit of the code within 4 seconds. Briefly press one of the key fob buttons. The number of the button pressed will correspond to the first digit of the personal code. The system will confirm the selected digit with the corresponding number of siren signals and alarm flashes 6) To enter the second digit of the code within 4 seconds. Briefly press one of the key fob buttons. The number of the pressed button will correspond to the second digit of the personal code. The system will confirm the selected digit with the corresponding number of siren signals and alarm flashes 7) To enter the third digit of the code (when using a four-digit code) within 4 seconds. Briefly press one of the key fob buttons. The number of the button pressed will correspond to the third digit of the personal code. The system will confirm the selected digit with the corresponding number of siren signals and alarm flashes. To enter the fourth digit of the code (when using a four-digit code) within 4 seconds. Briefly press one of the key fob buttons. The number of the button pressed will correspond to the fourth digit of the personal code. The system will confirm the selected digit with the corresponding number of siren signals and alarm flashes 9) After entering the second (fourth) digit of the personal code, the system will exit the programming mode. To confirm exiting the programming mode, the system will give two signals of a siren and an emergency alarm.
Entering personal code PIN 1:
1) Open the car door with the key. The system will go into alarm mode 2) Turn on the ignition. There is no need to start the engine 3) Press the button on the call sensor body for 2 seconds. The hazard warning lights will flash once. The alarm mode will end
Each alarm key fob has its own individual code. Often a situation arises when you need to configure and register a remote control. You can program the Sherkhan 9 key fob yourself without turning to specialists. This process is described in detail in the instruction manual. The security system's memory can store three key fobs.
Advantages and disadvantages
According to reviews, the following advantages can be identified:
- Availability of two-way communication. Thanks to this, the car owner can always know what condition the car is in. But only taking into account the fact that the remote control is within the range of the “signal”. The device shows whether the security mode is activated and which zones of the anti-theft system were activated if the siren was activated.
- Remote motor start option. Particularly relevant in the winter season or if the driver is in a hurry.
- Effective vehicle protection. Technologies that are used to protect code from interception make it possible to ensure reliable security of the machine.
- Extensive functionality that allows you to customize the anti-theft installation to suit your needs and requirements.
- A detailed installation and use manual will allow the car owner to independently install the system and configure it.
An overview of the system from user Pavel Korshunov is presented in the video.
Flaws:
- Consumers note that the “Slave” mode is actually useless. When the turbo timer is operating, the car remains running; in this case, the buttons on the door handles do not work. This means that closing the machine is impossible. The car owner needs to lock the vehicle using the remote control.
- The system control panel is large in size. If you are accustomed to a tag key and the fact that to open the car you do not need to perform any actions, but only approach it, then you will not like the large Sherkhan keychain.
- To activate the turbo timer option or automatic engine start, the handbrake must be activated in advance in the car. Some consumers consider this a disadvantage. Although, this is a feature of the option.
How to remotely start and stop a car
Remote engine starting using the main or optional key fob is performed by holding down key II for two seconds. At the same time, magicar 9 will activate the security mode, and all door locks will move to the closed position. In the case of the main key fob pager, the screen will display a successful engine start in the form of smoke from the exhaust pipe. The LCD display will also show a countdown until the magicar 9 needs to turn off the engine.
Display of successful engine start on the screen
The warm-up time for remote start can be programmed to standard values of 5, 15, 25, 45 minutes. To do this, you need to hold down the combination of buttons I and IV, and go to the menu and select the engine operating time. Which buttons to press to activate the required duration are indicated in the table below.
Engine run time programming table
After the driver has figured out how to turn on the engine remotely, he can try to turn off the car using the key fob. To do this, you need to press the same key II for two seconds, similar to how to start the power unit.
Installation Guide
For installation, prepare the following tools and materials:
- Multimeter. We recommend using an electronic device; pointer testers give less accurate readings.
- Wiring for connecting the “signaling”. The alarm kit comes with wires, but we recommend additionally preparing a set of cables for installation. Standard wiring may not hold up.
- A piece of foam rubber, preferably dark in color. Required for packaging the control module of the anti-theft system.
- Insulating tape.
- Double-sided tape.
- Phillips head screwdriver.
- Stationery knife.
- Socket wrench.
How to install the Sherkhan Magikar 9 system:
- First of all, the location for mounting the central module is determined. The control unit must be installed so that an attacker cannot reach it. For example, behind the glove compartment or dashboard. You can also disassemble the facing part of the center console and hide the device behind the control panel if there is free space. Before installation, the unit should be wrapped in foam rubber to hide it and also to prevent damage to the module due to exposure to moisture or elevated temperatures. The device is fixed with self-tapping screws. It is important that it is not affected by vibrations, otherwise the unit may fail.
- It is better to use the engine compartment to install the siren. It is necessary to select a place for installation so that the siren is as far as possible from the cylinder block. When installing, the siren horn should be turned to the side or in the direction of travel of the car, the main thing is that it does not look down.
- The temperature sensor is installed in the engine compartment. The device is installed in the cooling system pipe. The sensor cannot be placed in close proximity to the collector, otherwise it will quickly fail due to exposure to elevated temperatures. Securely fix the controller.
- The shock sensor is mounted inside the car. Experts recommend installing the device on the partition between the passenger compartment and the engine compartment. At this point, the sensor will be able to record all the impacts that occur on the car body. The controller is fixed to a metal surface; plastic parts cannot be used for fastening. Plastic is a more sensitive material than metal, so it will more often transmit vibrations that activate the sensor. In addition, when heated, plastic expands. And this also contributes to the operation of the controller.
- An antenna adapter should be placed on the inside of the windshield. The transceiver should be installed away from metal components of the body. The presence of metal near the adapter within a radius of 5 centimeters will cause interference and reduce the accuracy of signal transmission. There will be difficulties with setting and disabling the security mode.
- The LED indicator is installed in the area of the glass so that when it turns on, you can understand that the car is under protection without going close to it. The operation of the diode element can frighten potential attackers.
- Limit switches are installed on the hood, doors and trunk. To do this, you will have to dismantle the facing elements on the doors and trunk. Handles, speakers, trim are removed. After installing the switches, the contacts from them are led out into the interior.
- The final stage of installation will be laying the wiring. Electrical circuits are laid under the interior trim elements; there should be no moving elements at their location. From the engine compartment, the wires are pulled into the passenger compartment through a technological hole in the partition. All components of the anti-theft installation are connected to the central unit.
Install the central unit
Install the siren in the engine compartment
Lay out the wires and connect them to the module
Safety precautions
To prevent problems from occurring, it is necessary to take into account the nuances of safety precautions.
All connection and installation work must be carried out with the battery disconnected. Otherwise, a short circuit may occur, which will lead to damage and even failure of the alarm components. Do not connect wires unless you are sure you are doing it correctly.
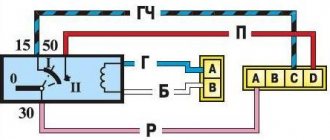
Installation and connection diagram
The connection procedure is carried out in accordance with the electrical diagram included in the kit. If you have never performed such a task before, it is best to leave the connection to a qualified electrician.
Installation and connection diagram - 1
Installation and connection diagram - 2
The connection procedure is carried out in accordance with the electrical diagram included in the kit. If you have never performed such a task before, it is best to leave the connection to a qualified electrician.
Equipment
The Sherkhan Magikar 9 alarm system comes complete with the following products:
- instruction manual and warranty card;
- head unit equipped with a microprocessor;
- main key fob with liquid crystal display and feedback function;
- spare communicator without display and two-way communication;
- shock and tilt sensor with wire and terminal for connection;
- button to call the user to the car;
- antenna module;
- engine temperature sensor;
- siren;
- power unit blocker with cable and connector;
- limit switches installed on the trunk or hood;
- a set of installation cables with 6-pin terminals and fuses;
- wiring for connecting the antenna unit;
- electrical circuit for introducing new modules;
- four-core cable designed for integration into digital buses;
- a set of stickers for mounting system elements.
User manual
The package includes an instruction manual, which describes all the nuances of operation. Let's look at the main points.
Modes
Features of the “signaling” operating modes:
- Pressing key 1 for 0.5 seconds will activate the protection function, turn off the alarm, close the locks, and also block the starter mechanism.
- To disable the security mode and alarm, click on button 2. This will deactivate the locking of the starter device and open the door locks.
- Pressing key 3 will activate the screen backlight.
- A short click on button 4 will allow you to diagnose the state of the anti-theft installation.
- To turn on the “Panic” mode, the car owner needs to hold down button 1 for two seconds.
- To remotely turn on and off the car’s engine, as well as to intercept the ignition when the “Pit Stop” mode is activated, button 2 is pressed for two seconds.
- If you hold down key 3 for two seconds, the luggage compartment of the car will open. The first channel is controlled by pressing button 4 for two seconds.
- To activate or deactivate the siren signal, you must simultaneously click on buttons 1 and 2.
- Enabling and disabling the “Jack” function is carried out by simultaneously pressing keys 1 and 3.
- To activate and deactivate the kick controller, press buttons 1 and 4 simultaneously.
- By pressing keys 2 and 3, you can enter the control mode for the second additional channel.
- You can activate and deactivate the timer for remote start of the internal combustion engine by simultaneously clicking on keys 2 and 4.
- To activate and deactivate the keypad lock on the remote control, you need to hold down buttons 3 and 4.
- To enter the remote control options programming mode, press buttons 1 and 3 for two seconds.
- Activation of the “Hands-free” mode is carried out by simultaneously pressing keys 2 and 3.
- To manually reserve the ignition start function when the “Turbo” option is turned on, you need to briefly press button 2 twice within one second. This option is only possible with manual transmissions.
Setting up the key fob
In order to use the key fob to turn the engine on and off, as well as perform other functions, it must be programmed into the device’s memory:
- When the engine is turned off, the ignition is activated. Then the call key is pressed for two seconds. The turning lights should blink once.
- Within five seconds, you need to briefly click on the key fob call button. The turn lights will flash twice if no personal password is used. If it is activated, the warning light will blink once.
- If you have set a password for management and configuration, then at the next stage you need to specify its value. The turning lights will blink twice.
- After five seconds, the LED indicator should blink blue. This indicates that the system is ready to program remote controls.
- Within five seconds, briefly press key 1 on the remote control. If the system has accepted the code, the emergency light will blink once. The procedure is repeated in a similar way for an additional key fob. If the system accepts the remote control, the turn lights will blink once.
- You can leave setup mode at any time. To do this, simply do not perform any actions for four seconds. Exit from this mode will be indicated by one long siren signal.
The scherkhan5 channel showed how the Sherkhan Magikar 9 anti-theft installation reacts to an attempt to intercept the code by a code grabber.
Programming functions using a key fob
The options are configured as follows:
- To start the setup mode, press buttons 1 and 3 simultaneously for two seconds. “Pr o9” will appear on the key fob display and a melodic signal will sound.
- The user is automatically taken to the time setting menu. To change the hour, use key 1, to change the minutes, press button 2.
- To start the engine on time, press button 4. The set time readings will start blinking on the remote control display. Button 1 changes the hours, and button 2 changes the minutes.
- To set the alarm activation time, the user presses button 4 again. In the same way, by pressing keys 1 and 2, the alarm clock is set to start the internal combustion engine.
- To turn off or activate the alarm, press button 4 again. The clock-shaped indicator on the key fob display will begin to blink. Using button 1 you can set whether to activate or deactivate the device.
- The next press of key 4 will take you to the menu for disabling and activating the option to call the car owner. A handset-shaped indicator will flash on the remote control screen. Key 1 enables or disables the function.
- After pressing key 4 again, the user will be transferred to the section for activating and disabling the vibration of the remote control. The screen will display an indicator in the form of a vibrating key fob, as well as the current status of the option. With key 1 you can disable or enable the function.
- The next time you press button 4, you will enter the menu for changing the temperature display format. Degrees can be displayed in Celsius or Fahrenheit. The indicator that corresponds to the set temperature format will blink on the remote control screen. By pressing button 1, you can change the format sequentially.
- To change the time display format (12 or 24 hours), button 4 of the remote control is pressed again. The indicator that corresponds to the currently set format will flash on the display. If you press button 1 of the key fob, you can change it.
- Pressing key 4 again will activate the menu for enabling and disabling the “Battery Saver” option. A battery symbol will appear on the display and the current status of the option will also be shown. The mode is changed by pressing key 1.
- To leave the options programming mode, press buttons 1 and 3 on the remote control simultaneously. The device goes into the anti-theft installation control mode.
The AvtoGSM channel demonstrated the operation of the Sherkhan Magikar 9 anti-theft installation.
How to install an alarm
The alarm installation manual prescribes preparatory work and studying safety precautions.
Installation Tools and Materials
Before you begin installing system components, you need to purchase the following materials and tools:
- screwdrivers with different attachments;
- construction knife;
- soldering iron, tin-lead alloy;
- corrugated tubes for cable protection;
- plastic ties;
- a set of wrenches of different sizes;
- insulating tape.
Connection diagram
Connecting system elements to the head unit is carried out according to the diagrams contained in the user manual. All power circuits must be equipped with appropriately rated safety devices. The ground wire coming from the head unit is connected to a standard nut on the car body. The +12 V cable is connected to the positive terminal of the battery. A fuse is inserted into the circuit.
Safety precautions
Compliance with the following rules helps to avoid injury to the user and damage to the vehicle's electrical network:
- installation and connection of alarm elements should be carried out only after the on-board network has been de-energized (if the battery is not disconnected, a short circuit may occur that disables electronic devices);
- the cable should not be connected to the contacts by twisting (the connections are soldered with solder) and should not be pulled near moving parts of the car;
- The connection points of the wires are protected with corrugated tubes;
- the connected sections of cables are wrapped with electrical tape.
Step by step guide
According to the installation instructions, the installation process of system parts includes the following steps:
- Installation of the main unit. The device is mounted in a place inaccessible to criminals (behind the main console or dashboard). The casing is removed using wrenches and screwdrivers. Before installation, the module is wrapped in soft material and then secured with plastic ties.
- Siren installation. The part is placed in the engine compartment. The siren must not be mounted near the intake valve or engine cylinders. The bell is directed downward, which prevents moisture from entering.
- Installing a temperature sensor. The part is mounted on the cooling system fitting. You can choose any pipe with a connected thermostat.
- Shock sensor placement. Placed in the middle part of the cabin on a flat surface. Non-metallic vehicle elements cannot be used for installation.
- Installation of the antenna module. The part is installed away from metal objects and electronic devices. Secure the antenna using the included sticker.
- The LED element is on the dashboard closer to the windshield.
- Limit switch. The controller is placed in a dry place. When installing additional switches, remove the decorative door trims. The controller wires are routed into the interior.
Possible faults
What problems can a car owner encounter:
- The engine does not start when the autostart function is turned on. Diagnostics will help you find out why this happens. First, check if the remote start feature is enabled. The option to start the internal combustion engine based on temperature may be activated. If the difference between the readings of the thermometer and the temperature sensor is at least one degree, the system will not start the engine.
- The alarm doesn't work. If you cannot enable or disable the security mode, first of all the condition of the battery in the key fob is diagnosed. When the battery is dead, it must be replaced. You can tell when the battery is low by reducing the range of signal reception and transmission. Try to approach the car close to the side where the antenna adapter is installed and press the key fob button. If the “alarm” does not work, change the battery. When the battery is normal, you need to disassemble the key fob and assess its condition. If there are traces of moisture, the device must be dried, but it should not be left under prolonged exposure to high temperatures. You also need to check the condition of the transceiver. Practice shows that damage to the contacts on its connector or broken wires most often contribute to such problems.
- The alarm goes off for no reason. This error may be due to incorrect operation of the control module or incorrect settings of the shock sensor. First, we recommend adjusting the sensitivity controller. Usually such problems are associated with it. Make sure the sensor is securely fixed in its installation location. If this is the case, then the control module is checked. It is necessary to diagnose its connectors and contacts. If the plug is oxidized, the contacts must be cleaned. We recommend dismantling the unit and disassembling it. When there are traces of moisture or damage on the module, the device must be repaired. Moisture must be carefully removed with a napkin. If liquid gets on the board, it is better to leave it for a while near a battery or other heat source.
- The security mode does not turn off, the car engine is blocked and will not start. The reason should be sought in the control unit. Water could get on it, causing the device to malfunction.
For what reasons may the automatic start of the internal combustion engine not work:
- the engine has already started, the warning light will blink once, and the key fob display will display error code 01;
- the ignition in the car is activated, the hazard warning lights will blink twice, the fault code on the remote control is 02;
- The car door is not locked, error 03, the car's turning lights will blink three times;
- autostart will not be possible if the trunk door or hood is open, the warning light will blink four times, the fault code is 04;
- another reason - the car owner has not completed the start reservation procedure for a manual transmission, the turning lights will blink five times, the fault combination is 05;
- The handbrake lever is turned off, error code 06, the warning light will blink six times;
- remote start of the power unit will be impossible when the brake pedal is depressed, the key fob display will display fault code 07, the turning lights will blink seven times;
- if the reason lies in the engine itself (malfunction of the power unit or ignition system), then the error code on the remote control screen will be 08, and the turning lights will blink 8 times.
Independently performing any repair work related to the alarm system is only possible if the system’s warranty period has expired.
Possible alarm malfunctions
When using the alarm for a long time, malfunctions are possible:
- The key fob does not work. The batteries may be low and should be replaced. Interruptions in the operation of the communicator also occur due to moisture ingress - the microcircuit needs to be cleaned.
- Autorun does not work. Due to incorrect placement of system components or damaged wiring. In this case, the installation is carried out again, taking into account the recommendations set out in the instructions. Damaged wires are replaced.
- The engine lock was activated automatically. The problem arose due to a breakdown in communication between the alarm blocker and the standard immobilizer. The latter must be deactivated.