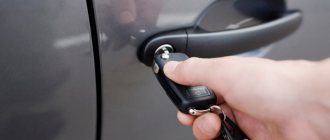
The ignition switch of the Chevrolet Niva cannot be called its weak point - as a rule, it serves for ten years without problems. However, over time, it can still begin to act up, since its larva is made of soft metal and is subject to simple physical wear and tear.
Replacing the ignition switch of a Niva Chevrolet does not require special knowledge and skills, so the car owner can handle it himself. The main thing you need when dismantling an old lock and installing a new one is patience, since the procedure itself is simple, but quite labor-intensive and time-consuming.
Ignition switch (lock) Niva Chevrolet
On VAZ-2123 vehicles, an ignition switch of type 2123–3704005 is used with an anti-theft locking device, a lock against re-starting the starter without first turning off the ignition, and a communication coil for the ignition key transponder with the automobile anti-theft system.
Rice. 1. Connection diagram of the ignition switch (with the key inserted)
At the ignition switch, check the correct closure of the contacts at various key positions (Table 1), the operation of the anti-theft device and the presence of communication with the automobile anti-theft system.
The voltage from the battery and generator is supplied to contact “30” (Fig. 1).
Switched circuits at different key positions
| Key position | Live contacts | Switched circuits |
| 0 (off) | ─ | ─ |
| I (ignition) | 30-50 | Engine management system, generator excitation, headlights, turn signal, control devices, windshield and rear window cleaners and washers, front door window motors |
| II (starter) | 30-50 30-50 | See position I Starter |
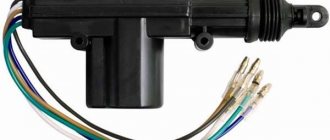
To unload the contacts of the ignition switch, a K6 relay is installed in the mounting block. The anti-theft locking rod should extend when the key is turned to position 0 (off) and removed from the lock.
The locking rod must be recessed after turning the key from position 0 (off) to position I (ignition).
The key should only be removed from the lock in position 0.
The locking device against reactivation of the starter must not allow the key to be turned again from position I (ignition) to position II (starter).
Such a rotation should only be possible after first returning the key to position 0 (off).
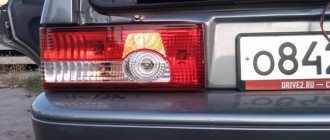
The NIVA electrical circuit is responsible for powering the equipment built into the rear doors
The ignition system ensures the formation of a spark in the cylinders according to the power strokes. In modern engines, wires are connected to sensors that monitor ignition, engine temperature and other parameters.
Also interesting: Chevrolet Niva Chevrolet power steering pump
The ignition system harness 2123 (commonly called “braid”) is indicated in blue in the figure.
In the cabin, it connects to the controller (“brains”), instrument panel, ground and wire from the rear harness. Exiting into the engine compartment, it is divided into two wires.
The largest one is directed to the radiator and along the way it is connected to the mass air flow sensor, crankshaft sensor, resistor, and electric fans.
Throwing over the power steering pump, wires extend from the core to the phase sensors, idle speed, throttle valve, detonation and injectors. This wiring controls the operation of the engine and ensures its smooth functioning.
The second wire runs upward and is divided into two: wires go to the right to the plus and minus of the battery, and to the left to the adsorber, fuel pressure sensor and oxygen sensor.
On models with air conditioning, a branch goes from this harness to its fuse.
If at least one wire in the “braid” is short-circuited, there is a big risk that you will not be able to start the engine. The controller simply will not see information about its temperature, fuel supply to the injectors or throttle position.
In this case, it is better to immediately replace the entire harness than to contact a diagnostician, look for one wire and replace it if the result is questionable.
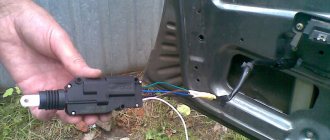
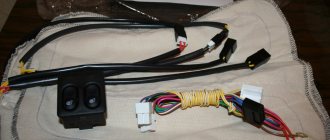
There are wires running through the interior that connect to the door wiring. They ensure the operation of power windows, speakers, alarms, heated rear windows, etc. Each line has a socket, thanks to which the door can be easily removed and replaced.
Let's note some features:
- each harness has wires going to the central locking moderator; in more advanced models, the rear doors have wires for the interior lighting and the window regulator;
- the driver's door harness goes to the buttons for the two power windows of yours and the passenger's;
- in the front doors there are wires going to the speakers that are located in them;
- The rear door harness is one of the most complex - it includes wires for the heated glass, wiper and washer gear, rear brake light, central locking and ground wires.
You can see door wiring diagrams in the picture. They all originate from the rear harness, which goes to the taillights.
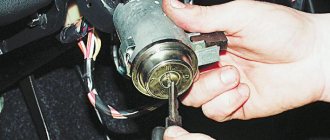
Removing and disassembling the ignition switch
We remove the ignition switch to replace or to replace the lock contact group, as well as when replacing the APS coil
Disconnect the negative terminal of the battery
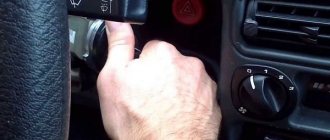
We remove the steering column switch (described in the article - removing the steering column switch)
Disconnect the anti-theft device coil block from the wiring harness block.
Disconnect the wiring block of the contact part of the ignition switch from the wiring harness block
All work is shown for clarity on the removed steering column
Using a chisel, loosen the four bolts (with cut off heads) securing the ignition switch
Unscrew the bolts with pliers
Remove the bracket and ignition switch
Use a Phillips screwdriver to unscrew the three screws
And remove the ignition switch bracket
We remove the locking rod of the anti-theft device
Turn the key in the ignition switch and remove the locking device drive
Remove the rod spring from the drive
Removing the stopper with the spring
Push the cylinder out of the switch body and remove the locking ball
We remove the cylinder from the switch body
Remove the retaining ball spring from the hole in the cylinder
Use a screwdriver to pry off the clamps of the wire block cover
Open the cover of the wire block
In order not to confuse the wires when installing them in the block, mark the location of the wires relative to the block
Use a thin awl or needle to bend the locking tendrils of the wire tips
We remove the wire tips from the block
Remove the insulating tube from the wires
Squeeze the three plastic latches with a screwdriver and remove the contact group from the body
We route the wires through the holes in the housing
Use a screwdriver to pry up the three plastic latches and disengage them.
And disconnect the contact group
Removing the moving part of the contact group
Press the movable contact and turn it counterclockwise
Remove the moving contact from the housing
Remove the contact spring
Use a screwdriver to pry off the APS coil
We take out the APS coil
We assemble and install the ignition switch in the reverse order.
Design features of the Chevrolet Niva ignition switch
On VAZ-2123 cars, an ignition switch of type 2123-3704005 is used with an anti-theft locking device, a lock against re-starting the starter without first turning off the ignition, and a communication coil for the ignition key transponder with the car's anti-theft system.
Ignition switch 2123-3704005
At the ignition switch, they check the correct closure of the contacts at different key positions (see photo below), the operation of the anti-theft device and the presence of communication with the car anti-theft system.
Closing contacts at different positions of the ignition key
The voltage from the battery and generator is supplied to terminal “30”.
Connection diagram of the ignition switch with the key inserted
The locking device against reactivation of the starter must not allow the key to be turned again from position I (ignition) to position II (starter). Such a rotation should only be possible after first returning the key to position 0 (off). To unload the contacts of the ignition switch, a K6 relay is installed in the mounting block. The anti-theft locking rod should extend when the key is turned to position 0 (off) and removed from the lock. The locking rod must be recessed after turning the key from position 0 (off) to position I (ignition). The key should only be removed from the lock in position 0.
Signs that it’s time to change the ignition switch
Early signs of a malfunction in the Chevrolet Niva ignition switch usually manifest themselves in the key jamming when it is turned in the cell. Slight jamming is especially common when turning the key from the “Ignition” position to the “Starter” position. Over time, the malfunction progresses and can lead to the key jamming in the cylinder.
At first, this problem can be solved by disassembling the lock and dripping oil into the cylinder, thereby reducing friction in it when turning the key. However, if the jamming progresses, then it is better to replace the lock before its cell jams tightly.
The presence of problems with the ignition switch is also indicated by the key slipping in the cylinder when it cannot be turned to the “Ignition” or “Starter” position. This situation also indicates a breakdown of the larva.
The second group of faults is related to the contact group. The Chevrolet Niva ignition switch is powered by several groups of energy consumers:
- in position “0” the car’s side lights can be turned on;
- in position “1” (“Ignition”) the high and low beams, turn signals and tail lights, the fuel pump, power windows, wipers, etc. work;
- in position “2” the starter starts.
In the case when several energy consumers, seemingly unrelated to each other at first glance, stop working, the problem may lie in a break, breakdown, or oxidation of the contact.
Such a malfunction does not necessarily require replacing the lock - you can repair the contact group by replacing damaged contacts. However, a problem with the contact group may indicate general wear and tear of the lock, so it is better to replace it entirely.
Chevrolet Niva Svetly › Logbook › Ignition switch repair
Quite a long time ago, the lock sometimes began to jam when trying to turn it to the start position. Gradually, the disease progressed, but I categorically did not want to change the lock because of the need to make new blades for the flip key and replace the larvae in the doors. Therefore, to begin with, I decided to gut it and understand what was wrong there. We disassemble the steering column. 3 screws secure the bottom casing to the column itself, two more on the sides and two from the bottom hold the halves together. After disassembling the column, remove the left steering column and move it to the side, without even unfastening the wires. We also disconnect the lock connectors.
The column covers and steering column have been removed. We are preparing a tool for removing the lock.
A hammer and a core (or a small chisel) are sufficient. Small pliers will also come in handy.
The lock has been removed. We disassemble the lock itself - three screws.
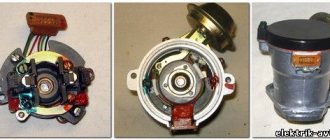
The lock is disassembled. Carefully pull out the cylinder, squeezing it out from the front side, making sure that nothing flies away.
1. - Here we catch the pin and its spring 2. - Here we catch the ball and its spring. The ball will fly first.
Extracted larva
Castle without a cylinder
Cylinder and retainer with pin in background
We look at the larva and find the problem (I forgot to take a photo here, there is only the result) We begin to fix it.
1. - At this point the pin jumps onto the step. Since it is narrow, he gradually breaks it and begins to fall to the next level. We carefully sand this area with a file to remove the pothole. 2. — In this place there was an influx due to attempts to turn the locked lock. We grind too. 3. - Here we polish for company. Why not throw out this pin and remove the starter lock, since it is electric? The pin is also responsible for locking the steering column, and the design also provides that if the steering wheel was unlocked, it will not lock until the key is removed, that is, if we turned off the engine but did not remove the key, the steering wheel does not lock. I find this useful. We assemble the lock and put it back. I'm picking up bolts like these from the stock instead of the loose ones. Full Size Bicycle Disc Brake Caliper Hex Bolts
The result is that the lock works well, the fault has been investigated. Next time the repair will take much less time. And when there is nothing left to sharpen, you can cut off the starter lock stop and rely on the electric lock.
We change the Shnivy ignition switch. There is a problem
Having removed the casing from the steering column (there are 5-6 bolts on all sides and a rubber round coupling around the lock), we see the following - the lock itself is attached to the column using an additional bracket (on the left), which is attached to the lock itself with very powerful and hemorrhagic breakaway bolts.
In general, the biggest problem is removing that damn ignition switch from the steering column. It is secured with 4 breakaway bolts, which are specifically designed to make it more difficult to steal a car.
Therefore, if you are not going to repair the lock itself, but simply decided to replace it, then do not forget to buy 4 tear-off bolts!
That is, they are easy to tighten; the caps have hexagonal key heads, which, at a certain tightening torque, break and a round cap remains. This is what we will need to unscrew, as many as 4 pieces. It turns out that putting it on is easy, but taking it off is difficult.
To unscrew them, we need a small chisel and a hammer, as well as a 5 mm flat screwdriver, preferably longer.
We unscrew it COUNTER-clockwise, adjust the chisel so that the angle of inclination is sharper, so that the force of the blow goes sideways, and not directly into the head. And we try to make a notch on the head of the breakaway bolt with a chisel; the most important thing here is to remove the bolt from the thread so that, once stuck, it begins to move.
Thus, moving the chisel, punching 3-4 mm at a time, we turn the bolt to the left until it loosens. Then you can unscrew it with your fingers or pliers if it still doesn’t turn well.
This is what such a bolt looks like, it goes to the cone. Let's take on the second one.
The most difficult one will be the one on the upper right; it will be very difficult to climb there.
Watch the video:
Having unscrewed the bolts, you have practically won, now you can replace the lock itself without any problems, everything is quite simple, you disconnect 4 wires - red, blue, pink and black. True, you will also have to unscrew the lock itself from the second part of the fastening - using a Phillips screwdriver, 3 bolts.
By unscrewing these 3 bolts, you can disconnect the ignition switch from the fasteners or (in our case) you can remove the “cylinder” of the lock and thereby repair it.
Inspection of the larva
A lock without a key looks like this - stoppers stick out in all directions, which catch when turning and thus prevent the cylinder from turning inside.
When you insert the key into the cylinder, all the pins should be removed, thus they will not interfere with the key turning. In our case, we had 1 pin sticking out on the left, which clung and did not allow the “larva” to spin. We worked on it with a file.
Also carefully inspect the lock cylinder; it is quite possible that you will see burrs and even grooves on the upper side that were “trodden down” by the pressure pin running along its top. It turned out that for all the time (and the car is already 10 years old), he made his own move in the “body of the larva” (outer side), which ended in a dead end. And in this position the key was locked (position I - ignition).
There, they also used a needle file to grind off the furrow it made; make the angle as sharp as possible. It is very difficult to explain, so think about how and what should work. The lock cylinder is made of soft material and in 10 years it will definitely wear out, the rear round pin “drills” its path. Point it the right way and you won't have to buy a new ignition switch.
On sale you can find locks with cylinders (3 pieces - for the front doors and trunk) - the cost is approximately 1,300 rubles.
Or take it without the cylinders - it costs 900 rubles, but now you will have 2 keys - one to start the car, and the second to close/open the front doors and trunk. So repairing the lock is a very good option, you win in 2 categories at once - you save money, and you will still have 1 key for everything, as before.
Source: autoprivat.ru
Replacing a faulty ignition switch on a Niva Chevrolet
First you need to remove the protective cover from the steering column and the protective coupling - the rubber ring around the lock. After this, it becomes clear that the lock is secured with a bracket. This is where the fun begins, as it is held on by breakaway bolts.
If you do not need to repair a faulty lock on a Chevrolet Niva, but rather remove it, you will have to unscrew these tear-off bolts. They are specially installed on the car to complicate the theft process. But at the same time, they add additional problems during repairs. They are twisted quite simply, like regular ones. Regular hexagonal heads are installed on the head of such bolts. But with a sufficient level of tension, the cap breaks off, leaving behind a flat, smooth round surface.
Therefore, they are quite easy to install, but difficult to remove. But during installation, do not neglect safety and install the lock on ordinary bolts. The next replacement may not be needed very soon, and you will have to risk your car every day. Therefore, along with the new lock, it is necessary to purchase a set of new breakaway bolts.
It will take a lot of effort to remove the old fasteners. You will also need a certain set of tools - a chisel, a hammer and a flat-head screwdriver.
Remember that the bolt is unscrewed counterclockwise. To remove a stuck fastener, you need to point a chisel at it, but not exactly in the center, but casually so that it starts to rotate.
We repeat this several times until the bolt is loosened and can be unscrewed using pliers.
We continue in the same way with other fasteners.
Some difficulties may arise with the right upper mount, since access to it is relatively limited.
After the bolts are unscrewed, you can disconnect the wires from the lock. You can also now unscrew the bolts that hold the lock itself. They are located on the inside of the bracket. You can unscrew them using a Phillips screwdriver.
When the lock itself is removed, you can take out the cylinder and inspect it for damage. In normal condition it should look like the photo below. Stoppers diverge in all directions, limiting the rotation of the larva.
After the key is inserted, they retract and do not interfere with rotation. But if some pins are damaged and are in the way, you can try to treat them with natfil.
Also, when examining the larva, you can notice burrs on the side. They can be formed by a pressure pin. This problem can occur in older cars. In this case, the own travel will be limited and the key can be locked in position I.
When processing this area with natfil, it is necessary to make the angle as sharp as possible. This procedure can save you money on buying a new lock.
If the wear from the pin is too large and the problem cannot be solved, then a new part should be installed immediately. The only disadvantage of this method is the need to use two keys. The first is to start the engine and the other is to unlock the doors.
How to replace the ignition switch of a Chevrolet Niva with an immobilizer
All variations of the Chevrolet Niva are standardly equipped with a factory immobilizer - an anti-theft device that blocks the engine from starting if a flip key with a transponder is not located within the coverage area of the immobilizer antenna.
Replacing the ignition switch of a Chevrolet Niva with an immobilizer is complicated by the fact that the training key does not fit the new cylinder. Accordingly, it will not be possible to train a new key, so the immobilizer will prevent the engine from starting.
There are several ways out of this situation. You can try to completely disable the immobilizer, but this is not the best solution - reducing anti-theft security cannot be called a reasonable solution.
You can also continue to use two keys - one with a transponder in the immobilizer reception area, the other to start the engine. If carrying a whole bunch of keys is inconvenient, you can hide the old key with the transponder tag inside the car. But this also potentially reduces safety, and you will also have to open the car doors with a key rather than a button. Therefore, you can try to find another solution to the problem.
The tip of the key from the new lock can be transferred to the key fob from the old one, since it is collapsible. However, in this case, it is necessary that the new key also be removable - if it is soldered into the case, then removing it without damaging the tip is quite difficult.
You can also try transferring the transponder chip to a new key. The chip is located inside the body of the old key. It is desirable that the new key also have a collapsible body.
The replacement of the ignition switch with an immobilizer is completely similar to the replacement on a car that is not equipped with a start blocker. You will also need:
- hammer;
- chisel;
- Phillips and flat screwdrivers;
- pliers (round nose pliers);
- if necessary, a needle file.
The replacement procedure is also similar.
- The battery is turned off.
- The steering column protective cover is removed.
- The bracket attached to the tear-off bolts is dismantled.
- The contact group is removed.
- The lock itself is dismantled and a new one is installed.
- The contact group is installed.
- The lock is secured to the steering column, and a protective bracket is mounted on the breakaway bolts.
- The protective cover is installed in place.
Important. When replacing the lock, you do not need to perform any actions on the immobilizer. The blocker is not physically connected to the ignition switch, so there is no need to turn it off when the battery is de-energized. To start the engine after assembly, you need to place the old key with the transponder in the coverage area of the immobilizer antenna.
Chevrolet Niva Severe mechanism › Logbook › Full-fledged ACC in the ignition switch
It's no secret that the shnivy's ignition switch does not have an ACC mode. After reading this entry, I decided to refine the operating algorithm... The idea was this: - when the key is inserted into the lock, the radio turns on - when the key is pulled out of the lock, the radio continues to sing - when the driver's door is opened (without a key in the lock), the radio turns off - when the driver's door is opened (with key in the lock) the radio continues to sing until you take out the key. Let's get started... To begin with, an ignition switch 2112 was purchased at a well-known online flea market for 200 rubles, because... it contains the microswitch we need, which is activated when the key is inserted.
This is the microphone. Next, we disassemble the lock, take out this microswitch and the rod that presses the microphone.
microswitch
rod and stick it all into your lock. There is no need to redo the Shniv lock, all the necessary holes are already there.
ready-made lock, microswitch contacts in black corrugation. This completes the first stage.
Let's go to the car...
Now you need to find any signal that appears when you open the driver's door. This signal is located on pin 14 of the APS-6, which is located near the driver’s right foot under the trim. When the door is opened, a “mass” appears on it. I temporarily removed the terminal block from the APS-6 and pulled it out through the “face” for ease of installation.
Pin 14 is marked with an inserted needle. We will also need a five-contact relay. In it, contacts 30 and 88 are normally closed, i.e. When current is applied to contacts 85 and 86, contacts 30 and 88 open. I sketched out a diagram for clarity: The diagram works like this: when you plug in the key, +12 appears on the red wire of the radio (ACC). Next, +12 also appears on the blue wire of the radio (REM). T.K. 30 and 88 relay contacts are closed, then +12 is applied to the red ACC wire, and the key can be removed (the radio continues to sing). When you open the driver's door, ground appears on pin 14 of the APS-6, current appears on pins 85 and 86, and contacts 30 and 88 open (the radio turns off). Now all that remains is to connect all this Makhnovism according to the diagram
Makhnovshchina