Specifications
The Scher-Khan Magicar 7 alarm system has the following characteristics:
- The sound signal is played for 10-30 seconds. The duration of the sound is determined by the selected settings. In this case, the siren operates in continuous mode.
- If the steering horn is connected, the signal will become intermittent and sound at a frequency of 1 Hz.
- Packet data exchange between the communicator and the microprocessor unit is carried out at a frequency of 433.92 MHz.
- You can control the Sherkhan Magikar alarm via a key fob.
- Additional fuses are used to protect the electrical circuits of the system. The wiring is protected using resistor elements, transistor protection or diodes.
- Both impact controllers and regulators are protected. But the user can independently disable them in the settings menu.
- The Scher-Khan Magicar 7 car alarm is suitable for those cars that have an operating voltage in the on-board network from 9 to 18 Volts. For other values, installation is not permitted.
- Current consumption indicators vary from 15 to 35 mA.
- The temperature range in which the system can operate varies from -40...+85°C.
- The device weighs 235 g.
- The communicator with a screen is powered by AAA batteries with a nominal value of 1.5 V. The declared service life reaches 4 months.
- The replacement key fob runs on 6-volt CR2016 batteries. They can last for six months.
Properties
Description of the technical properties of the Scher Khan 7 H2 Way security system for a car:
- the duration of the sound signal can be from 10 or 30 seconds depending on the setting, the siren operates continuously;
- when connecting the steering horn, the duration of the sound signal can be 10 or 30 seconds, only in this case the signal will be intermittent and operate at a frequency of 1 Hz;
- the process of transmitting packet data between the pager and the microprocessor unit is performed at a frequency of 433.92 MHz;
- car alarm control is allowed using a call controller;
- protection of car alarm electrical circuits is carried out by installing safety elements;
- The signaling wiring is protected by internal combustible resistor elements, transistor protection, as well as diode components from polarity reversal;
- The protected zones include a shock controller and an auxiliary regulator; the consumer can configure the disabling of these elements before or after activating the security option;
- for protection, contact controllers can be used that respond to opening the doors, trunk, hood, turning on the ignition or pressing the brake pedal;
- the microprocessor device can be installed on cars whose on-board voltage will be from 9 to 18 volts; it is potentially possible to install this model on motor vehicles;
- the current consumption of the Sherkhan Magikar 7 alarm when the protection mode is on is from 15 to 35 mA;
- the operating temperature range at which the system optimally performs its functions is from -40 to +85 degrees;
- microprocessor device weight – 235 g;
- the main remote control, equipped with a display, is powered by AAA batteries with a nominal value of 1.5 volts; the service life of the power supply is approximately four months;
- The spare communicator runs on two six-volt CR2016 batteries, with an average service life of about six months.
Equipment
The complete set of the Sherkhan Magikar 7 car alarm is presented as follows:
- Detailed instructions for use, which provides an overview of all settings, including setting autorun, activating the clock and others. After studying the manual, the user can independently start and set the system to autostart without contacting a service center for help.
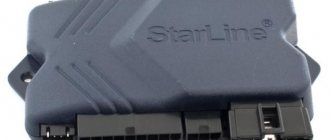
- Microprocessor device.
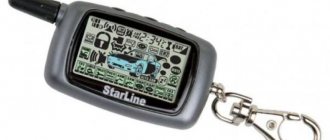
- The main keychain that supports feedback and has a screen.
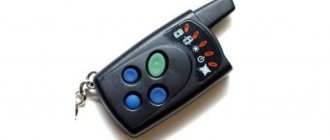
- Replacement key fob without screen with limited range.
- All communication wires with connectors for connection.
- Signal transmitter with cable and plug.
- Thermal sensor, which is located on the power plant.
- Sensitivity controller with wire and plug.
- A limit switch that is used as a protective device for the motor or trunk.
- Blocking relay with block.
- Sound indicator.
- Stickers for attaching working elements.
Is there life without a keychain?
So, the weekend went well, but the key fob for the alarm went somewhere... Lost it? Stolen? But now I somehow have to go home.
In our driving life, it often happens that the alarm control panel gets lost, is completely crushed, or magically ends up in the washing machine. There are a lot of cases and examples. What to do? Break glass? Call a burglar? Change the alarm? Change car?.
Calm down, don't panic! Each alarm has an emergency disarming mode. All you need to do is calm down and calmly follow these steps:
For Scher-Khan Magicar A, 5, 3, 4, (B, 6 – factory removal code for these models is 1111)
- Open the car door with the key, the system will immediately go into alarm mode and begin loudly notifying others about the break-in.
- Within four seconds, turn the ignition key from the OFF* position to the ON position three times. The alarm mode will stop. Turn off the ignition
- (This item is only for models B and 6)
Within four seconds, turn the ignition key from the OFF* position to the ON ignition position the number of times corresponding to the first digit of the personal code. Turn off the ignition. After 4 seconds. the alarm will flash once, thereby confirming that the system is ready to enter the second digit of the personal code
- (This item is only for models B and 6)
Within four seconds, turn the ignition key from the OFF* position to the ON ignition position the number of times corresponding to the second digit of the personal code. Turn off the ignition. After 4 seconds. the alarm will flash once, thereby confirming that the system is ready to enter the third digit of the personal code
- (This item is only for models B and 6)
Within four seconds, turn the ignition key from the OFF* position to the ON ignition position the number of times corresponding to the third digit of the personal code. Turn off the ignition. After 4 seconds. the alarm will flash once, thereby confirming that the system is ready to enter the fourth digit of the personal code
- (This item is only for models B and 6)
Within four seconds, turn the ignition key from the OFF* position to the ON ignition position the number of times corresponding to the fourth digit of the personal code. After 4 seconds. The hazard warning light will flash twice, thereby confirming that the fourth digit of the code has been entered.
- The starter (ignition) interlock will turn off. The system will enter VALET mode. If the code was entered incorrectly (only for models B and 6), the system will return to alarm mode.
* It is acceptable to move the key from the ACC (Accessory) position to the ON position.
For Scher-Khan Magicar 7, 8, 9, 10, 11, 12 and Logicar 1, 2, 3, 4, 5, 6,
1. Open the car door with the key. The system will go into alarm mode
2. Turn on the ignition. There is no need to start the engine
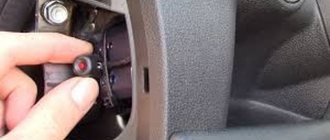
3. Press the button on the call sensor body for 2 seconds. The hazard warning lights will flash once. The alarm mode will end
4. Within 5 sec. Briefly press the call sensor button. The hazard warning lights will flash once. The call sensor LED will flash blue quickly
5. After these manipulations, the system will exit the security mode, and a signal to disarm the system will be sent to the key fob communicator. You can calmly sit down and call us and order a new key fob.
If suddenly for some reason you are not able to do the described actions, or you did not get the desired result from them, call us. We will solve the issue with you together.
By the way, if you decide to break the glass, then hit the front side glass. It's cheaper than the little one you're already looking at. J
Functions
The range of alarm functions with auto start of the Car Magic 7 is quite extensive. It includes the following items:
- Possibility of detailed demonstration of all information regarding the operation of the system and security zones.
- Exchange of packet data between the microprocessor and the pager using Magic Code Pro 2 technology, which guarantees a high degree of protection against hacking.
- Use of additional channels to activate/deactivate security functions.
- Using an identification code to disable protection.
- Long range that exceeds 2 km in open space.
- Enable automatic backlighting when the pager is in low light conditions.
- Detailed display of operating information, including current battery level, time and other important information.
- Possibility to set the output of voltage readings to the display.
- The presence of a controller that allows you to monitor the temperature inside the car from the key fob.
- Supports audio/visual danger notification.
- Economical energy consumption, which extends battery life.
The alarm operating instructions also mention the functions of the microprocessor unit. They include the following features:
- Remote engine start on vehicles with manual transmission/automatic transmission.
- Support for installation of additional protective mechanisms on diesel/gasoline engines.
- The ability to start the power unit using a communicator or other external device responsible for managing and changing the settings of the Scher-Khan alarm system.
- Setting the time or temperature range after which the engine will start. The user can also set the voltage in the electrical network.
- Remote engine start on a car with the “Virtual Key” mode enabled.
- Possibility to disable security functions in case of loss of the key fob. To do this, use the personal authorization code, which is provided in the 7 Magikar user manual.
- Availability of 3 modes for turning off the lighting inside the car.
- Support for protection against binding of third-party communicators by an attacker.
- The presence of power outputs for monitoring locks on the doors, trunk or hood compartment.
- Supports the auto-disable function of security modes.
Advantages and disadvantages
According to owner reviews, the Sherkhan Magikar 7 signaling system has the following advantages:
- Compact dimensions allowing the system to be installed in an inconspicuous location.
- Supports 2-channel communication, simplifying the comfort of use.
- The system has autostart support, which is useful in cold weather.
- Availability of detailed instructions for use. Even an inexperienced driver can set up the Sherkhan Magikar alarm system. To do this, he just needs to carefully study the instructions.
User reviews also take into account a number of disadvantages of Magicar 7 Scher-Khan. Among them:
- High price. For some car owners, the price of 7 thousand rubles is excessively high. They justify their position by the fact that on sale you can find alarms with similar functionality for a lower price.
- The pager is not resistant to aggressive use. It is quite easy to damage the device. Even 1 fall can cause it to malfunction.
- With the energy saving function installed, the Magikar 7 batteries still have a limited working life. Often batteries lose their functionality in less than 2 months, although the declared service life is at least 4 months.
Users also complain about frequent false alarms of the system. But the problem is resolved by reprogramming the shock sensor.
Features of SCHER-KHAN MAGICAR 7
- Remote engine start;
- Control of a second car using the main key fob, provided that it also has the SCHER-KHAN MAGICAR 7 system installed;
- Synchronization of key fobs, allowing the car owner to receive all information about the condition of the car on the main key fob;
- Additional tachometer sensor;
- The operation of the system with turbocharged engines based on the tachometer signal allows you to either arbitrarily set the engine operating time after turning off the ignition (1, 2 or 3 minutes), or this time will be determined automatically by the system (1-4 minutes) depending on the engine speed in during the last 5 minutes. before activating the TURBO function;
- Security of a car with a running engine without a key in the ignition switch for a set (15, 25 and 45 minutes) or unlimited time;
- Key fob battery energy saving function, which allows you to extend the battery life up to 3 times;
- Built-in parking timer, recording the time elapsed since the car was parked;
- Function of blocking the buttons on the key fob, which allows you to avoid arbitrary pressing of the buttons. When the alarm mode is activated, the buttons are automatically unlocked;
- ALARM function.
How to install and connect the system
The installation instructions for the Magicar 7 system describe the connection diagram in detail and give the driver the opportunity to install it independently. To accomplish this task, you need to follow the following installation guide:
- First you need to install an electrical circuit, which uses a microprocessor model. It is fixed under or behind the control panel after preliminary dismantling of the instrument panel. Depending on the features of the car model, you will need to remove the steering column trim and fasteners.
- Next you need to fix the transceiver module on the inside of the windshield. When performing installation, you need to make sure that the distance to metal objects is at least 5 cm.
- The call controller is installed in the corner of the windshield. Before this, the working surface is treated with an alcohol-based degreaser. When performing installation, you need to make sure that the sensor housing does not touch the plastic panels.
- The warning siren is installed under the hood in a hidden place.
- Limit switches can be installed on the hood or tailgate.
- The remaining working units are fixed in the cabin.
How to install?
Installation and connection diagram part 1
Installation and connection diagram, part 2
Signal installation:
- Install the microprocessor module; it can be installed under or behind the control panel. Depending on the design features of the machine, the process of removing the dashboard may differ. But usually, to do this, you need to dismantle the steering column trim and unscrew the screws that secure the device. The block is secured using plastic ties or double-sided tape. To eliminate the negative impact of vibrations on the device while the car is moving, it can be wrapped with foam rubber.
- The transceiver module is mounted on the inside of the windshield in the corner. During installation, please note that the distance from the device to metal surfaces and objects must be at least five centimeters to prevent interference during signal transmission. During installation, the glass temperature should be at least ten degrees Celsius. Hidden installation of the transceiver can be done behind the sun visor on the rear window, under the acoustic shelf. But with such installation, the range of the device may be reduced.
- The car owner's call controller is mounted in the corner of the windshield. Before installing the device, the working surface is washed and degreased with alcohol. The installation must be carried out so that the sensor housing does not come into contact with the plastic panels and the car body. This will reduce the likelihood of false positives.
- The siren should be installed under the hood of the car. The location must be chosen so that it is impossible to access the device from under the car. The siren is installed in a hidden place so that no water gets on the device when washing the engine.
- Limit sensors are mounted on the hood or tailgate. When installing, you need to choose a place where moisture will not get in. Placement of devices on drains is not permitted. When installed correctly, devices should have at least 5 mm of free play.
- The sensitivity controller is installed inside the car and secured with two bolts, double-sided tape or plastic ties. When installing, remember that the consumer must have easy access to the device to adjust the sensitivity parameter.
- After installation, all signaling components must be connected to the microprocessor module. Electrical circuits are placed under the plastic upholstery of the cabin; cables must be laid away from moving mechanisms and components, as well as electronic devices, to prevent interference during signal transmission.
The Avtozvuk channel talked about the mistakes that consumers often make when installing an anti-theft system on their own.
User manual
Automatic engine starting is possible only after the system has been correctly configured. To do this, you need to study the Magicar 7 instructions for dummies in Russian, which describe in detail all the intricacies of programming. The instruction manual will help you set up the system yourself in a couple of minutes.
Purpose of buttons and icons
The functions of the car alarm buttons are specified in the instructions. Before starting the system, you need to carefully study them.
How to program a key fob
The key fob is programmed as follows:
- When starting to install the system, you need to disable the security functions, place the ignition key in the “On” position and hold the call sensor button for 2 seconds.
- Over the next 5 seconds, you need to make 1 more press.
- Next, press the call sensor key the required number of times (it must correspond to the first digit of the password). A similar action is carried out for the remaining numbers.
To avoid mistakes, you need to follow the programming table.
On the keychain Sherkhan Magikar 7
The instructions allow you to set the clock not only on the Magicar 7 key fob, but also on 11,12, 10 Mini.
- Setting the current time begins with entering the remote control programming mode. This is done by pressing for two seconds. keys I and III. Confirmation of actions - the inscription Pro9 and a tone signal from the remote control.
- After successful completion of the first step, an automatic switch to the time setting occurs. The dial should flash.
- Button I changes the clock readings.
- II changes the minutes.
- Exit the regulation mode by pressing for 2 seconds. buttons I and III.
How to enable autorun on Sherkhan 7
Setting up autorun by command is done by holding the second button on the remote control for 2 seconds. After this, the protective functions are activated and the door locks are closed. As a result, the engine will start, and the screen will display the time remaining until it stops.
How to set up autorun by time
Timer triggering is activated as follows:
- After short presses on keys 2 and 4, the timed autorun programming menu will be activated.
- To enter the engine start mode, you need to press button 4 and select a time interval.
By temperature
Temperature-based autostart is activated as follows:
- The user connects mode 1-13, following step-by-step instructions.
- Next you need to activate function 1-21, which is responsible for controlling the temperature range.
- Using key 4, we start the engine according to the temperature indicator.
- Having chosen the optimal value, you need to press buttons 2 and 4.
How to increase warm-up time
To increase the warm-up time, press the 4th or 3rd button on the pager.
How to disable the feature
To disable the option, you need to deactivate the ignition and open the settings mode using buttons 1 and 4. Then you need to press button 3, after which the indicator lights will blink three times and the siren will sound 3 times.
Scher-Khan Logicar remote control stopped beeping
The Logicar A, B, 1, 2, 3i, 4i, 5 i, 6i, 5iS, 6 iS key fob can stop beeping for several reasons:
- battery low;
- speaker failure;
- damage to the wires as a result of the pager falling.
One of the common reasons for the disappearance of the squeak is the involuntary pressing of the remote control keys, which entails the activation of a vibration alert. The display will show a vibrating key fob icon. To turn it off.
- Press keys 2 and 3 simultaneously and hold them for two seconds. The Pro 9 will light up on the screen.
- Click button 4. The image of the vibrating remote control will disappear. Vibrate alert is disabled.
- Press 2 and 3 for two seconds to exit the programming mode.
Find out how to attach the Sherkhan Magikar 5 keychain.
Possible malfunctions and their elimination
Any possible malfunctions have their own error code, according to which the car owner can find a suitable way to solve the problem. If autostart does not work, the following malfunctions may occur:
- The motor is in activated state.
- Ignition circuit is disconnected.
- The door is not closed.
- The user has not configured the start backup features for the manual transmission.
- The handbrake lever is deactivated.
- The brake pedal is depressed.
If other errors are made, the indicator lights will blink 8 times. To fix this problem, you will need to seek help from a specialist, but do not try to solve it yourself.
