Withdrawal procedure
- First of all, remove the belt from the generator.
2. Disconnect the block from terminal “D” of the generator.
3. Remove the protective cover, unscrew the nut and disconnect the wires from terminal “B+”.
4. Unscrew the tension bolt.
5. Unscrew the top mount of the generator.
6.Remove the tension bar.
7. Unscrew the lower mount of the generator.
8. Remove the spacer bushing.
9. Remove the generator mounting bolt and remove it.
Replacing the generator with power steering, eliminating noise
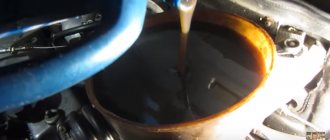
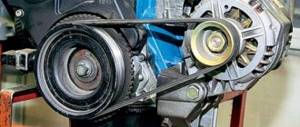
There was a very strange knocking sound from the engine, when you accelerate and let off the gas there is a knocking sound from the area of the generator and the steering wheel... I struggled with this for a long time, but not very successfully, in order: - the fault was on the belt roller, well, it was a little sensitive and not everything was going well with it okay, I was looking for a roller without play for a long time, but I found it and installed it, it didn’t help with the main knock; -removing the engine and power steering belt and starting the car, the knocking noise disappeared completely, well, for a long time I sinned on the power steering pump, then I replaced it, and it seemed to be better, but after some time this knocking noise came again (((... - I thought, what if it’s a generator It’s noisy, and the voltage was low when you turn everything on to 12V. I went to remove it and look, and then it started... Removing the gene on a car with power steering is another quest... I decided to remove it through the headlight, since it’s not possible to pull the receiver out through the top, but through the bottom, the pump Power steering, removing the pump means draining the oil, and then also pumping it... so it’s easier through the headlight, especially since I also changed the headlights)))
It fits through the headlight just fine, removing the headlight is not difficult))
And so, having removed the generator, I twirled it in my hands and realized that its bearings were running out...
burnt contact, apparently he was punished well at one time)
The contact from the winding is a little burnt, a stub from it remains, the bearings are damaged, the voltage sags, so I bought a new one then)))
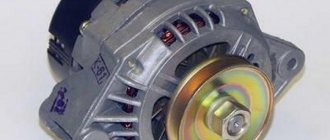
dynamo
Dynamo 105A when the old one had 80 Next is the most interesting thing, the secret of the ominous noise is revealed...
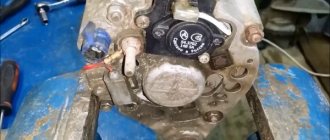
bottom of generator mount
and this is the top part of the generator mount
that’s the reason for the noise, a mount broken in two was knocking on another engine mount.
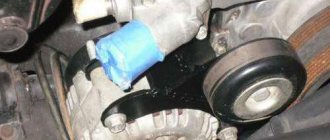
I’ll say right away that finding a new bracket for an engine with power steering was not easy; I never found one in Bryansk! It is attached to the same bolts as the engine mount, but in order to screw it on I had to remove the pump; I removed it directly without twisting the tubes from it, but simply lowering it to the bottom)
The bottom bolt can only be tightened by removing the power steering pump
new generator next to the old one
The new one looks impressive, it has one more winding contact, the regulator is more massive, the voltage on board is 14.2 V and does not consistently respond to the heater and low beams)))) if you turn on everything you can, these are high beams, heated mirrors, emergency lights , heater, reverse, brake light...
The result is I'm happy, there is no noise, the voltage is normal, everything is fine))
- Generator 3800
- Bracket 560
How to replace alternator brushes on a VAZ 2110-VAZ 2112?
Note! The brushes can be replaced in two ways, which one you choose is up to you, the first method is to remove the generator from the car and replace the brushes (Convenient, but takes more time), the second method is to simply disconnect the minus terminal from the battery (How to remove the terminal, read in paragraph 1 of the article: “Replacing the battery on a car”) and doing all the work on the installed generator on the car (It’s not very convenient but it won’t be difficult to remove the brushes, if you do everything correctly, you’ll save a little time if If there are no short and suitable tools for this, then it doesn’t even make sense to attempt such work, it’s better to do everything on a removed generator, and read about how to remove the generator in the article: “Replacing the generator in a car”)!
1. To change the brushes, first press out the three latches on the sides of the generator that secure the cover to it and then disconnect this cover from the generator (see small photo), now you have access to the voltage regulator, it has two screws that it is secured (indicated by blue arrows), you unscrew these screws and then, by pulling the regulator, disconnect it and thereby remove it completely from the generator.
Note! When you have removed the regulator, you can change it entirely with brushes, or if you do not have such an opportunity (it is not sold anywhere or you just don’t have money for a regulator), then you can find the brushes separately and replace only them, they go to the regulator they are attached using soldering (or rather, their wires are soldered to the terminals of the regulator), so in this case, take a soldering iron and unsolder the wires coming from the brushes and then remove them from the regulator and new ones in the same way, install them in the same places by soldering, in more detail everything Look at the video below, but there is no sound in it, but in principle everything is perfectly clear from the video!
2. A few words about checking the brushes: as soon as you remove the regulator, look at the brushes themselves, which should be in good condition and have a length of at least 5 mm (see photo 1), if they are smaller, then either change them separately, or Replace the entire regulator so that you definitely don’t have any problems with it in the future, you can also check the regulator itself as follows, connect a 12-volt test lamp as shown in diagram 2 (that is, to the brushes) and apply the same voltage 12 Volts (the battery can supply it, that is, run some thin wires from it) “+” to the terminal, and “-” to ground, and the lamp should light up and do the same thing, but just apply the current not at 12 V, but at 15-16 V and if the lamp goes out, then everything is fine with the regulator and it does not need to be replaced.
Additional video: You can see in more detail and clearly the process of replacing the voltage regulator with a new one in the video located just below:
Generator VAZ 2110 and VAZ 2112
The functional purpose of a car generator is to convert engine energy into electricity. The generator starts working after starting the engine from the battery and supports the operation of the ignition system and additional energy consumers.
It is the number of sources loading the generator that affects the operating life of the unit.
How to choose a generator for a VAZ 2110 or VAZ 2112
Due to the similarity of many components in the structural assemblies of the VAZ 2110 and VAZ 2112 cars, most of the electrical equipment is identical, including generators. To choose the right generator, it is necessary not only to take into account the dimensions of the device, but also to determine its rated power - for the 2110-12 generation Lada, it should be indicative of at least 55 Amperes.
| Brand/manufacturer | Trade article | Rated power | Approximate cost, rub. |
| ZiT | 372.3701-02 | 55 | 4700 |
| ZiT | 372.3701-05 | 65 | 4900 |
| BATE | 9402.3701 | 90 | 6200 |
| BATE | 9402.3702 | 95 | 6500 |
| ATE | 3202.3771000 | 75 | 5700 |
| ATE | 3202.3771034 | 70 | 5500 |
The higher the generator power, the greater the number of energy consumers the unit can support without the risk of overheating and reduced service life. Installing an increased power generator instead of the standard equipment will allow you to connect additional equipment and accessories - heated seats, high-quality car audio, a car refrigerator, etc. However, when increasing the power of the generator, it is also necessary to take care of laying power wiring with a larger cross-section of the conductive part, as well as installing a more capacious battery.
Note! If you purchase a non-standard generator, it is important to check the compatibility of the device with your car. To do this, you need to go to the official website of the manufacturer and enter the product article number and VIN number of the vehicle into the search form. If information about the part is available in the dealer database, the unit can be considered for purchase.
Dismantling the generator on a VAZ 2110 or VAZ 2112
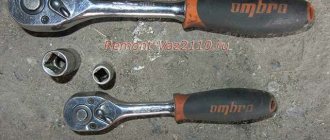
The algorithm for dismantling the generator on a VAZ 2110 or VAZ 2112 is not complicated and can be performed with one pair of hands within 40-50 minutes. To perform the procedure, you will need an inspection pit or a car lift, as well as a set of wrenches or socket heads, a set of screwdrivers and pliers. Removing the unit from its original location is carried out in the following sequence:
- First of all, we drive the car onto a pit or a lift, after which we unscrew all the battery terminals and take out the battery itself. To remove the battery, in some cases it is necessary to unscrew the bolt on the fixing clamp;
- Next, we move to the bottom of the vehicle and remove the crankcase protection to provide free access to the engine compartment;
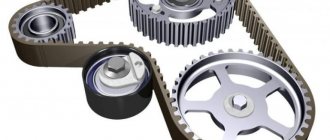
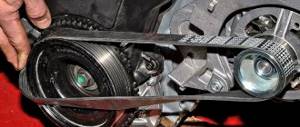
- After removing the protection, carefully pull back and remove the drive belt, after pressing down the tensioner with a screwdriver or wrench;
- Then unscrew and remove the power wiring leading to the generator. Now you can use sockets with extensions to remove the fixing bolts holding the generator to the bracket;
- At the end of the procedure, you can remove the unit from the car. During dismantling, it is important to monitor the position of the buffer bushing - this unit may become deformed when removed.
Note! Before repairing the generator, it is important to inspect the condition of the wiring and drive belt. If there are breaks or any other damage, the components will have to be replaced - otherwise there is a high risk of a short circuit or an accident on the road.
Disassembling the generator housing to replace components
Disassembling the generator is also not difficult. As a rule, this unit is only disassembled into parts, after which the faulty part is modularly replaced - there is no need to solder or rewind the winding. To repair a generator on a Lada, you will need the set of tools described above, as well as a pair of round nose pliers that will allow you to remove the insulation without the risk of damage. The entire scope of work takes no more than 1 hour and occurs according to the following action scenario:
- After dismantling the device from the car, you need to move the unit to a workbench or table and place the back cover up. The generator cover is fixed with 4 long bolts, which must be unscrewed and the device separated into 2 parts - the rotor and the stator;
- The upper part of the unit consists of a rotor with a shaft and bearing. To check the operating condition, you should ring the rotor with a multimeter and, if necessary, replace the bearing itself;
- The lower part of the unit consists of a stator, a rectifier relay and a winding. To check, you also need to test the stator and relay with a multimeter, and, if necessary, replace the insulating material around the winding;
- At the end of the procedure, we replace all faulty modules with new parts, after which we assemble the unit. During assembly, it is important not to damage the external and internal insulation.
It is important to know! The average service life of a generator on a VAZ 2110 or VAZ 2112 is 50,000 km, after which it is recommended to check the part every 3-5,000 km.
A simple method is to measure the battery voltage with the engine running - if the voltage is below 13.1 V, then the generator will soon have to be replaced.
Design, principle of operation of the VAZ 2110 generator
Initially, vehicles were equipped with DC generator equipment. Growing energy consumption has forced the abandonment of low-power generator devices and the use of more powerful alternating current devices. A method of energy generation is used, based on inducing an electromagnetic field on static windings by a rotating electromagnet.
Design of the VAZ 2110 generator: 1 - casing; 2 — output “B+” for connecting consumers; 3 - noise suppression capacitor 2.2 μF; 4 - common terminal of additional diodes (connected to the “D+” terminal of the voltage regulator); 5 — holder of positive diodes of the rectifier unit; 6 — holder of negative diodes of the rectifier unit; 7 — stator winding terminals; 8 - voltage regulator; 9 — brush holder; 10 — back cover; 11 — front cover; 12 - stator core; 13 - stator winding; 14 — spacer ring; 15 — washer; 16 — conical washer; 17 - pulley; 18 - nut; 19 — rotor shaft; 20 — front rotor shaft bearing; 21 — beak-shaped pole pieces of the rotor; 22 — rotor winding; 23 - bushing; 24 - tension screw; 25 — rear rotor bearing; 26 — bearing sleeve; 27 — slip rings; 28 - negative diode; 29 - positive diode; 30 - additional diode; 31 — pin “D” (common pin of additional diodes)
The rotor, supplied with a constant excitation voltage by graphite brushes, rotates inside a metal housing equipped with series-connected coils. The electromagnetic field created by the rotating closed loop produces an induced electric current in the stationary windings. A three-phase rectifier bridge makes it possible to obtain a constant voltage.
Structurally, the device is made in the form of a cylindrical unit, closed on both sides with lids.
The front cover includes a bearing that supports the rotor. The axle has a pulley connected through a belt drive to the car engine. Under the back cover there are electronic elements - rectifier diodes, a relay-voltage regulator.
Initially, when starting the engine, the excitation circuit is powered by the battery, then it switches to supply itself - it receives voltage from the rectifier.
There are holes for natural airflow. The cooling radiator for the rectifier bridge is a metal holder.
Generator operating principle
This unit consists of several parts:
- frame;
- rotor;
- stator;
- rectifier bridge;
- relay-regulator;
- pulley.
Thanks to the generator, the torque from the power plant is converted into electrical energy. During rotation, the rotor creates a magnetic flux, which is regulated by a relay, and the pulley carries out a belt drive. The rotor moves with the help of bearings, and when they work well, the shaft moves easily.
Another purpose of the relay regulator is to limit the output voltage in the range from 13.6 to 14.7 V. The voltage is transmitted through the commutator rings to the brushes, and the rectifier bridge is responsible for ensuring that energy is transferred in one direction.
Signs of generator failure
Signs of abnormal operation of a car generator may include:
- no “battery” indication on the dashboard when the ignition is turned on;
- the “battery” light glows after starting the engine;
- periodic blinking of the “battery” signal indicator while driving;
- the smell of burnt electrical wiring in the generator area;
- failure to start the engine after parking.
Read also: Network cable crimping diagram
Lack of battery charge with a faulty generator leads to problems with starting the engine. More dangerous is a malfunction associated with exceeding the current and voltage of the car battery charge. Many car enthusiasts use a donor battery to start the engine, after which they disconnect the battery terminals to switch to charging their own battery. At this moment, the vehicle's electrical equipment is powered by a generator.
If the generator is faulty, the voltage in the on-board network may be more than 17 volts, which leads to breakdown of the protective zener diodes in the engine control unit. In this case, expensive repairs to the engine control unit are required.
What types of breakdowns are common?
Most often, the generator for 8 and 16 valve VAZ-2110s fails as a result of moisture and dirt. Another reason is the wear of the components of this assembly, namely the brushes.
Most often, the malfunction manifests itself as follows:
- the generator does not produce electricity;
- output current is either too high or low voltage;
- During engine operation, extraneous sounds are heard, most often a squeak or squeal.
The operation of the generator is checked using special stands or a digital voltmeter. If extraneous sounds are heard in the engine compartment area, then first of all you need to check the timing belt tension. Most often this is the reason, but after checking, remove the belt from the pulley and start the engine. The absence of noise is a reason to check the performance of the generator more carefully.
Typical faults
Among our compatriots there is an opinion that one of the main faults of the armature is the lack of resistance. It should be noted that the resistance is checked on the rotor winding, and the rotor, in turn, can be installed instead of an inductor, and a stator will stand instead of an armature. This is done in order to provide higher power, so the resistance can only be diagnosed at the rotor.
Read also: Is rosin a flux or not?
As for the anchor specifically, it is characterized by the following malfunctions:
- Most often, do-it-yourself repair of the generator armature is carried out as a result of wear on the slip rings;
- also, the need to repair the unit may arise as a result of failure of the shaft bearing;
- not so often, but the problem of winding short circuit still occurs.
It should also be noted that there are breakdowns that cannot be repaired:
- wear of the collector to a diameter of 8.6 cm;
- wear of keyways.
How to properly remove the generator on a VAZ-2110
If you have a power unit with 8 valves, then it is best to work from above. In the sixteen-valve version, the generator must be removed from below. To do this, first unscrew the pan. Before work, prepare several different keys. You can remove this assembly quickly if you follow the following instructions:
- De-energize the vehicle's on-board system - to do this, simply remove the negative terminal from the battery.
- Find the M10 nut on the positive stud of the autogenerator and unscrew it.
- There are wires connected to the generator on the back of the device, which must be disconnected before the next stage of disassembly.
- Using a 13mm wrench, loosen the upper and lower nuts.
- Unscrew the tension bolt with a 10mm wrench to loosen the belt tension and remove it.
- Then completely remove both nuts (upper and lower) and remove the tension bar.
- Carefully rotate the generator at a right angle and remove it from the engine compartment.
If you want to repair this unit, you should thoroughly wipe it with a rag to remove all dirt.
Location, dismantling of the VAZ 2110 generator
The unit is located under the hood at the bottom right, at a level below the right headlight, opposite the passenger seat. Dismantling work does not cause any particular difficulties. The device is planted deep in the engine compartment. It is more convenient to remove it downwards.
Location of the VAZ 2110 generator
There are two options:
- work by placing the car on a viewing hole,
- use a jack.
The third option is that the fault occurred on the road. There is a spare generator; there is nothing to lift the car with. Repairs are carried out for a long time, by touch, blindly.
- Set the car to the handbrake.
- Raise the front right side with a jack.
- Loosen the fastening, remove the negative terminal of the battery.
- Pull off the rubber protective cap, unscrew it with an M10 wrench, remove the nut and washer from terminal B+. An open-end wrench will do. A ratchet wrench or head will speed up and simplify the process. - Disconnect the wire with the connector.
- Unscrew and remove the alternator belt tension adjusting bolt.
- Reduce the belt tension and move the generator closer to the engine.
- Unscrew the nuts of the upper and lower mounting bolts. Remove the bushing.
- Knock out the bottom bolt, remove the top one with the bar.
- Holding the generator with one hand, remove the belt from the pulley with the other, release it, and remove the device.
- A working device is installed in the reverse order. Check the reliability of the contacts, avoiding sparking.
- Adjust the belt tension: a whistle indicates a weak tension, a humming noise from the generator bearing indicates an excessive tension.
How to disassemble a generator
First, make two marks on the metal covers. This will help you later assemble the unit without problems.
- Press out the metal latches and remove the plastic cover.
- Use a Phillips screwdriver to unscrew the voltage regulator mounting screws.
- Unscrew the M10 nut. Then use a screwdriver to remove the screw and remove the capacitor.
- To remove the pulley, clamp the generator housing in a vice. Put a 21 socket on the nut, and through the hole in the head put a 8 hexagon on it. Only after you unscrew the nut can you remove the washer and pulley.
- Remove the four mounting screws to disassemble the generator into two parts.
- From the back of the housing, unscrew the screws securing the stator wire and diode bridge.
- Remove the diode bridge and the oscillator winding.
- Press the rotor out of the cover with your fingers along with the bearing.
- Carefully remove the bearing bushing.
- Take a puller and remove the bearing.
Disassembling the generator itself is much more difficult than removing the entire assembly from the car. To carry out repairs, you will need to diagnose the components of this unit. First of all, pay attention to the brushes; they need to be changed if this element is visible from the holder by no more than 5 millimeters. If the bearings rotate slowly, then they are the defective element (a hum may be heard during operation). The breakdown of the starter and rotor windings can be checked with an ohmmeter; the same device determines the performance of the capacitor. If nicks, scratches or burrs appear on the slip rings, they must be carefully sanded to a shine with fine sandpaper.
Replacing parts of the VAZ 2110 generator
There are situations where the electronic components of the VAZ 2110 generator set fail. Replacement can be made without completely dismantling the generator, directly on the car. The voltage regulator and diode rectifier are located under the rear cover of the generator. It is much more convenient to make such repairs on a repair table.
In the field it is necessary:
- de-energize the generator (disconnect the negative battery cable, the wires on the back of the device);
- remove the plastic cover on the back of the device, gaining access to the electronics;
- unscrew, remove the relay-regulator,
- pay attention, remember the location of the fastening elements (screws, insulating washers, metal), wrap them, strictly observing the order of placement, excluding short circuits,
- replace the holder with diodes, put it back together, tighten the contacts.
How to properly maintain and repair a generator on a VAZ 2112 on your own?
In a VAZ 2112 car, the generator is designed to power electrical equipment when the engine is running. If this unit fails, full operation of the car will be impossible, so the driver may encounter certain difficulties while driving. You can read more about the principle of operation, as well as the replacement of some elements of this unit, below.
Technical characteristics and principle of operation of the generator set on the Dvenashka
First, let's look at the operating principle of the 2112 generator. One of the main design elements is the rotor, which performs the function of generating a magnetic field. This component is a shaft on which the field winding is mounted. The halves of this winding are installed in special pole parts, and the winding is supplied with current thanks to slip rings. The rotor rotates thanks to a belt drive from the drive.
Removing the Unit Cover
Another equally important component is the stator, consisting of a core and a winding. This mechanism produces alternating current that passes through the electrical network through slip rings. To supply current to the rings, the design of the unit is supplemented with special brushes. After them, according to the scheme, a rectifier unit is installed, which is used to convert the voltage that the device produces. Depending on the device model and its technical features, different winding connection diagrams can be used.
The generator unit relay is used to maintain the voltage within specified limits. This element, if necessary, changes the frequency and duration of electrical pulses. By design, a relay consists of several controllers, as well as executive components. The purpose of these components is to determine the time during which the field winding must be connected to the network. If the relay fails, an unstable voltage will be supplied to the battery.
As for the technical characteristics of the generator on the VAZ 3701010-07, the voltage limits generated in the winding are 13.2-14.7 volts. The unit itself allows you to generate current up to 80 amperes. It is important that the VAZ generator belt is tensioned properly, otherwise the operation of the device as a whole may be incorrect. If you want to check the belt tension with your own hands, then keep in mind that when there is pressure on it with a mass of about 10 kilograms, the deflection of the belt should be at least 8 mm (the author of the video is the channel In Sandro’s Garage).
Service Features
The need to repair the generator unit on a VAZ 2112 16 valves does not arise often, but in order for the unit not to have to be repaired, it must be properly maintained. In general, this unit has a fairly high margin of reliability.
What maintenance features must be observed to prevent repairs:
- It must be remembered that the outer surfaces of the unit must always be clean.
- When carrying out maintenance, you also need to check the quality of fastening of the unit - it must be securely fixed at the installation site.
- It would be a good idea to check the functionality of the voltage regulator; a multimeter is used for this.
- The same applies to belt diagnostics. As stated above, first of all you need to check its tension - the belt should not be too tight, but it should also not be loosened. In addition, diagnostics of the condition of the strap should be carried out every 10 thousand km - there should be no signs of damage, cracks, and the belt should not peel off.
- Another point in maintenance is checking the condition of the bearings. For diagnostics, you need to remove the strap, and the rotor of the unit must be rotated by hand. If during rotation you feel a gap or even slight jamming, then the bearing devices need to be changed. The same applies to the appearance of sounds uncharacteristic of their normal operation.
Photo gallery “Main device malfunctions”
1. New and worn brushes 2. Bearings with frozen grease 3. Worn belt
Possible malfunctions and ways to eliminate them
The need to repair a generator unit may arise for various reasons. As practice shows, the most common of them are failed brushes or bearings. Read below about repairing these components.
Brush replacement procedure
Replacement of VAZ generator brushes is carried out as follows:
- First of all, you need to release the three latches on the device’s body, on its sides. These latches secure the cover to the mechanism.
- The cover itself can be detached and put aside. This will allow you to access the regulator.
- There are two bolts on the regulator that secure the device - they need to be unscrewed. Then pull the regulator and remove it.
- Assess the condition of the brushes - if they are working, then the length of these elements should be at least 0.5 cm. If their size is smaller, then you have two options - either repair it by replacing the brushes, or change the device assembly. If repairs are being made, you will need a soldering iron since the brush assembly is soldered to the relay. First, you need to unsolder the wires connected to the brushes, and then dismantle the assembly, replacing it with a new one and securely soldering it to the relay contacts. Or you simply change the relay, and further assemble the device in the reverse order (the author of the video is the IZO channel)))LENTA).
How to change bearings yourself?
To replace the bearings, follow these steps:
- On the dismantled generator, you need to block the rotor; to do this, use a screwdriver, then unscrew the pulley.
- Next, by pulling the latches, you need to remove the device casing. You need to make marks on the two halves of the case, and then, using a screwdriver, you will need to remove the front cover.
- Then you will need to knock the bearing out of its seat; to do this, you will need to place it on a more suitable object. Alternatively, you can use a 27mm socket.
- After this, you can take a new bearing device and fill it with grease. This element should be hammered through the old one. To make the device more securely fixed at the installation site, you can use a chisel to flare the edges.
- Now let's move on to the rear bearing. To do this, you need to place either a thick screwdriver or a thin chisel under it, and hit the top several times with a hammer, while simultaneously moving the screwdriver in the opposite direction. The device can be dismantled using an open-end wrench.
Initial check sequence
An initial performance check can be performed without dismantling the generator. To do this, set the multimeter switch to the “constant voltage 20V” mode. Next, connect the black probe to the negative terminal of the battery, the red one to the positive terminal. After this, you need to start the engine and let it reach a stable idle speed. Multimeter readings ranging from 13.5 to 14.5 Volts are considered normal.
If the multimeter shows a value less than 12.8 Volts, the charging process either does not occur at all, or the charging current is extremely small. The generator is operating in abnormal mode. When the voltage is more than 14.8 Volts, the battery is overcharged. This can lead to boiling of the electrolyte, an increase in acid concentration, and destruction of the battery plates.
To check the voltage at the generator output, you need to turn on the car lamp in the open circuit from terminal 30 on the generator (the point of contact with the thick wire leading to the positive terminal of the battery or starter).
Next, connect the multimeter in the “=20V” mode with the red probe to contact 30 of the generator, and the black probe to the stripped contact on the engine or body. Start the engine. The reading on the multimeter should not be more than 15.5 volts whenever the accelerator pedal is pressed. Otherwise, further operation of the generator is dangerous for the electrical equipment of the car.
When checking, you should evaluate the degree of tension of the generator belt. Using a simplified method, this can be done by pressing on the belt with your finger.
Read also: Roofing screws for metal with drill dimensions
The amount of deflection should be within 0.5 - 1 centimeter. At the same time, check the degree of belt wear. To determine the reasons for abnormal operation of the generator and perform repair work, dismantling the generator is required.