Removing the Niva engine. Video on how to remove the engine from a Niva yourself in your garage
Before disassembling, clean the engine from dirt.
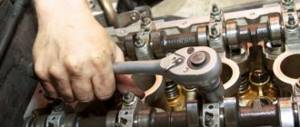
Using a 17mm socket, unscrew the three bolts securing the front axle gearbox bracket to the cylinder block... |
...and remove the bracket.
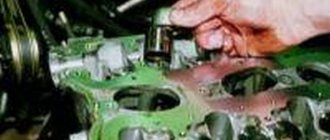
Using a 13mm socket, unscrew the four nuts securing the left power unit support bracket to the cylinder block... |
...and remove the bracket assembled with the pillow.
After removing the brackets, we mount the disassembly stand plate onto their mounting studs and threaded holes in the cylinder block and secure the engine to the stand. Removing the clutch (see here)
Remove the flywheel and clutch housing cover (see here).
Using a 13mm socket, unscrew the four nuts securing the bracket for the right power unit support to the cylinder block... |
...and remove the bracket with the pillow. |
Using a 17mm socket, unscrew the three bolts securing the generator bracket to the cylinder block...
...and remove the bracket. |
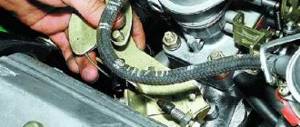
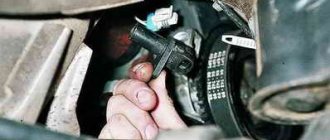
Using round-nose pliers, loosen the clamp securing the coolant drain hose from the throttle assembly (VAZ-21214 engine) or from the carburetor heating unit (VAZ-21213) to the outlet pipe of the heater radiator. |
Remove the hose from the outlet pipe fitting. |
Using a 10mm socket, unscrew the two nuts securing the flange of the heater radiator outlet pipe to the coolant pump housing. |
Having unscrewed the nut securing the tube bracket to the exhaust manifold (see here),...
...remove the heater radiator outlet pipe and its sealing gasket. |
Using a 13mm socket, unscrew the three bolts securing the coolant pump to the cylinder block...
...and remove the coolant pump assembly and its gasket. |
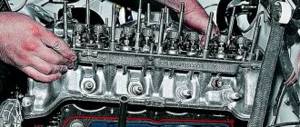
On an injection engine, we dismantle the cylinder head assembly with the receiver, intake pipe and exhaust manifold (see here).
On a carburetor engine, remove the cylinder head complete with carburetor, intake pipe and exhaust manifold (see here).
We remove the oil separator of the crankcase ventilation system, the oil pan and the oil pump (see the corresponding sections).
Using a 10mm socket, unscrew the six bolts securing the crankshaft rear oil seal holder to the cylinder block. |
Use a screwdriver to pry the rear oil seal holder off the bosses... |
...and remove the holder assembly with the oil seal.
From the grooves of the oil seal holder, remove two special bolts (with square heads) securing the clutch housing cover. |
Remove the rear oil seal holder gasket. |
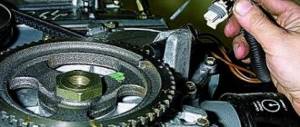
We remove the camshaft drive cover, dismantle the chain, crankshaft sprocket, oil pump drive shaft, chain tensioner shoe (see relevant sections). Using a 10mm spanner, unscrew the bolt securing the drain pipe bracket for the oil separator of the crankcase ventilation system.
Also interesting: Engine 21214 Features, characteristics and tuning
Remove the bracket. |
Using a 14mm socket, unscrew the two nuts securing the connecting rod cover (the piston must be at BDC). |
By tapping the side surfaces of the lid with a hammer with a plastic striker,... |
...remove the connecting rod cover. |
Remove the lower connecting rod bearing shell from the cover. |
Leaning on the ends of the rods of the connecting rod bolts, we move the lower head of the connecting rod from the crankpin of the crankshaft. |
Using the wooden handle of a hammer against the connector of the lower head of the connecting rod, we push the piston into the cylinder... |
...and remove the piston and connecting rod from the cylinder. |
Remove the upper bearing shell from the connecting rod head.
Similarly, we remove the pistons with connecting rods from other cylinders.
We clamp the connecting rod in a vice with soft metal jaw linings.
Using your fingers, carefully (without exerting much force) open the lock of the upper compression ring... |
...and remove the upper compression ring. |
We shoot in the same way...
...lower compression ring,... |
...two oil ring discs. |
Remove the oil scraper ring expander. |
To remove the piston from the connecting rod...
...pry off the piston pin retaining ring with a screwdriver... |
...and remove it from the annular groove of the piston. |
In the same way, remove the second locking ring of the finger.
By moving the piston pin...
...remove it from the hole in the piston. |
Remove the piston from the upper end of the connecting rod. |
If some parts of the connecting rod and piston group are not damaged and have little wear, they can be used again. Therefore, during disassembly, we mark the parts so that they can be installed in the previous cylinder.
Using a 17mm socket, unscrew the two bolts securing the crankshaft main bearing cover. |
Remove the main bearing cap. |
Remove the lower main bearing shell from the cover. |
In the same way, remove four more main bearing caps.
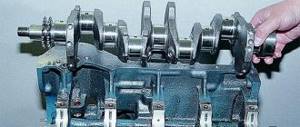
Remove the crankshaft from the cylinder block. |
We remove the thrust half-rings from the grooves of the rear support of the cylinder block. |
We remove the upper crankshaft main bearing shells from the cylinder block supports. |
After disassembling the engine, thoroughly rinse with gasoline and clean the parts from carbon deposits to check their technical condition.
To determine cylinder wear...
...with a bore gauge we measure the diameter of the cylinder in four zones and two planes (parallel and perpendicular to the axis of the crankshaft). |
Scheme for measuring cylinders: A and B - measurement directions; 1,2, 3 and 4 - belt numbers
Main dimensions of the cylinder block
see also the dimensions and markings of the connecting rod and piston group
To determine piston skirt wear...
Also interesting: The best automatic transmissions and engines for the VAZ 2121 Niva, characteristics, gasoline, diesel internal combustion engines
...with a micrometer we measure the diameter in a plane perpendicular to the piston pin axis, at a distance of 55 mm from the piston bottom. |
Using a micrometer we measure the diameters...
... connecting rod journals... |
...and the crankshaft journals. |
Permissible runout of the main surfaces of the crankshaft
We grind the crankshaft journals to the nearest repair size if their wear or out-of-roundness is more than 0.03 mm, and also if there are burrs and marks on the journals. (
We remove the engine for repair or replacement
We install the car on an inspection ditch or a lift
Relieving pressure in the fuel system - article Reducing fuel pressure Niva Chevrolet
Disconnect the negative terminal of the battery
Removing the engine screen - article Removing and installing a decorative engine cover for Niva Chevrolet
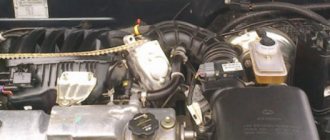
We remove the air filter with the mass air flow sensor and two air supply hoses to the throttle body
Disconnect the throttle cable from the throttle assembly and the receiver (if the throttle drive is cable driven) - article Adjusting and replacing the Niva Chevrolet throttle cable
Disconnect the vacuum brake booster hose from the receiver pipe.
We disconnect the tube connecting the valve to the adsorber from the canister purge valve - article How to remove elements of the gasoline vapor recovery system Niva Chevrolet
We disconnect the wire block from the ignition module - article Replacing the Niva Chevrolet ignition module
Disconnect the wiring harness from the idle speed control, fuel rail and injectors, knock sensor, crankshaft position sensor, throttle position sensor, coolant sensor, low oil pressure warning lamp
From the bottom of the car, next to the left support of the power plant, using a 17mm spanner, unscrew the bolt securing the negative battery cable and the control system wiring harness bracket to the cylinder block
We remove the negative wire and the bracket with the wiring harness holder from the cylinder block
We remove the control system wires from the engine
Removing the starter - article How to remove and check the VAZ-2123 starter
Disconnect the wires from the generator – Removing and installing the Niva Chevrolet generator
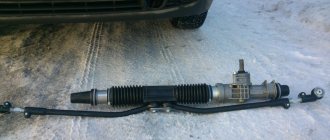
We dismantle the power steering pump without disconnecting the hoses from it and tie it to the left bracket of the front suspension cross member
We remove the air conditioning compressor (if the car has air conditioning) without disconnecting the system pipes from it
We tie the compressor to the right bracket of the front suspension cross member
Disconnect the fuel supply hose from the fuel rail tube
Loosen the fastening clamp and remove the lower radiator hose from the thermostat pipe.
Loosen the fastening clamps and remove the fluid supply hose to the pump from the thermostat and coolant pump pipes
Having loosened the fastening clamp, remove the upper radiator hose from the outlet pipe of the cooling jacket.
Loosen the fastening clamps and disconnect the heater radiator hoses from the heater radiator outlet pipe
And the cylinder head pipe.
We disconnect the exhaust pipe from the exhaust manifold and gearbox - How to repair the exhaust system of a Niva Chevrolet
We unscrew the nuts securing the front power unit supports to the front suspension cross member brackets - How to replace the power unit supports of a VAZ-2123
Removing the gearbox – Removing and installing the VAZ-2123 gearbox
We remove the clutch cover with the driven disc – Removing and installing clutch discs VAZ-2123
Using a standard bolt, we attach the eye, which was removed when removing the gearbox, to the upper left hole of the cylinder block.
Install the hood in a vertical position
We fasten the lifting device cable to the engine on the right side - to the front eye; on the left side - behind the rear eye attached to the cylinder block.
We lift the engine and remove the studs of the front supports of the power plant from the holes in the brackets of the front suspension cross member
We remove the engine assembly with the front supports of the power plant from the engine compartment
We install the engine on the car in the reverse order